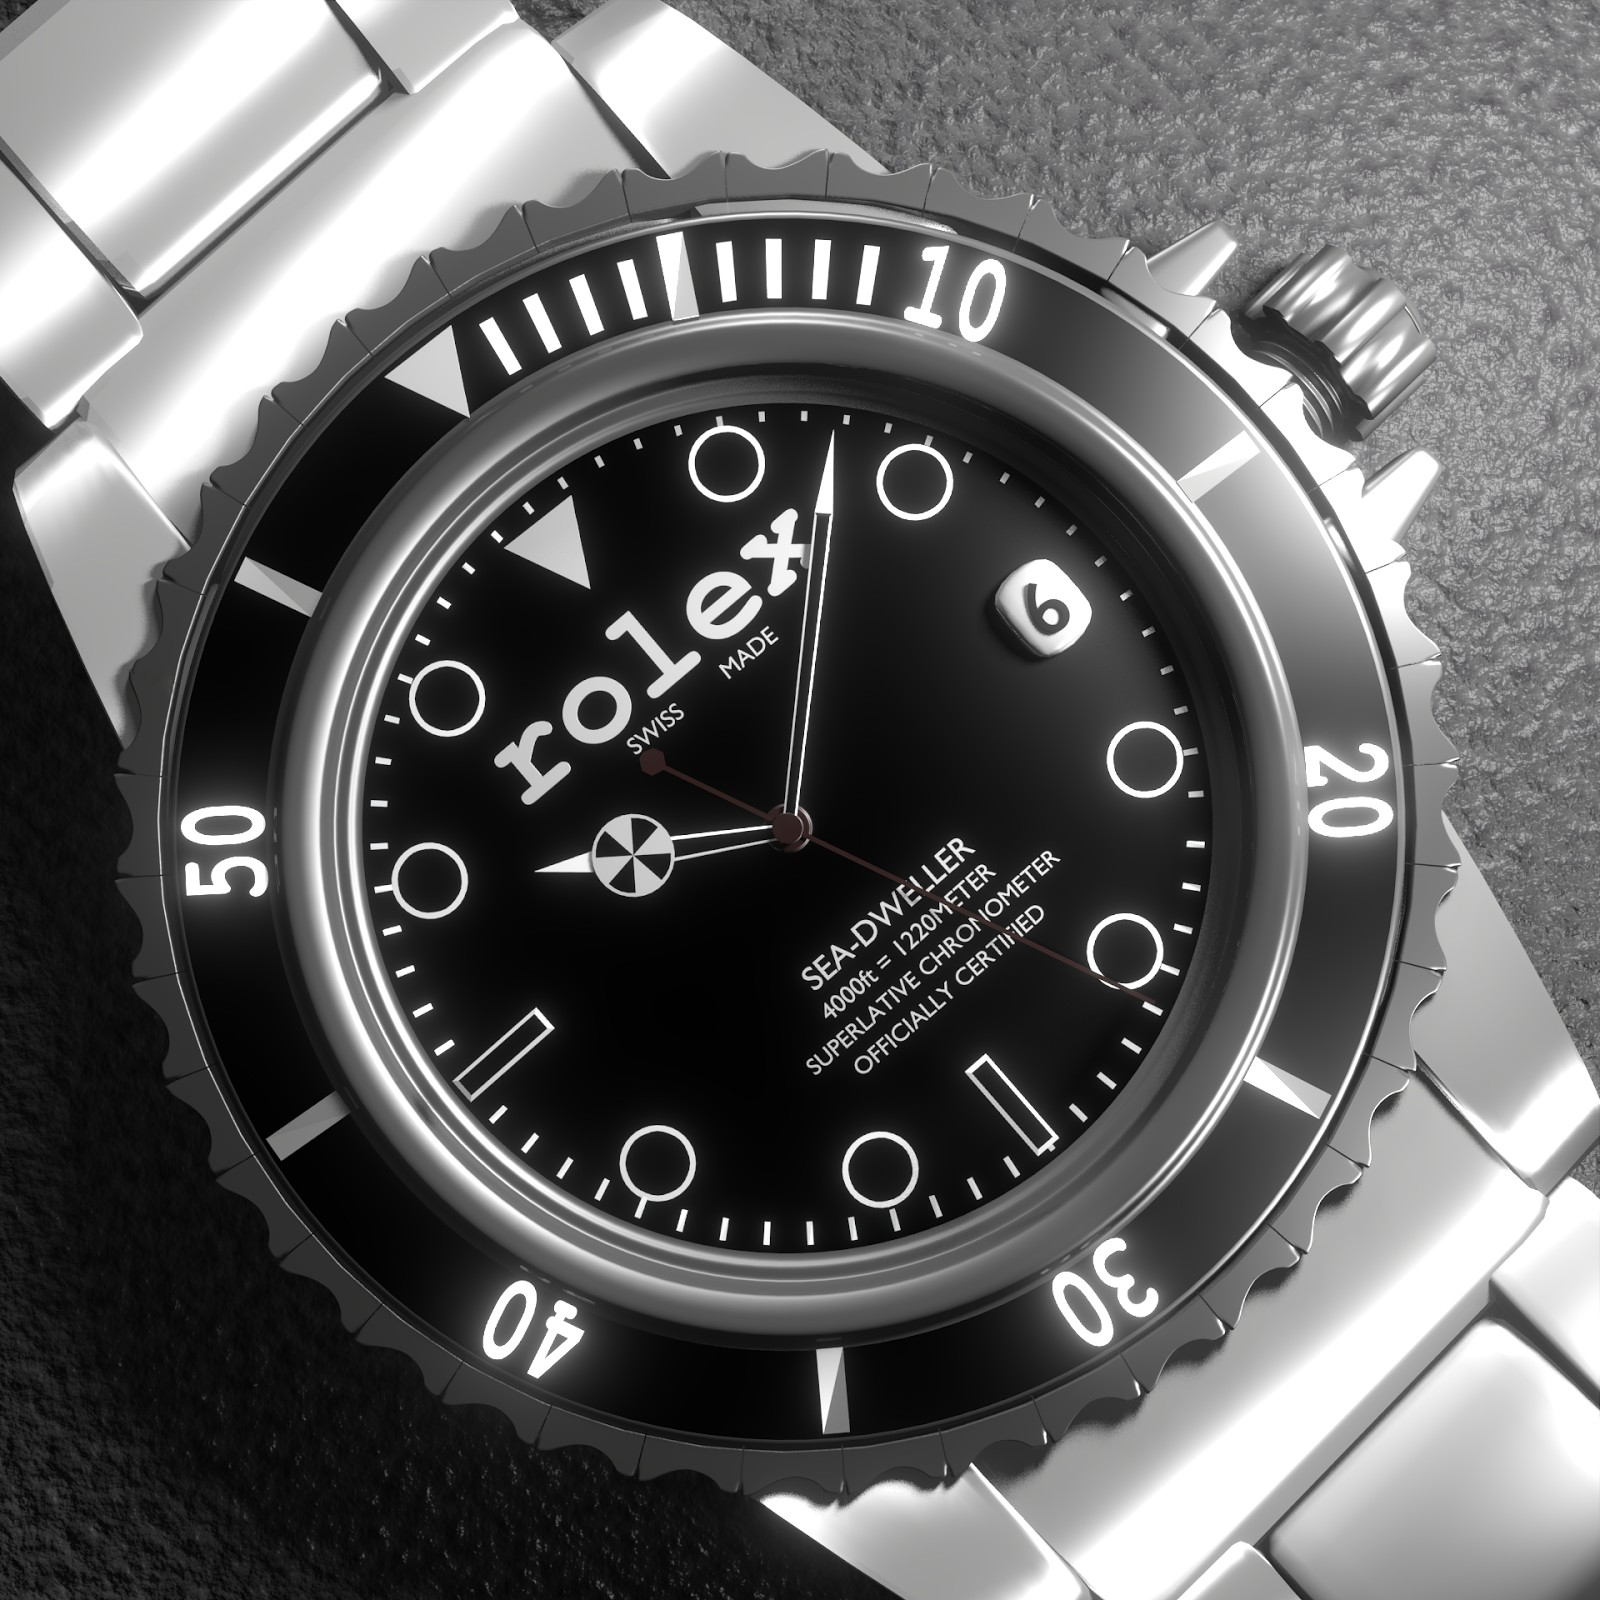
Welcome to the Rolex Dweller Engine watch Blender Tutorial.
By the way, this tutorial is tailored for Blender Intermediates to Advanced users. If you’re a newbie, hmmm. In this tutorial, you’ll learn how to create the image you see below 100% in Blender Internal.
I’m sorry, but in this tutorial, I will not go through the step by step making of the individual objects in the scene. If you wish to learn more about getting started with Blender, please make your way to the numerous sites dedicated to doing that.
I’m gonna talk about 4 aspects of the Rolex scene, namely, Modeling and Modifiers Setup, Lighting, Compositing and Materials and Textures.
Modeling and Modifiers
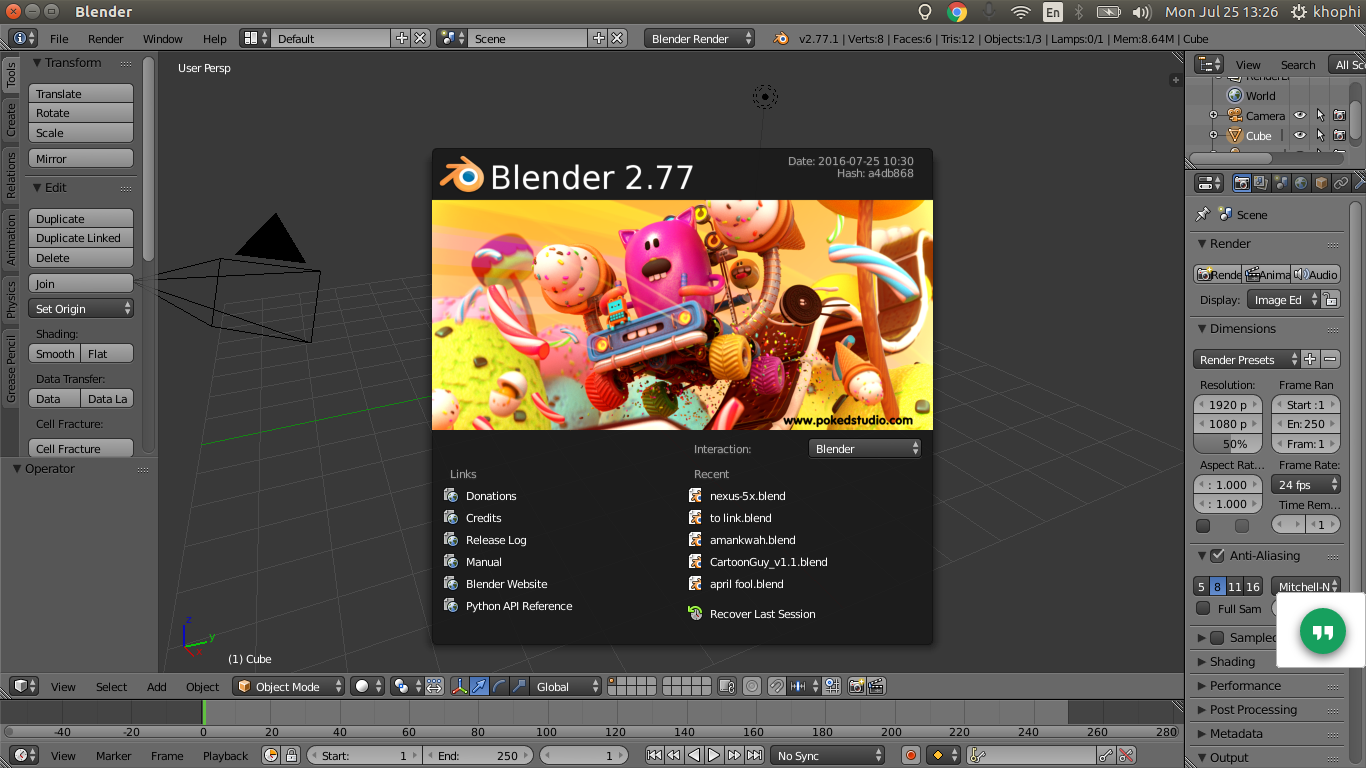
![My first modeled object. Went ahead to [G], [S] and [R] to suite my taste](https://blog.khophi.co/wp-content/uploads/2016/08/2013-04-06-131840_1024x600_scrot.png)
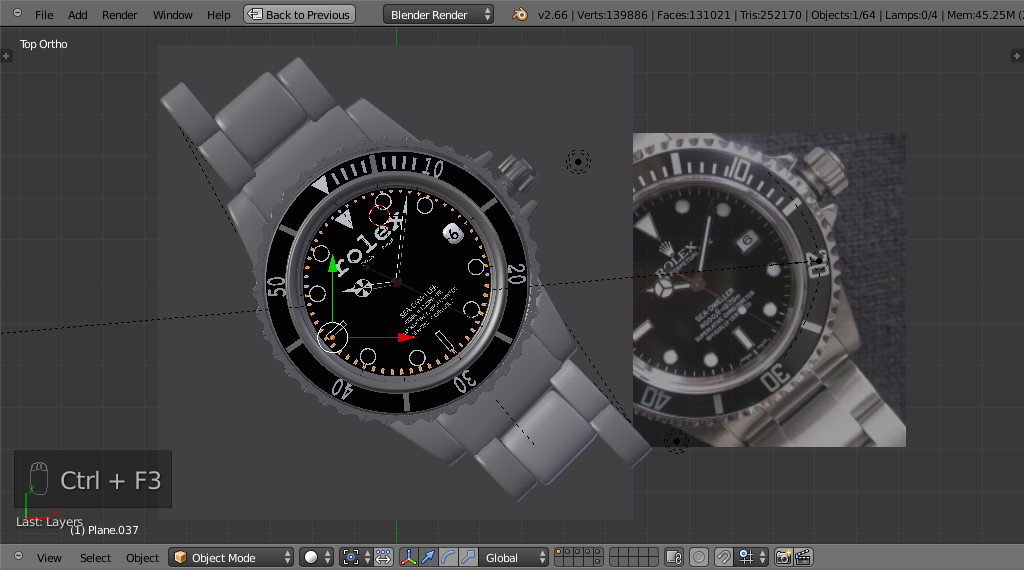
Since it was a still image, I wasn’t bothered much about joining them all to form one object, as done by pressing [Ctrl + J] after all the objects are selected. And there was no rigging needed. The image below with the top-left-most object selected, with its insert image showing the selected object in local view (achieved by pressing [/] on your number pad) was the first object I modeled.
I grabbed [G], stretched and scaled [S] and rotated it [R] to create the other portions of the chain of the watch. Using the [G] key, I placed them nicely as you can see in the image. Remember too that I have applied a level 1 Subdivision Surface Modifier [Ctrl + 1 or 2 …]
So that was all about the chain portion of the watch. I could edit the
distinct vertices of the object by shifting to Edit Mode by pressing [Tab]. Click to toggle back to Object Mode. Pressing [Ctrl + R] will cut loops in your objects when in Edit Mode.
Scrolling the Middle Mouse Button forward or backward, will increase or decrease the number of loop cuts created.
You’re not going to add so many loop cuts and vertices since that will slow down blender in larger scenes and will be unnecessary.
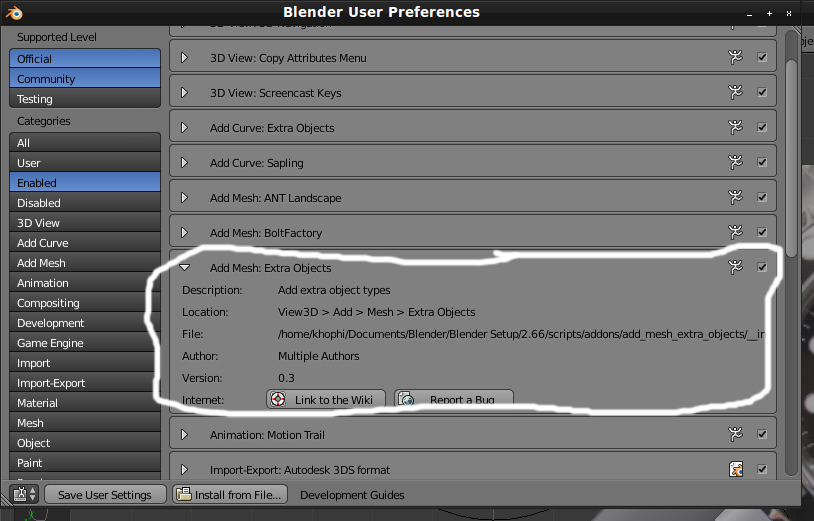
As showed in the image below, you can create extremely quickly bolts and gears in Blender, as I used for the portion that extends out purposely made for setting time. Just [Shift + A >> Mesh >> Extra Objects >.Gears >> {Select Whichever}] and you’re good to go.
Remember to press [T] to bring up the tool shelf and do any tweaking you want to be effected on the just-added Extra Object before you move onto other stuff. Settings peculiar to the extra object never waits for anyone. So do that quickly.
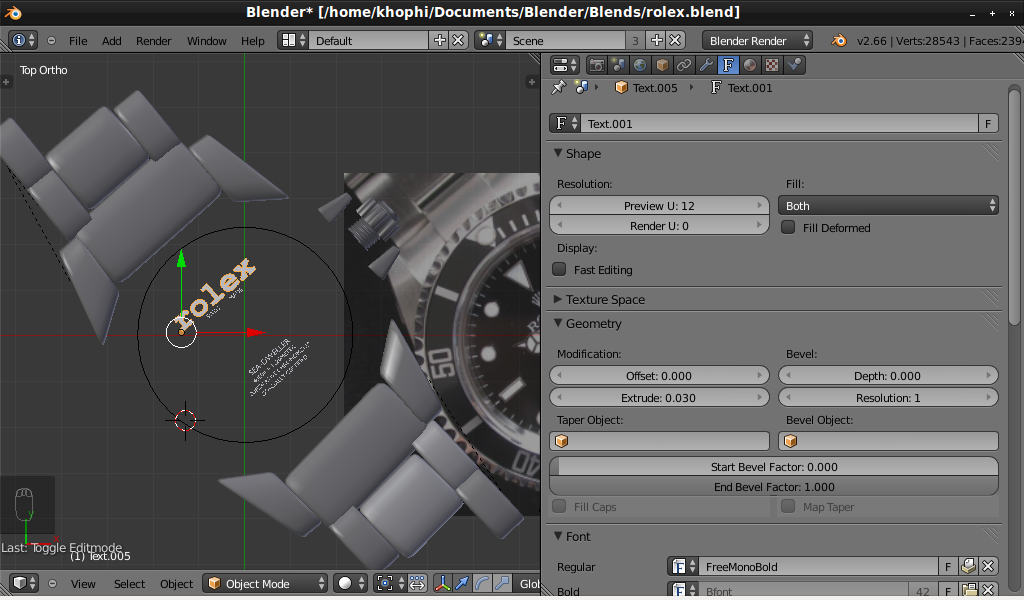
The text Rolex and the other texts are not textures. They’re texts (tautology, ait?) Blender by default ships with an object known as Text, invited on board by pressing [Shift + A >> Text]. Press [Tab] to edit the writing.
Now, under the Properties panel on the right, under the Text tab, you will find settings for your Text, if and only if you have selected your text. Check my settings to see how I run things with it in my scene. Done deal to texts, right? Okay, let’s move on.
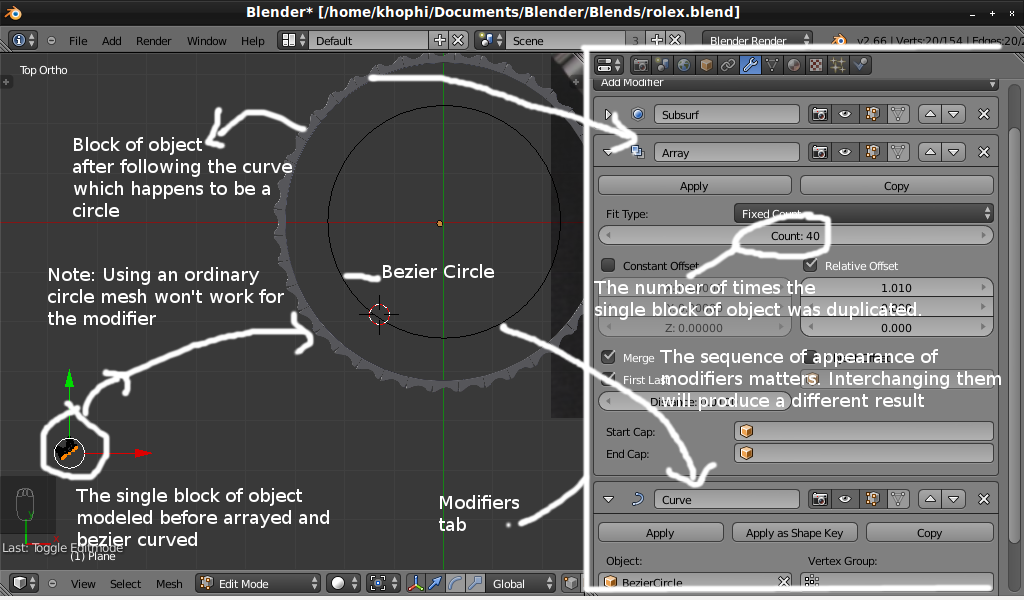
The metal around the top of the watch? I did that by creating one block of the metal, added an Array Modifier, and added another Modifier, this time, a Curve Modifier, selected my Bezier Curve which I added via [Shift + A >> Curve >> Circle].
Then I just increased the count of the array till it formed a 360 circle, just like the Bezier Circle. That’s all.
As regards the main watch interface, as seen in the image below, I know you know how to screw it up. Yes! I added a circle and turned on the Fill to Triangular in the tool shelf.
The rest of it was toggling between Edit and Object Mode [Tab] and [G] and [S]. That’s so simple, r? I’m glad we can put the Modeling and Modifier aspect on our tutorial shelf and pick up Lighting.
Lighting
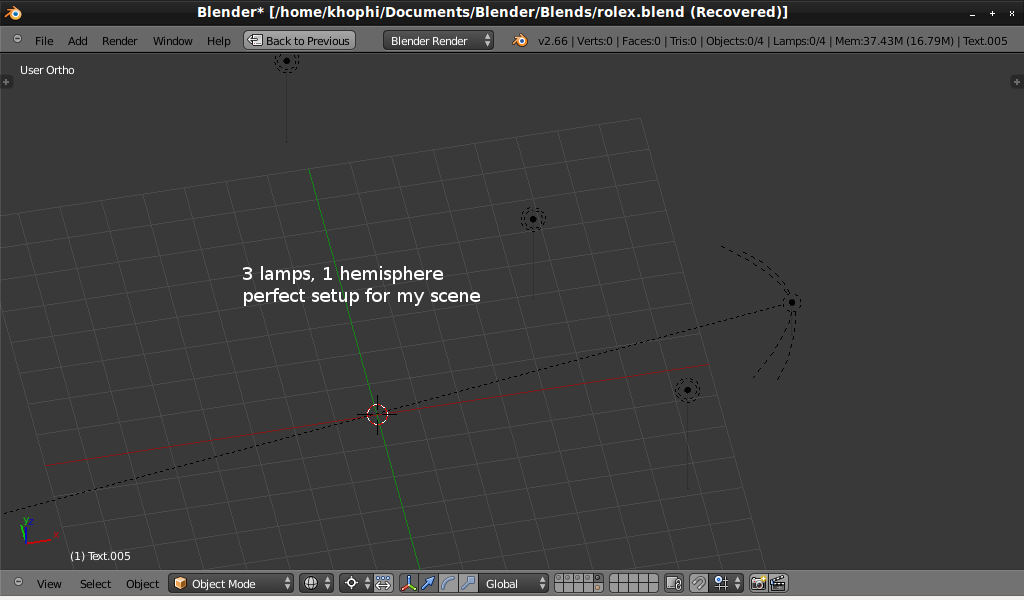
To be honest, I hit the lighting jackpot for this scene faster than I just could imagine. I placed my lights as in the image below, bam bam bam bam, and Voila! I just didn’t have 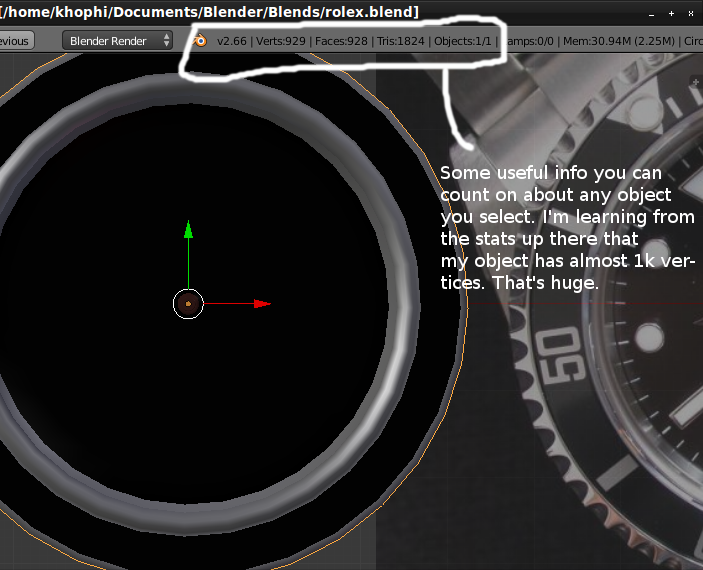
It was so cool for me, and I found it to be the easiest lighting setup I’ve worked on before, and perhaps the last, I guess.
In fact, there was no magic to what I did. Please, if you have the .blend file of this tutorial, just go over to (I guess one of the layers) I have the lights put there, and select each of them to see the settings I set for them to set up the setup like I have already set up. 🙂
Lemme explain a bit why I added 3 lamps and a Hemisphere and not Area lamps and Sun. Well, point lamps are like bulbs in our homes, with the illumination coming from all directions.
It was just perfect for this scene. I differed their intensities a bit just not to create a so bright nor so low illuminated scene.
And remember I added an anisotropic tangential shading to my chains and some metals, thus I needed the lamps to boost that anisotropic.
The Hemisphere lamp was just to clear some of the darkness that will show up in the scene and brighten up areas that would be dark and wouldn’t mimic realism.
The lighting algorithm for Internal isn’t as good as that of Cycles, thus most realism should be faked in Internal.
I don’t precisely know, but in cycles, there wouldn’t be any need for Hemisphere since the light passes are gonna clear up all the useless dark areas and mimic realism.
The Hemisphere also canceled the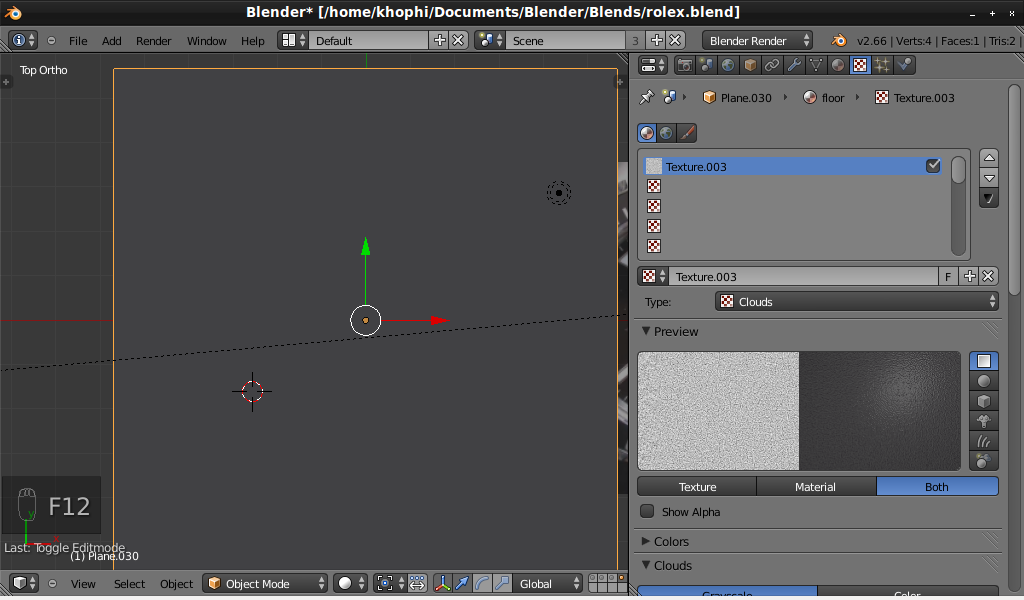
I also turned on rayshadow for all the lamps. I practically see Ray Shadows to be hugely realistic than that of Buffer, but your render times do suffer slightly (slightly can perhaps mean a year-long rendering :P)
Compositing
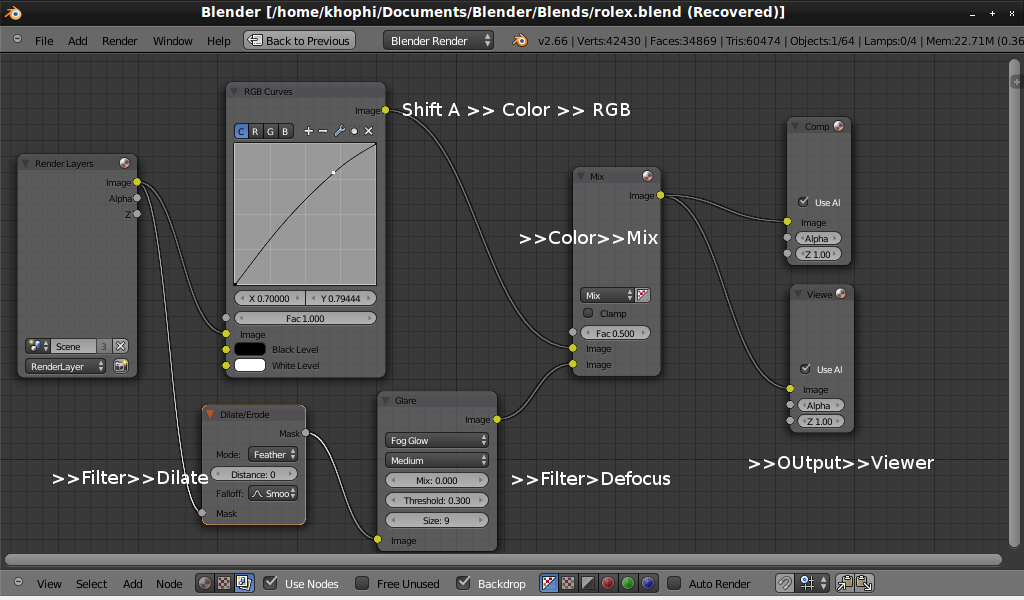
The Dilate/Erode noodle went on into the Defocus Node (in the filter menu) which came out to meet the noodle from the RGB Curves all combined in the Mix Node [Shift + A >> Color >> Mix] with a 50:50 output results.
The right noodle of the Mix Node, I connected to the Viewer and Compositor Node. This node setup worked for my scene quite very well than I expected. Kindly play around with my setup and you’ll figure out and learn more.
As a matter of fact, I’m also currently learning more about the compositor and hope to be in better position to explained detailed stuff about how it works in my subsequent tutorials on varying subjects. However, I’m not that bad at it. 😛
Materials and Textures
fortunately, I used no Textures for the Rolex watch scene. All are materials only. See images below for my settings. Was much pretty straightforward and simple.
I added a new material to the floor object, added a texture to the created material.
I then instead of loading in an image texture by selecting the Type and Image or Movie option, I just went with the default Cloud type.
Locate under the Textures panel, under the Clouds toggle What we care much there are the Nabla and Size. Just tweak to like mine, and you’ll see its beginning look like a leather. Oops Not yet.
Scroll down to the bottom part of the Textures tab (where you changed the Nabla and Size) and tick Normal under Geometry division. Then please change the RGB to Intensity color to something leathers. Are whitish colors still disturbing your wanted leather?
Please switch back to the Materials Tab and change the Intensity color to something leathers too, but this time, slightly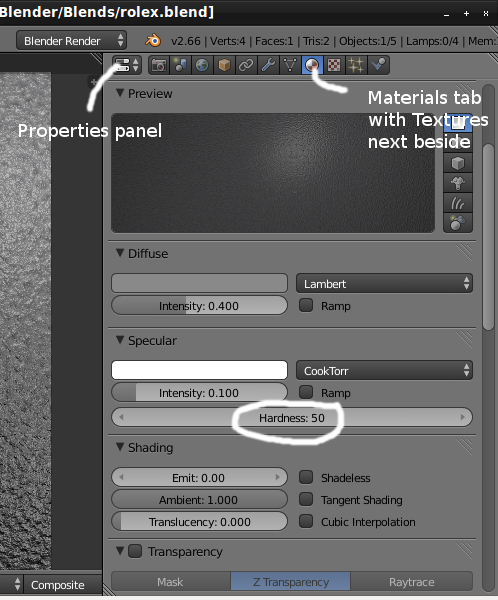
One piece of advice for you (look at me, giving advice. Lol.) You can create really realistic materials and textures using Blender’s inbuilt textures and materials options.
At first, I thought there’s never gonna be a possibility to achieve something cool with that Voronoi and clouds and etc. But hey, it’s faster, easier to manipulate, you can achieve exactly what you’re looking for, gently.
I created that leather material and textures in less than 30 seconds. So, please, do not worry online looking for textures for simple stuff like the leather we created when you can create one absolutely faster than Google search results.
The inbuilt Materials and Textures settings have got their own limitations, but hey, they’re worth it if you use them for the right job.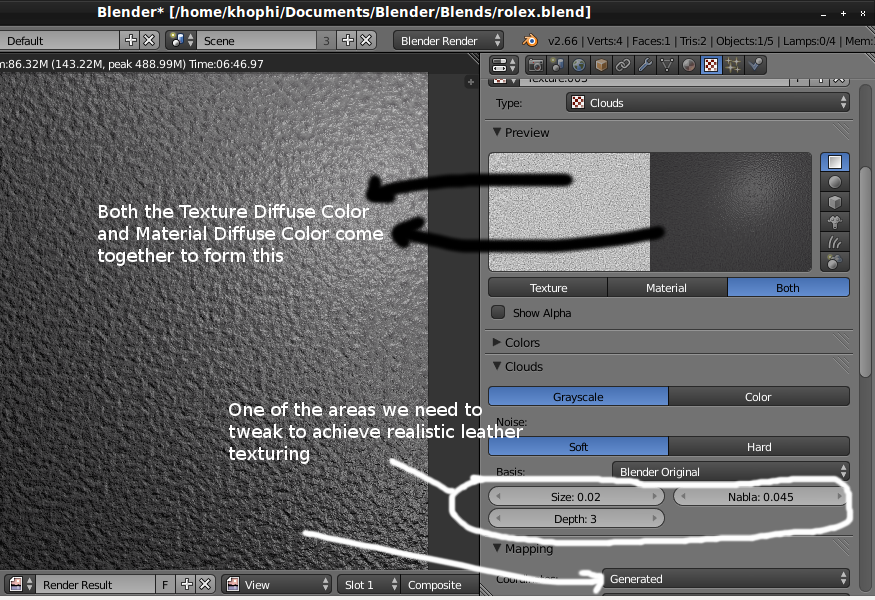
Just post your work in the comments below. Please post your questions too and I’ll be glad to respond as soon as possible.
Thanks very much for being a part of this tutorial.
.blend download link