Install OpenVPN with DNSMasq on DigitalOcean
“OpenVPN is a virtual private network system that implements techniques to create secure point-to-point or site-to-site connections in routed or bridged configurations and remote access facilities. It implements both client and server applications.” – Wikipedia
There are many VPN solutions today on the market for different price points with varied options available. In this tutorial, you will create your own VPN on your VPS (Virtual Private Server – you’ll be using droplets on DigitalOcean).
The VPN will be hosted on a server in a region and country of your choice. And this DIY deployment will allow you to install host name blocking, i.e block ads, porn sites, etc. To implement this blocking, you will use DNSMasq with a custom /etc/hosts file from Energized Protection
dnsmasq is free software providing Domain Name System caching, a Dynamic Host Configuration Protocol server, router advertisement and network boot features, intended for small computer networks, perfect for pairing with OpenVPN for DNS resolving functionality.
In this tutorial, you will
- Create your own VPN using OpenVPN
- Let your VPN use DNSMasq as DNS
- Use Energized Protection host name block list file along with DNSMasq for blocking unwanted domain names
Note: This blocking is only applicable for TLDN blocks. As in, you can use DNSMasq to block domains like
example.combut you can’t use it to filter out and block subdirectory URLs likeexample.com/mylink. If you blockexample.comit will block every link from that domain.This is important to note because with DNSMasq and hostname blocking, you cannot block ads from sites like YouTube, since the ads are not served from separate domains. Block the ads on YouTube with hostname blocking approach would mean blocking YouTube itself, since their ads are served from
youtube.com/ads-blah-blah...
Prerequisites
To follow along in this tutorial, you should
- have a DigitalOcean Account, and a Droplet running Ubuntu 20.04 LTS with the initial server setup guide completed.
The 5$ droplet is fine. If you already have a server for running your applications, you can still install the VPN and DNSMasq on the same box without issues - be familiar with using basic commands and editing in the Linux Terminal
- have UFW firewall installed and configured
Install OpenVPN
With the Nyr/openvpn-install script, all the installation steps for OpenVPN is simplified into an easy to follow guide. With the script,
- Install OpenVPN
- Add user certificates
- Revoke/remove user certificates
- Uninstall OpenVPN
To grab and run the script,
- log into your droplet, and using wget, download the script.
- then make the script executable (You’re free to inspect the script code yourself. “Trust, but verify”, they say)
- run the script with
sudo
$ ssh sammy@your-droplet-address
$ wget https://git.io/vpn -O openvpn-install.sh
$ chmod +x openvpn-install.sh
$ sudo ./openvpn-install.sh
After running the script, follow the onscreen steps.
Go with 1) UDP .
Which protocol should OpenVPN use?
   1) UDP (recommended)
   2) TCP
Protocol [1]:
Which option is “better”? Well, because UDP does not have the built-in error correction mechanism as TCP has, it means with UDP you will have reduced latency. For streaming, playing games, and use cases where error corrections in data transmissions are not critical, go with UDP.
Thus, is UDP better? Not necessarily. However, the potential advantages of TCP can be easily circumvented with Deep Packet Inspection, therefore making the TCP option unnecessarily having increased latency, but with no noticeable benefit.
Next…
What port should OpenVPN listen to?
Port [1194]:
Just go with the flow. Press Enter to continue and accept the port 1194
Select a DNS server for the clients:
   1) Current system resolvers
   2) Google
   3) 1.1.1.1
   4) OpenDNS
   5) Quad9
   6) AdGuard
DNS server [1]:
I like to go with AdGuard, however whichever you choose wouldn’t matter that much, because you will change this to point to DNSMasq instead as seen later below.
Enter a name for the first client:
Name [client]:
Press Enter to go with the default name for client. You can always add more clients later on. Think of ‘client’ here as ‘User’.
OpenVPN installation is ready to begin.

Press any key to continue...
Continue to install OpenVPN and then check the status after installation
$ sudo service openvpn-server@server status

● openvpn-server@server.service - OpenVPN service for server
     Loaded: loaded (/lib/systemd/system/openvpn-server@.service; enabled; vendor preset: enabled)
     Active: active (running) since Sat 2022-01-29 17:18:40 UTC; 17h ago
       Docs: man:openvpn(8)
             https://community.openvpn.net/openvpn/wiki/Openvpn24ManPage
             https://community.openvpn.net/openvpn/wiki/HOWTO
   Main PID: 4437 (openvpn)
     Status: "Initialization Sequence Completed"
      Tasks: 1 (limit: 2274)
     Memory: 3.0M
     CGroup: /system.slice/system-openvpn\x2dserver.slice/openvpn-server@server.service
             └─4437 /usr/sbin/openvpn --status /run/openvpn-server/status-server.log --status-version 2 --suppress-timestamps --config server.conf

Jan 30 10:50:48 sammy openvpn[4437]: 41.155.7.105:51640 Control Channel: TLSv1.3, cipher TLSv1.3 TLS_AES_256_GCM_SHA384, 2048 bit RSA
....
With OpenVPN running smoothly, kindly change just a few settings in the /etc/openvpn/server/server.conf file. This file contains the configurations for which OpenVPN uses to run.
The changes to add to the OpenVPN server conf are related to
- the
duplicate-cn– which specifies if a single certificate for a client can be used simultaneously from multiple devices. - the
push "dhcp-option ..."for specifying what DNS resolver should be forced down the throats of clients that connect to the OpenVPN. By specifying this, every device that connects to the VPN will strictly use the pushed DHCP details, instead of the devices using their own DNS. You want this, so as you can ensure whatever blocks you implement with DNSMasq takes effect.
The DHCP IP that will be sent is that of the DNSMasq, which is10.8.0.1
Your /etc/openvpn/server/server.conf should be updated to look like this
local <ip-address-of-your-server>
port 1194
proto udp
dev tun
ca ca.crt
cert server.crt
key server.key
dh dh.pem
auth SHA512
tls-crypt tc.key
topology subnet
server 10.8.0.0 255.255.255.0
push "redirect-gateway def1 bypass-dhcp"
ifconfig-pool-persist ipp.txt
push "dhcp-option DNS 10.8.0.1"
keepalive 10 120
cipher AES-256-CBC
user nobody
group nogroup
persist-key
persist-tun
verb 3
crl-verify crl.pem
explicit-exit-notify
duplicate-cn
Remember the first client (user) certificate that was created? The file will be within the /root folder. Therefore, to bring that file to the home directory which can then be scp‘ed back to your local machine, use the steps below
$ sudo cp /root/client.ovpn /home/sammy
$ ls
client.ovpn
Then exit from the server, and using scp, copy the client.ovpn to your local machine. This .ovpn file is what you will use in the OpenVPN client to connect to the VPN server.
$ exit
$ scp sammy@<server-ip-or-domain>:/home/sammy/client.ovpn /home/local
$ ls
client.ovpn
All looking good, in the next section you will install DNSMasq on the server.
Install DNSMasq
By default, Ubuntu 18+ comes with a Systemd Resolve service that provides network name resolution to local applications. You don’t want that interfering with DNSMasq. Disable that service with
$ ssh sammy@<server-ip-or-domain>
$ sudo systemctl disable systemd-resolved
$ sudo systemctl stop systemd-resolved
Then, remove the symlinked resolv.conf file
$ ls -lh /etc/resolv.conf
lrwxrwxrwx 1 root root 39 Nov  22 10:21 /etc/resolv.conf -> ../run/systemd/resolve/stub-resolv.conf

$ sudo rm /etc/resolv.conf
Then create your own new resolv.conf file. The nameserver in this file will be used by DNSMasq to resolve domains.
$ echo nameserver 1.1.1.1 | sudo tee /etc/resolv.confTime to install DNSMasq now that Systemd Resolve is outta the way
$ sudo apt-get install dnsmasqWith DNSMasq installed, go ahead to make a few tweaks to the configuration file. Open the DNSMasq conf file, and make this change
- Uncomment
interfaceand set it totun0
$ sudo nano /etc/dnsmasq.confThe tun0 interface is the VPN interface. Therefore, you are essentially limiting DNSMasq to listen to requests coming through the VPN interface only. If you want to listen on more than 1 interface, you can add another interface=interface-name on the next line.
Hostname Blocking
By default, DNSMasq reads the addresses in the /etc/hosts file. Therefore, if you want to block some domain names, you could resolve such domain names to a blackhole IP address, like 0.0.0.0. So adding an address line like, 0.0.0.0 youtube.com in the /etc/hosts will essentially resolve all requests to youtube.com to that IP, which is nonexistent.
That is what the Energized Host file does, but for hundreds of thousands of domain names (and updated every 24 hours).
To install a new /etc/hosts with blocked domains, use the Energized script for Linux.
$ wget https://raw.githubusercontent.com/EnergizedProtection/Energized_Linux/master/energized.sh
$ chmod +x energized.sh
$ sudo ./energized.sh

      _____  _________  _____________  _______
     / __/ |/ / __/ _ \/ ___/  _/_  / / __/ _ \
    / _//    / _// , _/ (_ // /  / /_/ _// // /
   /___/_/|_/___/_/|_|\___/___/ /___/___/____/

      P   R   O   T   E   C   T   I   O   N
                                         v.flaky
-------------------------------------------------
ϟ B A S I C  I N F O -
-------------------------------------------------
[✓] ROOT             [+] BUSYBOX:
[✓] ENERGIZED        [+] PACK: Ultimate Protection
[✓] ADBLOCKING       [+] SIZE: 13M
[+] LAST UPDATED: Sat, 29 Jan 22 17:01:57
-------------------------------------------------
ϟ P A C K s -             [ϟ] UPDATE AVAILABLE!
-------------------------------------------------
[1] Spark         [3] Blu          [5] Ultimate
[2] Blu Go        [4] Basic        [6] Unified
-------------------------------------------------
ϟ E X T E N S I O N s -
-------------------------------------------------
[p] Porn          [rl] Regional    [x] Xtreme
[pl] Porn Lite    [s] Social
-------------------------------------------------
ϟ O P T I O N s -
-------------------------------------------------
[o] Open Hosts File       [ip] Redirection IP
[w] Apply Whitelist       [iw] Instant Whitelist
[b] Apply Blacklist       [ib] Instant Blacklist
[r] Redirect Domains      [ir] Instant Redirect
-------------------------------------------------
ϟ M I S C -
-------------------------------------------------
[bp] Backup       [rs] Restore        [ck] Check
[u] Update H&WB   [in] Instructions   [i] Info
[c] Clear Hosts   [si] Submit Issue   [q] Quit.
-------------------------------------------------
[+] Your Input -
You can go with any of the packs, depending on your preference. To determine the scope of what each pack and extension blocks, check out the table on the Energized Repository.
After applying any of the packs and or extension, you should restart your DNSMasq so that the new changes to the /etc/hosts file will be re-read.
Finishing touches
With all the changes completed restart DNSMasq and OpenVPN with
$ sudo service dnsmasq restart
$ sudo service dnsmasq status
dnsmasq.service - dnsmasq - A lightweight DHCP and caching DNS server
     Loaded: loaded (/lib/systemd/system/dnsmasq.service; enabled; vendor preset: enabled)
     Active: active (running) since Sat 2022-01-29 17:03:48 UTC; 1h 30min ago
    Process: 899 ExecStartPre=/usr/sbin/dnsmasq --test (code=exited, status=0/SUCCESS)
    Process: 932 ExecStart=/etc/init.d/dnsmasq systemd-exec (code=exited, status=0/SUCCESS)
    Process: 997 ExecStartPost=/etc/init.d/dnsmasq systemd-start-resolvconf (code=exited, status=0/SUCCESS)
   Main PID: 995 (dnsmasq)
      Tasks: 1 (limit: 2274)
     Memory: 49.5M
     CGroup: /system.slice/dnsmasq.service
             └─995 /usr/sbin/dnsmasq -x /run/dnsmasq/dnsmasq.pid -u dnsmasq -r /run/dnsmasq/resolv.conf -7 /etc/dnsmasq.d,.dpkg-dist,.dpkg-old,.dpkg-new --local-service --trust-anchor=.,20326,8,2,e06d44b80>

Jan 29 17:03:46 sammy dnsmasq[995]: no servers found in /run/dnsmasq/resolv.conf, will retry
Jan 29 17:03:46 sammy dnsmasq[995]: bad address at /etc/hosts line 8
Jan 29 17:03:47 sammy dnsmasq[1044]: /etc/resolvconf/update.d/libc: Warning: /etc/resolv.conf is not a symbolic link to /run/resolvconf/resolv.conf
Jan 29 17:03:48 sammy systemd[1]: Started dnsmasq - A lightweight DHCP and caching DNS server.
Jan 29 17:03:53 sammy dnsmasq[995]: bad name at /etc/hosts line 189484
Jan 29 17:03:57 sammy dnsmasq[995]: bad name at /etc/hosts line 344886
Jan 29 17:03:59 sammy dnsmasq[995]: read /etc/hosts - 440879 addresses
Jan 29 17:03:59 sammy dnsmasq[995]: reading /run/dnsmasq/resolv.conf
Jan 29 17:03:59 sammy dnsmasq[995]: using nameserver 8.8.4.4#53
Jan 29 17:03:59 sammy dnsmasq[995]: using nameserver 8.8.8.8#53

$ sudo service openvpn-server@server restart
$ sudo service openvpn-server@server status

openvpn-server@server.service - OpenVPN service for server
     Loaded: loaded (/lib/systemd/system/openvpn-server@.service; enabled; vendor preset: enabled)
     Active: active (running) since Sat 2022-01-29 17:18:40 UTC; 10 secs ago
       Docs: man:openvpn(8)
             https://community.openvpn.net/openvpn/wiki/Openvpn24ManPage
             https://community.openvpn.net/openvpn/wiki/HOWTO
   Main PID: 4437 (openvpn)
     Status: "Initialization Sequence Completed"
      Tasks: 1 (limit: 2274)
     Memory: 2.1M
     CGroup: /system.slice/system-openvpn\x2dserver.slice/openvpn-server@server.service
             └─4437 /usr/sbin/openvpn --status /run/openvpn-server/status-server.log --status-version 2 --suppress-timestamps --config server.conf

Jan 29 18:26:13 sammy openvpn[4437]: sammy/154.160.0.250:60013 PUSH: Received control message: 'PUSH_REQUEST'
Jan 29 18:26:13 sammy openvpn[4437]: sammy/154.160.0.250:60013 SENT CONTROL [sammy]: 'PUSH_REPLY,redirect-gateway def1 bypass-dhcp,dhcp-option DNS 10.8.0.1,route-gateway 10.8.0.1,topology subnet,ping 10>
Jan 29 18:26:13 sammy openvpn[4437]: sammy/154.160.0.250:60013 Data Channel: using negotiated cipher 'AES-256-GCM'
Jan 29 18:26:13 sammy openvpn[4437]: sammy/154.160.0.250:60013 Outgoing Data Channel: Cipher 'AES-256-GCM' initialized with 256 bit key
Jan 29 18:26:13 sammy openvpn[4437]: sammy/154.160.0.250:60013 Incoming Data Channel: Cipher 'AES-256-GCM' initialized with 256 bit key
Finally, to allow OpenVPN and DNSMasq to receive responses on the port 1194 and 53 respectively, kindly open those ports in UFW with the command
$ sudo ufw allow 1194
$ sudo ufw allow 53
Status: active

To                         Action      From
--                         ------      ----

22/tcp                     ALLOW       Anywhere
1194                       ALLOW       Anywhere
53                         ALLOW       Anywhere


22/tcp (v6)                ALLOW       Anywhere (v6)
1194 (v6)                  ALLOW       Anywhere (v6)
53 (v6)                    ALLOW       Anywhere (v6)
With everything looking good, it’s time to connect from a client to the server using the client.ovpn in the next section.
Connect with Client using Certificate
In this section, you will install the OpenVPN Connect Client, and import the certificate generated from the server to connect to your VPN.
Install OpenVPN Connect Client
Download and install the OpenVPN Connect Client from the official website for your operating system. In this tutorial, you will be using the client for Windows. But the process is the same for all the other OS, even on Phone
https://openvpn.net/client-connect-vpn-for-windows/
Import and Connect
- Run the OpenVPN Connect after install
- Select the
FILEtab - And select the OpenVPN
.ovpnfile

- Choose a name for your connection, and proceed.
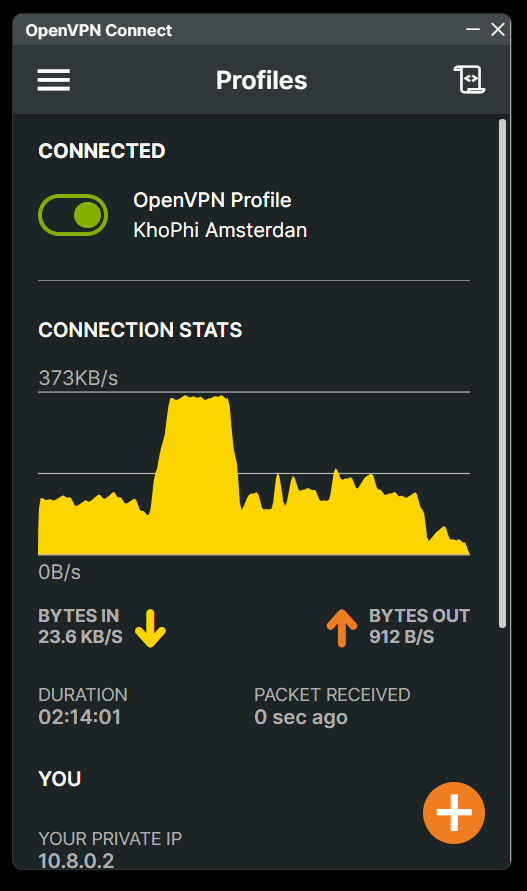
- Then tap on to toggle the added connection to connect
Voila! You are connect to your self-deployed VPN server.
Troubleshooting
After following all the steps above, if after connecting to the VPN, you can’t open websites, follow the next steps.
Allow tun0 in and out your ufw
$ ufw allow out on tun0
$ ufw allow in on tun0
The above commands will allow DNSMaq’s communication to and fro the outside world through your firewall
Summary
In this tutorial, you’ve
- Deploy your own VPN server software on DigitalOcean
- Using a custom host file, you’re blocking certain websites i.e ads using DNSMasq as a local DNS resolver.
- Connected to your VPN server using the OpenVPN Connect Client
What Next?
What application will you want to run next on Digitalocean? Check out the extensive tutorials in the community.