A Week (and beyond) with a Raspberry Pi 3
The first time I saw a Raspberry Pi was about three months ago. It was during my interview with Barnabas, who is into Internet of Things (IoT) and robotics. Barnabas shared some of his endeavors and projects, of which some of his works got him to represent Ghana in Dubai recently. More on that later.
On the very same day, I got to see an Arduino board too. Pretty fascinating devices. Their potential and the possibilities they come with, almost infinite!
In all, I did not get to play with one practically until the Tech Leads Ghana Summer Program 2017 in collaboration with IoT Africa. The chance I had to firsthand, get myself dirty with the Rasbperry Pi was a truly inspiring experience.
Did you see the typo I did in the Pi name above?
For the most part, the Summer program was more of a refresher course for me, as I spend many hours a week DevOps’ing. It was just a ball in my court! Heck, I am a Web Developer too.
However, the part that got me excited more was the Raspberry Pi experience and here, I share my experience below.
Understanding GPIO through use
Our first attempt at practically doing something ‘useful’ (turn on a LED bulb), was a success. As fundamental as it seemed, it opened my eyes to the possibilities. I wasn’t alone though.
I could see the faces of some 20 individuals who took part in the program cheer up, and light bulbs go on in their minds.
Getting the LED to light also ‘led’ to the understanding of what the breadboard is designed to accomplish. Took a while to understand the rows and columns and how they play integral way in forming circuits, circuits that get data signals from the GPIO pins to instruct whatever the input or output is.
General-purpose input/output (GPIO)
As we moved on to build slightly more complex setups meant the full potentials of the Raspberry Pi kept uncovering. When we threw in a button, which when pressed, lit up the LED bulb meant whatever the program was taking us through was hitting home right and solid.
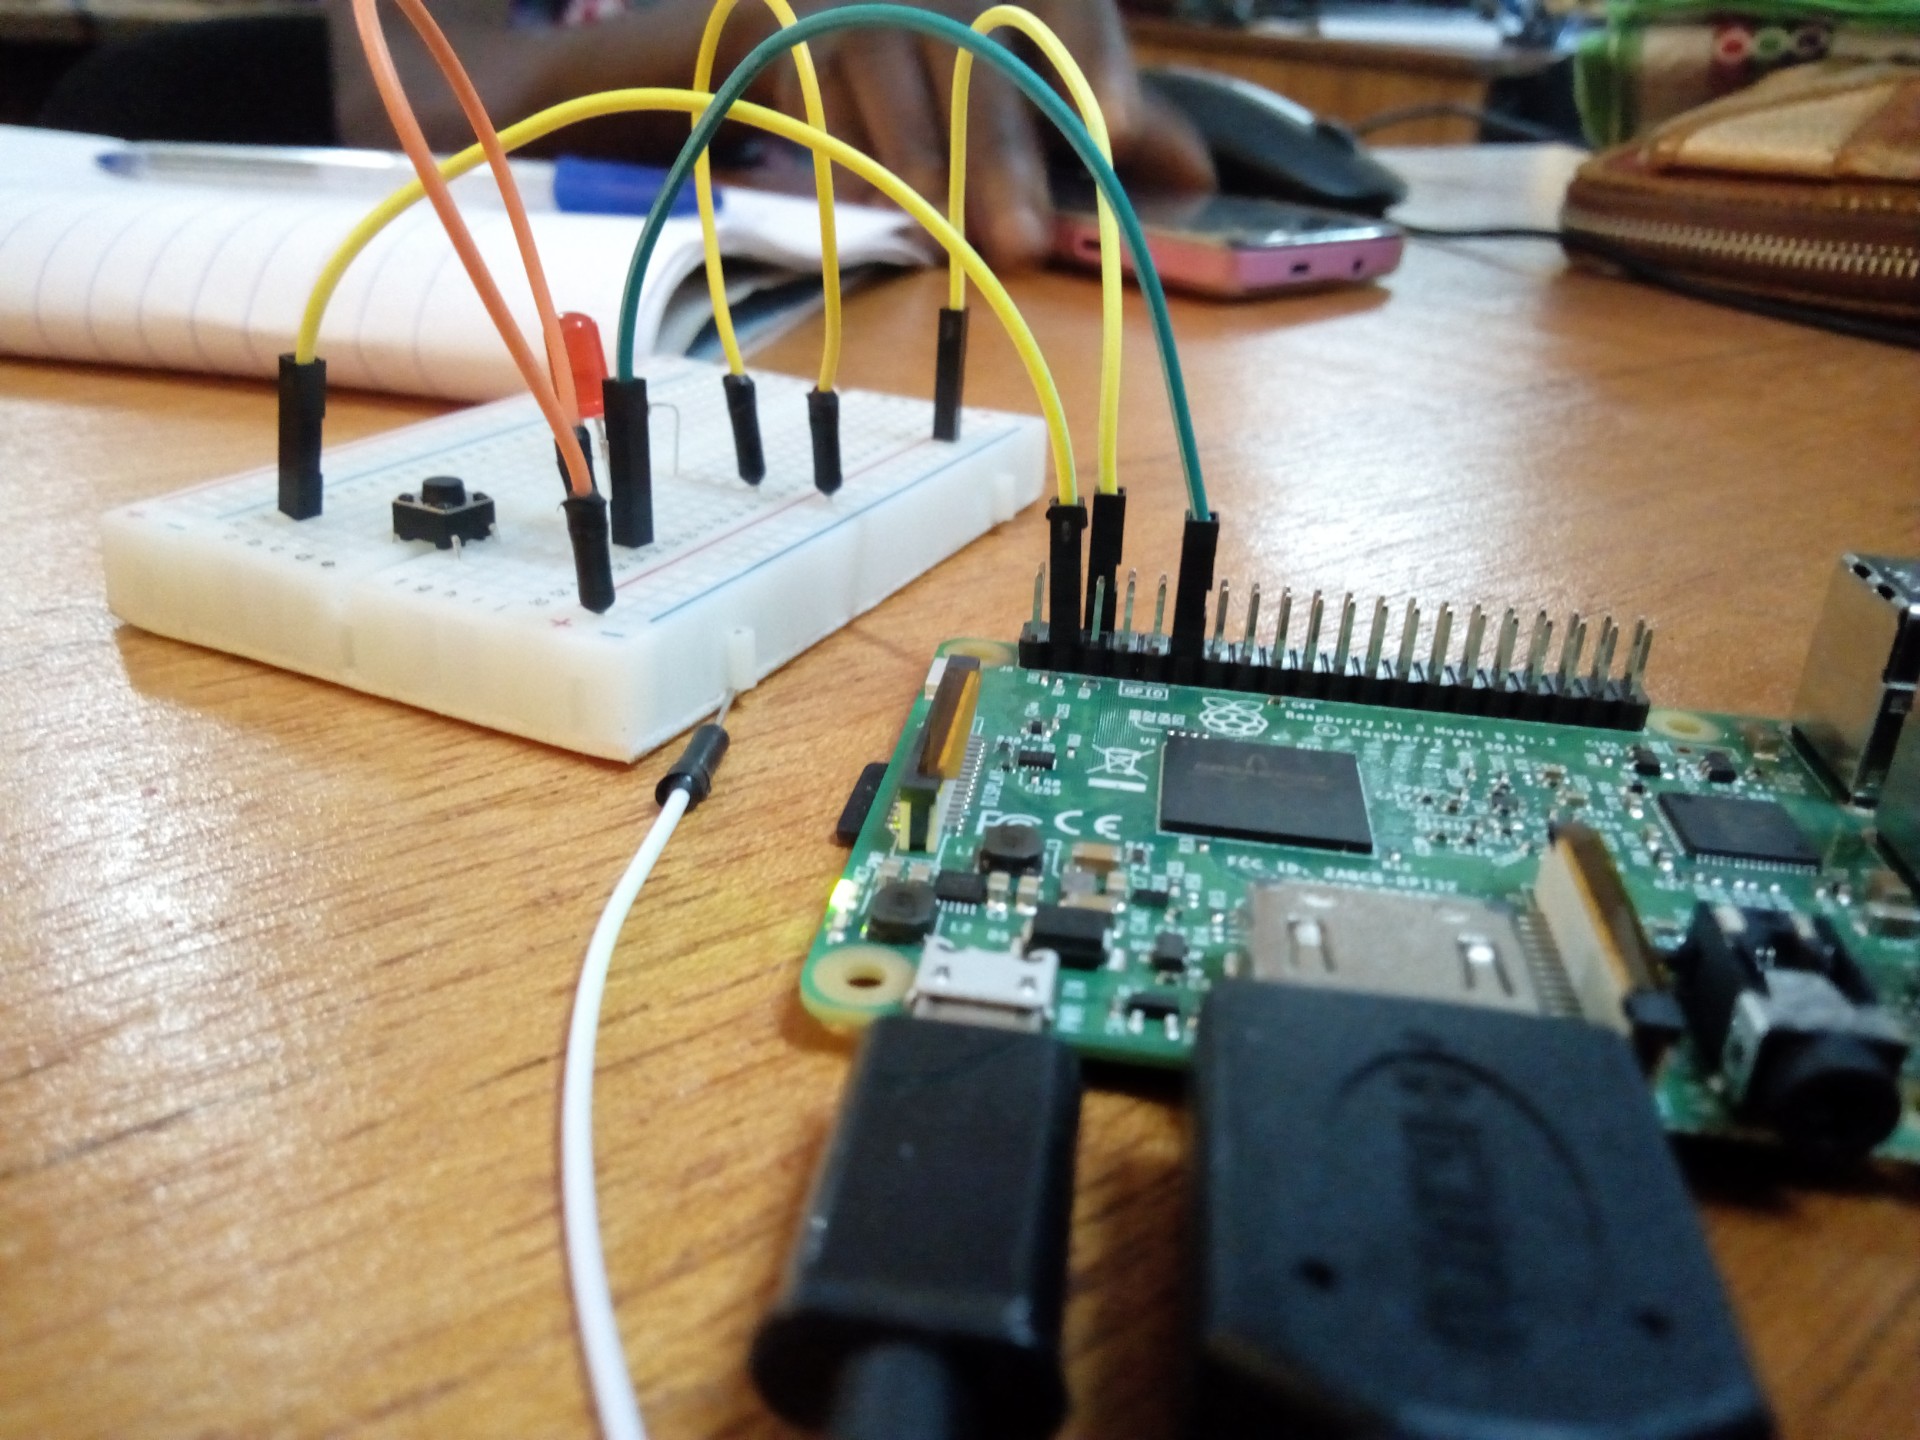
As chaotic the wiring seemed at first, tracing the input points and where they ended up (the Ground (GND)), gave a clearer picture.
Before I went into the course, I had no experience related to Raspberry Pi’s, no ever thought I would one day be IoT’ing. Yet, there I was, setting triggers and lighting up LEDs, to even triggering sending of emails via If This Then That (IFTTT) services.
Speaking of sending emails, since Python is my go-to programming language for many of my web development activities (cough cough, Django), the existence of a fully featured and rich API for communicating with the Raspberry Pi was a relief.
Icing on the Cake with Python GPIOZero
Having 20-pair GPIO pins that one could use to take input with or send signals out from is nice! What is even more amazing is the ease one could programmatically control.
GPIOZero made programming around feedback and signals sensors and input devices connected to the GPIO pins simple and streamlined.
In all, I realized I could throw the GPIOZero package into my usual Django applications, giving an interface to controls I have prepared on my Raspberry Pi. Thus the on and off button could be wired into an interface over the web, allowing an arbitrary user to turn on or off the LED light from anywhere in the world. Pretty handy!
Personal Customizations
So recently, I switched to using Mate Desktop full time, when news of Ubuntu switching to Gnome dropped. Therefore, I had to run a few changes to bring my Raspberry Pi to my taste, UI-tically and familiarity-wise. Forgive my English!
The Raspbian OS didn’t work as functional as I expected. The Mate Desktop for Arm architecture was the savior.
Each and every participant of the Tech Leads Ghana summer program took home, each a Raspberry Pi Model 3 and its related accessories, except a Monitor. Of course, I didn’t expect to carry home a monitor.
A big thank you to Sam Moorhouse, our instructor for the Summer Program for such a wonderful gift.
The customizations I applied to my Raspberry Pi are available on the Raspberry Pi website. Here is mine:
- Installed a brand new shiny Mate Desktop 16.04 LTS on my Raspberry Pi. The experience with Mate Desktop, just smooth!
- Installed OpenSSHServer, so I could remotely communicate with the Raspberry Pi via SSH (assuming both Raspberry and my machine are on same LAN or WLAN
- After setting up my SSH, I then threw in VNC, thus without plugging my Raspberry Pi to a monitor, I could still have a GUI, via SSH.
- Remotely accessing my Raspberry, as long as it is connected to the internet, from anywhere in the world.
- I went with Dataplicity.
Check out the Remote Access section of the Raspberry Pi documentation to learn more about ways to go about you Raspberry Pi.
Conclusion
I really enjoyed this year’s summer program by Tech Lead. Hopefully, next year’s event will be much more interesting and educative, even more.
Kudos to the Tech Leads Ghana team, and IoT in Africa.