Many, like myself, suffer from using Blender Cycles, simply because our computer hardware doesn’t support – I mean, I don’t have GPU enabled because I don’t have Nvidia VGA graphics card with CUDA enabled. This can be a thorn in the flesh.
However, over the few months, I have experimented with ways to help keep that thorn in a flesh, at least, turn to be a cane in the hands. My findings do not override the importance of switching to Nvidia Graphics Card for use in Cycles. Nonetheless, it will go a long way to saving you some few extra minutes (which can translate to millenniums when multiplied by a factor of rendering a movie)
Here in this blog, I present to you, in sections how I go about my scenes in terms of lighting, texturing and others. I have been working on all my projects using the laptop below (Acer Aspire One – a gift from
+Oral Ofori Thanks)
 |
| My supercomputer. It works like magic |
Lighting
To get a better experience and relatively correct illumination in your scene, I found it to be best when you set up your lights after you have modeled every single object you want in your scene. Blender Cycles’ lighting and illumination algorithm are much relatively realistic. Light bounces and interactions with surfaces help give a better overview of what your scene will look like finally. An empty room lighting looks different from that stocked.
 |
| Complete your scene, then you can light to give a better lighting overview |
If you worked out your texturing also, then that’s really cool. Do that and you’ll save yourself from many renderings which also saves you from putting much pressure on your CPU doing the wrong job, supposed to be done by GPU.
Texturing
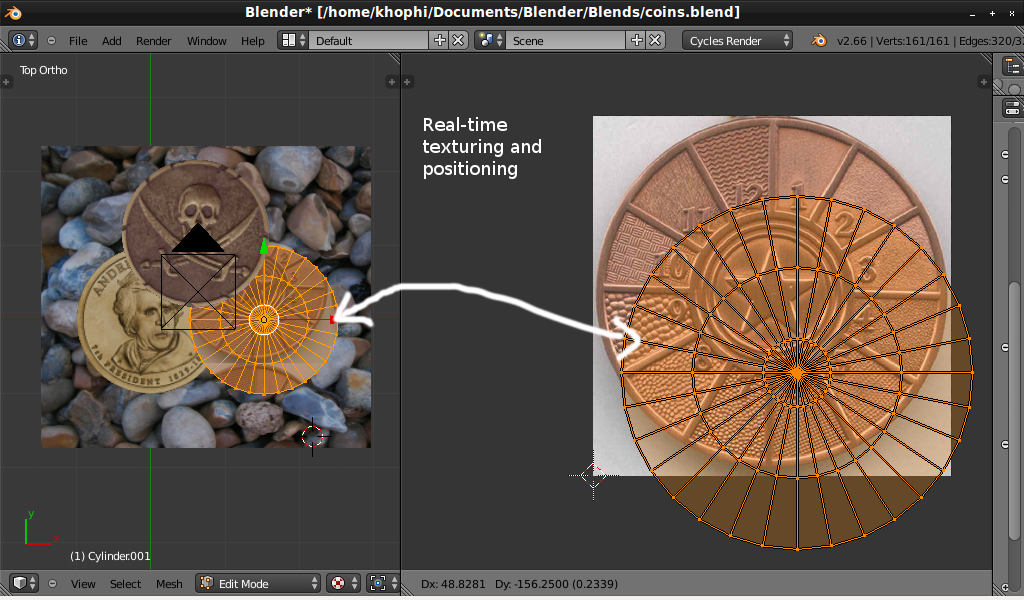
Blender ships with simple ways to see how your texture looks without even needing to render. See the image below.
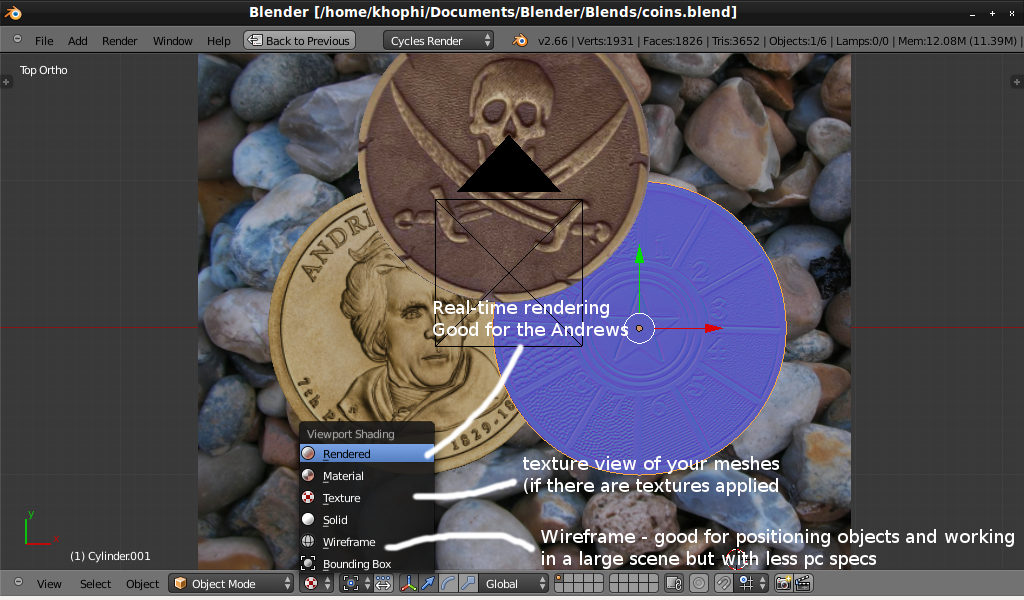 |
| One of the beauties of using the Texture Viewport Shading – Real-time texturing |
At times, it’s essential to know how your texture is mapped onto your mesh. Using the Texture view mode (Toggle View mode >> Texture View Mode) That saves me a lot. One beautiful feature about it too is that I’m able to position my texture in the UV/Image Editor and see its feedback in real-time (check image below).
Put it to good use and you’ll save yourself from rendering anytime you wanna see how your texture looks on the object.
Test Renders
It’s never possible to render a scene once at 2.5k samples and it goes 100% perfect. It’s not! No matter how well-versed you are in any 3D software suite on earth. We all need to test and tweak one or two stuff whenever we are working on our projects. A term we use for that is Test Rendering. During Test Rendering, not all the ingredients for the final image are put in our saucepan.
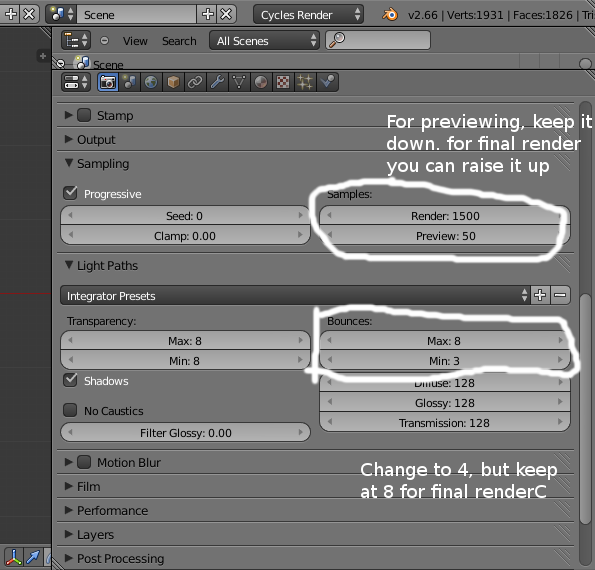
But to make your rendering using even the GPU slightly better is changing one or two settings in the Render Panel of Blender. Change the Max Bounces in the Integrator Presets accordion in the Render Panel to 4. By default, its set to 8. Leave the Min Bounces unchanged.
As the name indicates, their effects have to do with the time’s light bounces from surfaces within your scene off objects. In real life, light bounces off almost every object (unless 100% black surface) and that helps us to recognize what objects are and their color.
In Blender, the light bounces attempt to mimic real life in bouncing of the light coming from the light sources when it hits the surface. The more bouncing, the better looking your scene becomes, but hey too much of certain settings are bad! Reduce it to 4. Take it to 8 for your final render.
Particle System
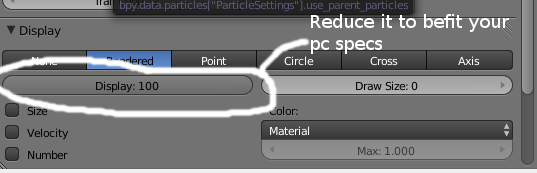
The last part I wanna talk about is Particle System. Try to keep down the display of particles in your viewport minimum as much as possible.
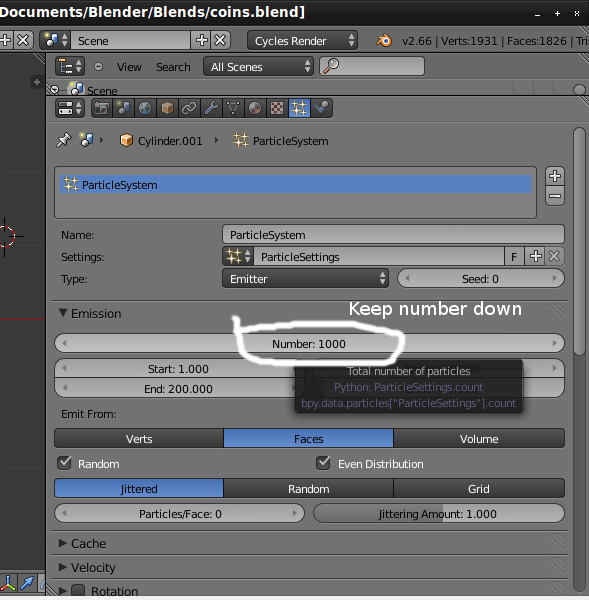
+Andrew Price might be using 250,000 of a number of particles in his tutorial. Try that and your PC will burn in flames, besides you’re using GPU. Andrew uses a 16Gig Ram, i8 processor with a high-performing VGA graphics card from Nvidia.
For your final scenes, you can aim higher, but during work, try to keep it down, as befits your PC. Below are some areas you can tweak.
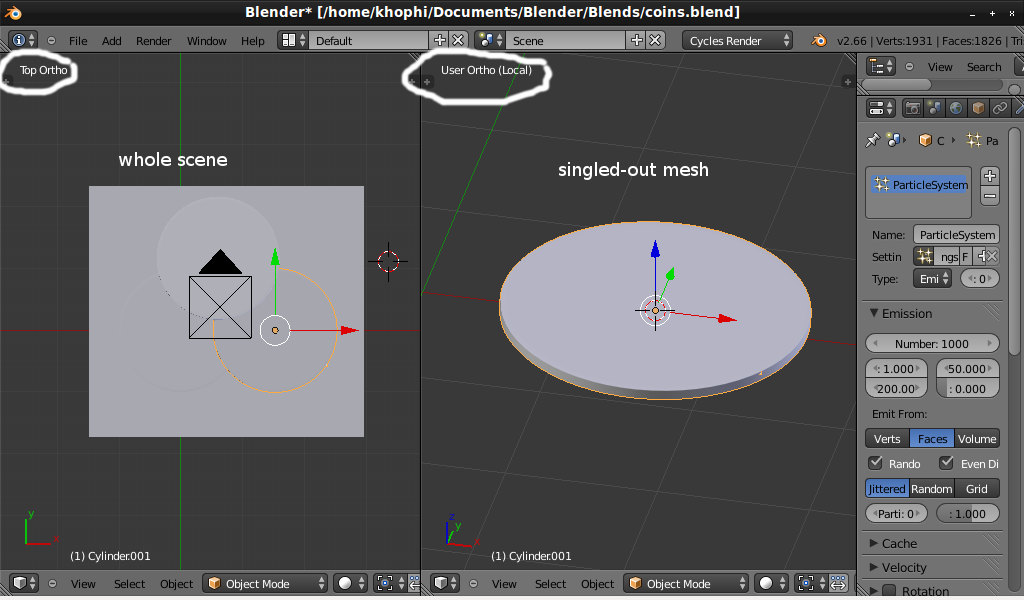
Object Local Viewing
Did you know your can render portions or object of your project? You still use the default [F12] button, but you got to press that only when in the local viewport of the object. See image below.
If you find yourself stuck in Blender Cycles but there’s no Nvidia VGA card in your PC, then you might find these tips useful.
One more note to keep in mind is the many render farms who offer cheap rendering services for Blender Cycles. One of them is Render Street. I’m enjoying $25 free render time, be it animation or still images. Sign up and enjoy one for free. I pick it out of the many render farms out there. Be sure to recharge when it runs down. 🙂
Enjoy your day
from +Blender Academy