The Secrets of Realistic Texturing – The GIMP Way – Part 1
August 21, 2016
2 4 minutes read
In this tutorial, I will take you through the process of realistic texturing your objects and models in Blender realistically. Many renderings you may find around might just have the necessary geometry detailing, good lighting, and rendering, however, the texturing makes the whole results unrealistic and not appealing to the eyes.
To create realistically textured objects, at least, you need a certain type of textures all extracted from your main texture you want to apply.
So, if you are planning of texturing a table, you probably will go in for a wood texture. It is out of this wood texture you will generate the other types of textures you will need to create the realistic-illusion in your renders.
Unfortunately, for Linux users (such as those on Ubuntu), using software like Crazy Bump, are hard to come by as they’re only for Windows PCs. I personally tried running Crazy Bump in Wine but failed since there were dependencies like .NET Framework and DirectX that was required.
Though I’ve worked hard and read wide on how to get mine .NET and Direct X embeds on Ubuntu to work, it proved futile.
Thus if you are a Linux user, and OK with using GIMP, you should find this tutorial very handy and timely. GIMP is a photo-editing software similar to Photoshop from Adobe.
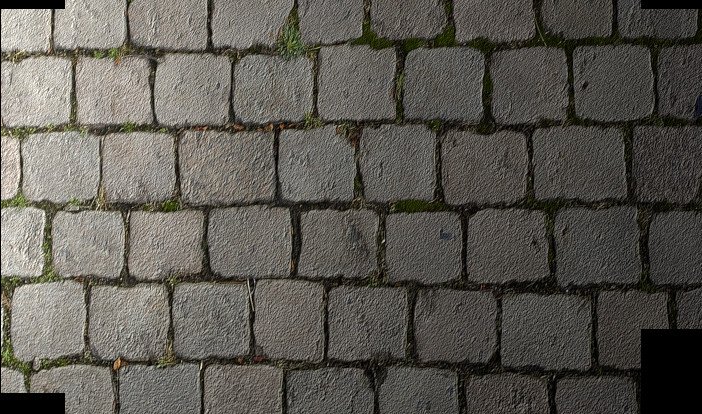
In this tutorial, I will teach you how to create a texturing looking similar to what you see below. The first part will touch on how to create the generated textures you will need in GIMP and the second part will explain how to feed that information into Blender.
Sample rendering using Normal Map, and Displacement combined – 300 samples – rendered on Intel graphics
I am going to generate 3 textures that are basic for the realistic texturing effect, namely, Displacement Texture, Specularity Texture and Normal Map. Also note too that I assume your knowledge to do basic tasks like ‘Open’ an image, ‘Export’ing an image, and moving around in the Menus of GIMP.0
If you are unfamiliar with the use of GIMP, you’re right to visit the official website and learn for yourself. There are plenty of tutorials out there too.
So let’s get going!
Specularity Texture
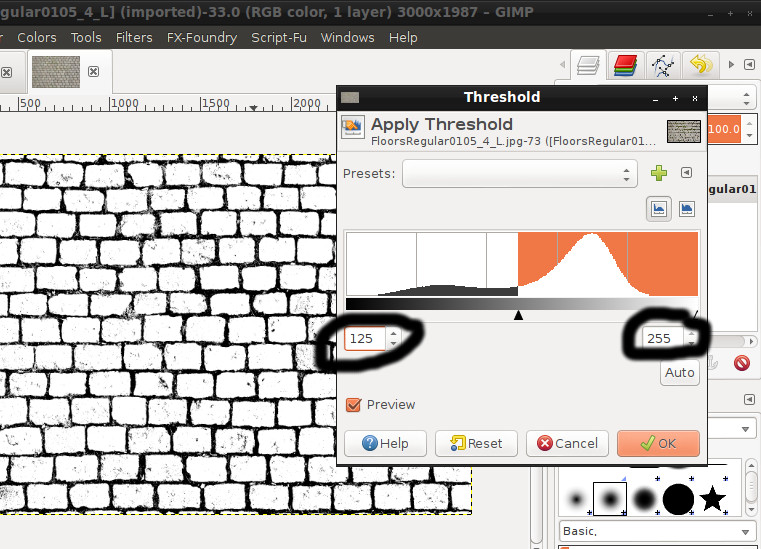
Creating a specularity texture in Blender happens to be very easy to do (perhaps easier than CrazyBump). I got something similar to the image below using the Threshold under the Color menu.
Just slide-tweak it until you achieve something similar to the image below (I did the comparison based on output from CrazyBump)
Spec your texture
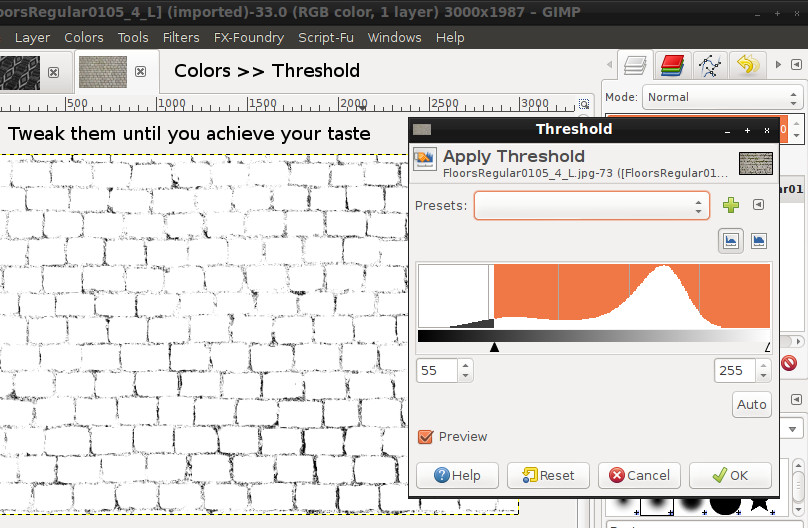
Occlusion Texture
Nothing new here. Using the same Threshold color feature, increase the sliders of the left and right handles till you get something similar to the one below (you can read my values in the Threshold box)
Occlusion texture creation
Normal Map Texture
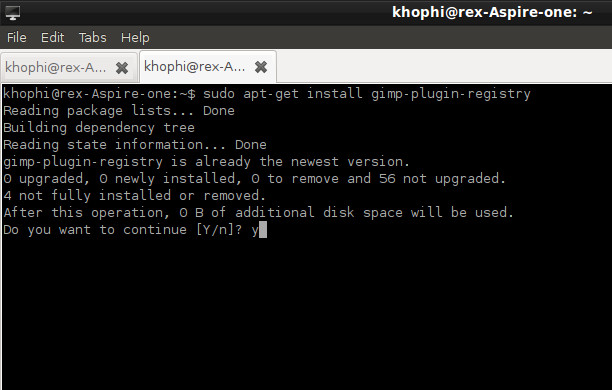
To create a Normal Map Texture in Blender, please, you will have to do some terminal typing. Don’t freak out. I will tell you what to type, and the process is simple and straightforward.
Type the bold part of the sentence below into your terminal, after clicking on it in your launcher (Ubuntu; you can search for it as usual in launcher):
In the image below, because I have my Gimp Plugin Registry already installed, I wouldn’t do that once again. However, you should confirm by typing in ‘Yes’.
After installation, you should just restart your gimp software, and I’m sure its gonna take effect immediately. (For me, I restarted my machine, not because of the gimp plugin installation though)
installing your gimp-registry-plugin which comes with the Normal Map feature
A whole bunch of options will available for your use including the ‘Fx-Foundry’ and ‘Script-Fu’ menus with many options.
However, we are not going close to any of these. Click on Filter >> Map >> NormalMap. Without installing the plugin registry for GIMP, you won’t see the Normal Map option. See image below to check out my settings for the normal map.
Displacement Texture
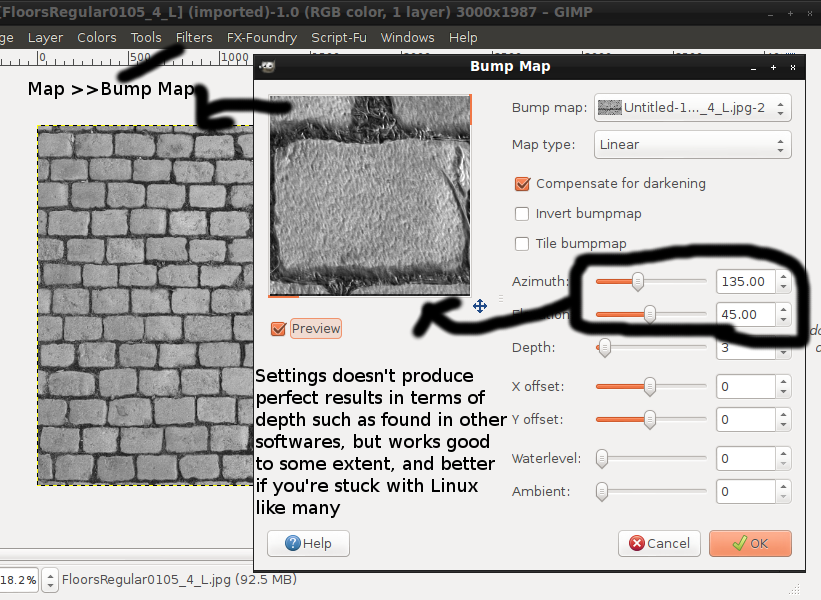
The trick for creating the displacement texture in GIMP isn’t perfect for use now, though it works to some extent nicely. Displacement texture should affect the z-displacement of the texture and should give a bit of depth to what’s being worked on.
Settings pertaining to the Displacement Texture creation
I went about creating my Displacement Texture the hard way this time round. Locate the BumpMap option (Filter >> Map >> Bump Map) and tweak the Azimuth and other options till it matches your taste.
Limitations
The outlined ways of going about in creating the textures for use in texturing have got their own limitations are compared to the output results from software like CrazyBump which have well-defined settings for giving out the best result. Known limitations of the above strategy are:
Normal Map lacks the option of inverting direction of bump
Creating displacement is possible via Bump Mapping which compares less to result of CrazyBump
Achieving your Specularity, Diffuse, and Occlusion textures are all possible by very manual try and error means, as compared to CrazyBumps’ well-defined settings.
Settings for achieving the right spec in one material might be different from another.
These are only my observations. I am ready to learn new ways of going about accomplishing generating textures easily. Will love to hear them.
Conclusion
To achieve realism in your renderings, giving a bit of attention to your textures is worth it. You can learn how to send these hard-earned textures into Blender and allow Blender apply its magic to them on blenderguru.com Thanks for following this Tutorial, The Secrets of Realistic Texturing – The GIMP Way. Visit blenderguru.com for a tutorial on how to feed this info into the blender. Andrew Price has done a perfect tutorial on that.
This website uses cookies to improve your experience. We'll assume you're ok with this, but you can opt-out if you wish.AcceptDetails
Privacy & Cookies Policy
Privacy Overview
This website uses cookies to improve your experience while you navigate through the website. Out of these, the cookies that are categorized as necessary are stored on your browser as they are essential for the working of basic functionalities of the website. We also use third-party cookies that help us analyze and understand how you use this website. These cookies will be stored in your browser only with your consent. You also have the option to opt-out of these cookies. But opting out of some of these cookies may affect your browsing experience.
Necessary cookies are absolutely essential for the website to function properly. This category only includes cookies that ensures basic functionalities and security features of the website. These cookies do not store any personal information.
Any cookies that may not be particularly necessary for the website to function and is used specifically to collect user personal data via analytics, ads, other embedded contents are termed as non-necessary cookies. It is mandatory to procure user consent prior to running these cookies on your website.