Blender
Lantern 3D Model in Blender
In this tutorial which is on how to create a lantern 3D model in Blender, you will learn how to use these basic manipulative tools in Blender to create shapes, enlarge to sizes of your choice, move around and rotate in any angle any axis you wish.
Similar to other 3D software, Blender too has got basic modelling tools, such as to scale (and stretch in particular directions or axes), move, and rotate objects. No matter the project you are working on or animation you wish to do, you surely cannot do without these.
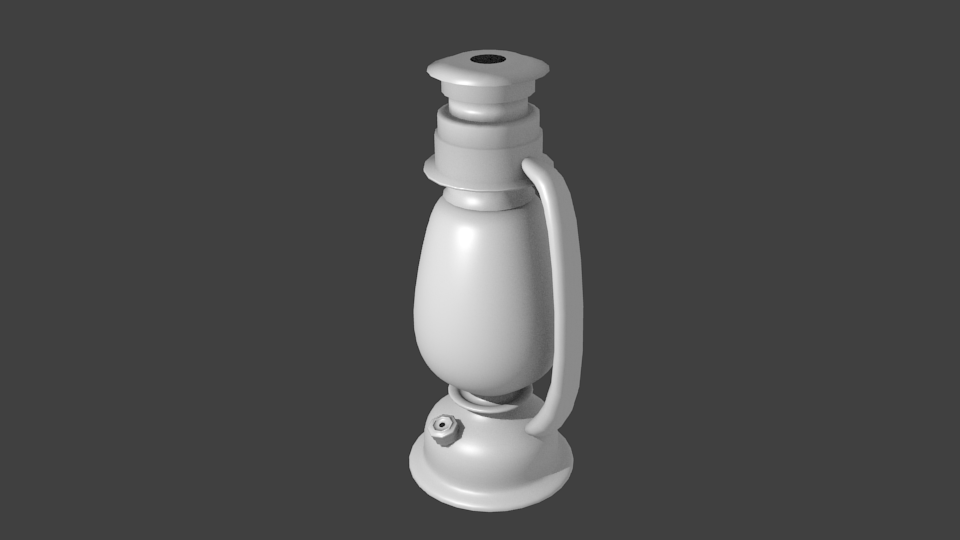
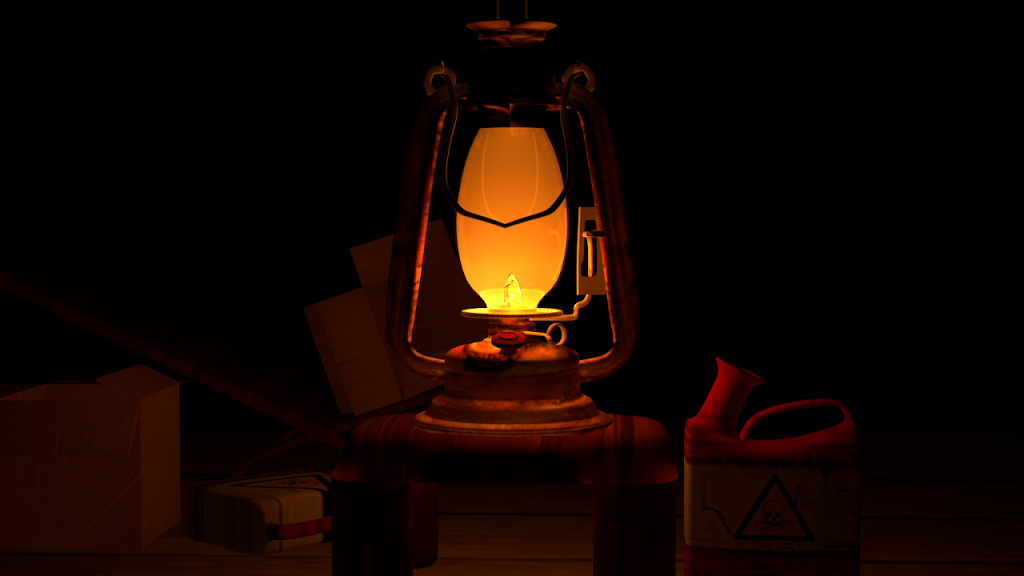
This is what I created finally from the lantern mesh. Unfortunately, I lost the .blend file of the final scene.
Extend yourself more in learning to be comfortable with these tools in Blender and you’ll be in a better position to unleash your designs in a nice way.
Without much ado, lets get started. I know you have your Blender software already opened on your computer. It doesn’t matter the version you’re using, but I suppose you’re using Blender 2.63 and above. I used 2.63 as at the time of doing this model.
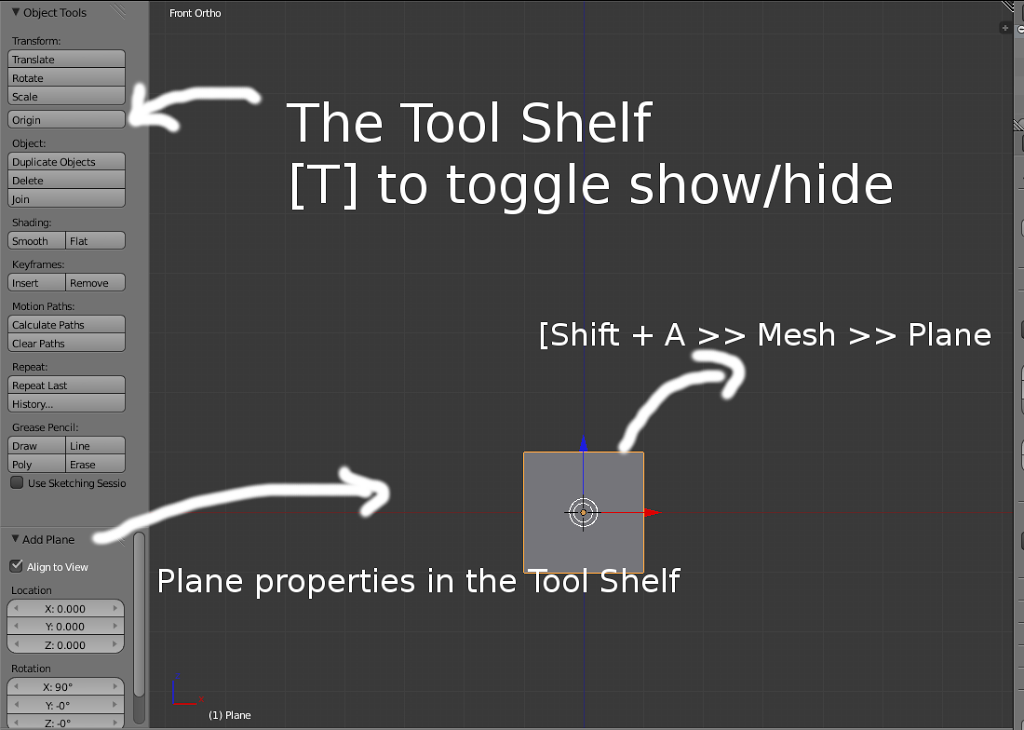
 By default, you should see a cube in your scene. Press [X] on your keyboard to delete it. Go ahead to create the basic mesh we will be extruding from.
Press [Shift + A >> Mesh >> Circle]]. Press [T] to bring up the Tool Shelf. The Tool Shelf contains handy options that you can run on objects you’re working on, whether you are in Edit mode ([Press Tab] to enter edit mode) or in Object mode ([Press Tab] to toggle back to object mode])
There are other modes you can work in, but they are beyond the scope of this tutorial, so lets get going.
Reduce the number of vertices from 32 to somewhere 8. Don’t worry about the type; just leave it at Ngon) (I recommend you reduce the vertices before getting onto other stuffs because that options only show immediately after the circle is added. When you try to grab, scale, or rotate, that option vanishes.)
Use the [S] button to scale the circle to any size of your choice. Press [Tab] to enter Edit mode. Press [A] twice to select all the vertices.
Press [E] and [Y] to snap the extrusion to the Y-Axis only whiles you move your mouse up. It can be fun moving these vertices to far areas in your 3D view, but its cool to keep your movements moderate.
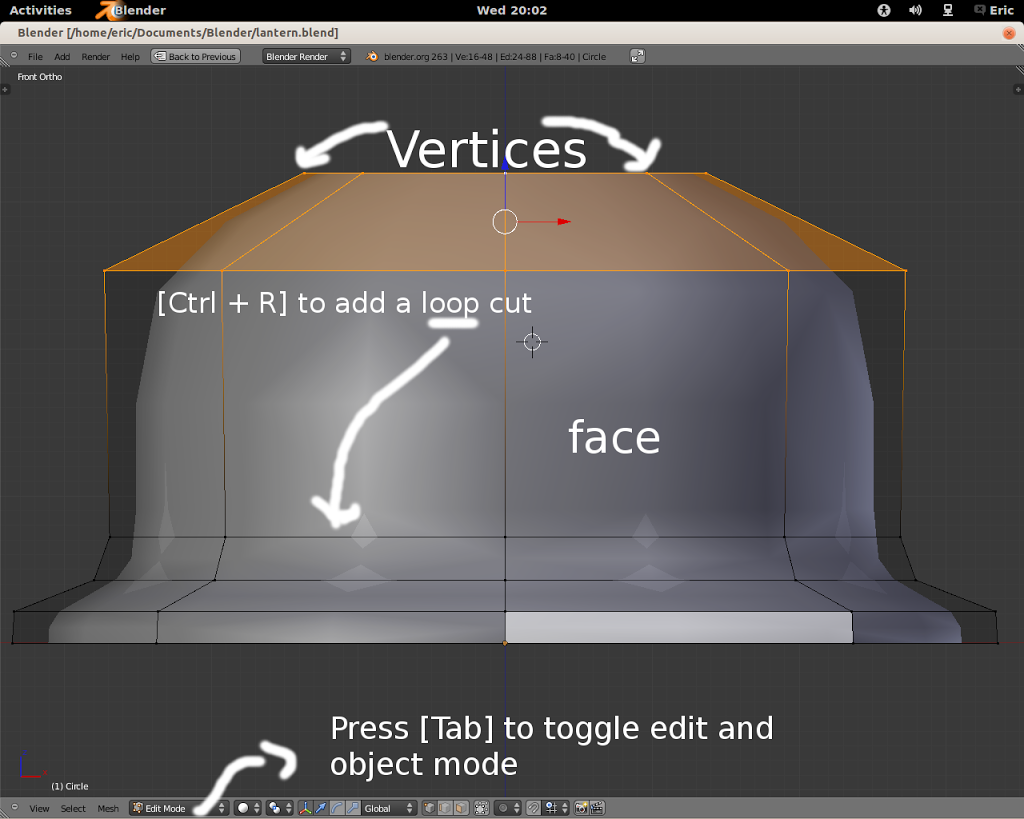
Now its time to divide the cylinder shape now to achieve something similar to what you have in the photo below.
Press [Ctrl + R] and hover on the cylinder. A purple line cuts across the object horizontally (it cuts vertically too depending on where your 3D cursor is hovered, but we need the horizontal cuts now).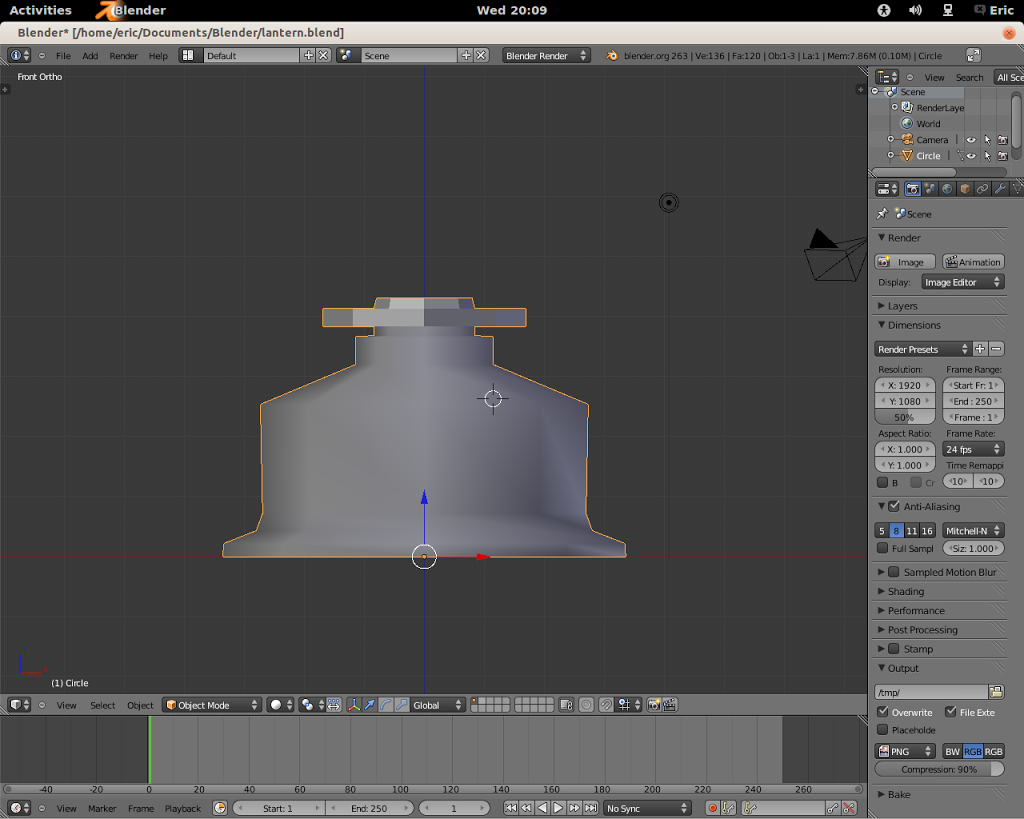
Left-Mouse Click or Press [Enter] to confirm the cut. Its called Loop Cuts. So now, using the [S], and [G] keys and the Loop Cut [Ctrl + R] try achieving something similar to what is in the photo below.
If you find yourself making mistakes, don’t worry. Simply press [Ctrl + Z] to undo your mistakes. You can undo several times, but not forever!
What you just created is the fuel holder for the lantern (the fuel perhaps Kerosene)
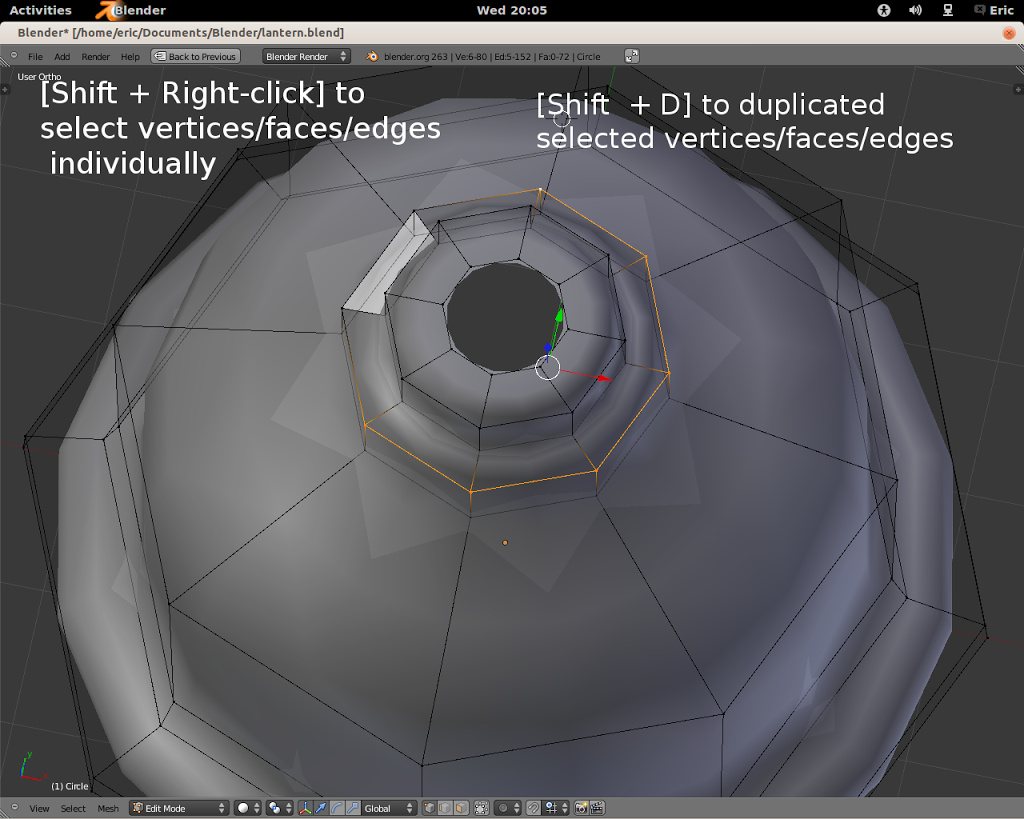
Lets learn one more thing – duplication vertices in Blender. To select vertices, you use the right-mouse click (i’m sure you know that already).

So select the ring of vertices indicated in the image below. When using Windows, use [Alt + Right-mouse click to select that particular ring of vertices.
If you wish to use that same key presses to select faces, then you should be in face-select mode ([Ctrl + Tab]. On Linux, press [Ctrl + Alt + Tab] instead)
 Press [Shift + D] to duplicate the vertices. [G] to grab, [Y] to snap to the Y-Axis, and move mouse up to raise the vertices in the positive direction of the Y-axis.
Kerosene Lanterns have Shades (glass) that rests on something. And that ‘something’ is what we gonna model.
So looking at images 3 and 4, should give you and idea of how to go about it. Once again, the ball is set rolling and is in your court, do justice to it! Try creating the base of the Shade as in the image 4.
Okay! Now, creating the Shade (Glass) can take less than 60 seconds. Really? Yes, really and truly. Let me show you how. We’re gonna use the Spin tool in Blender.
Move to a new layer, perhaps layer 2 (Press [2] on your keyboard to do so). In the new layer, Press [Shift + S >> Cursor to Center].
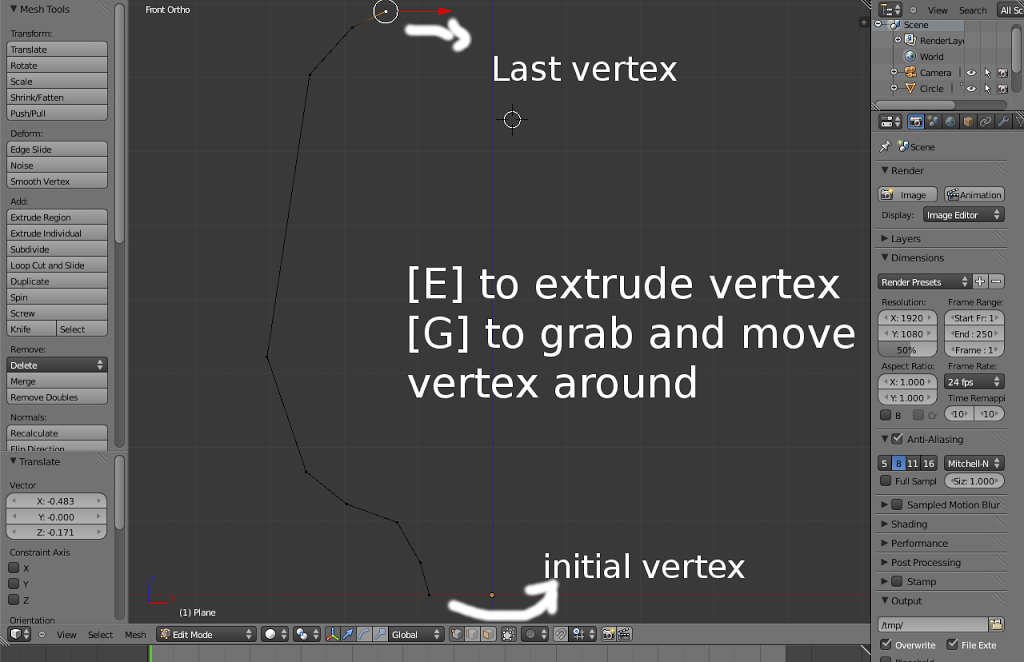
Whoop! The cursor is placed in the center of the 3D view. Add a plane mesh (Shift + A >> Mesh >> Plane]). Press [R] [X] and 90 to rotate 90 degress in the X axis (the plane should face you now.
Tab into Edit Mode, and select 3 out of the 4 vertices. Press [X] to delete the vertices. Grab [G] the last vertice left, position is somewhere on the x-axis as in the photo and start extruding to create a curve-like stretch of vertices as in the photo. Press [Numpad7] to go into top view.
[wp_ad_camp_1]
Still in edit mode press [A] twice to select all the vertices. Press [T] to open up the Tool Shelf if not already opened. Locate the Spin option and click on it.
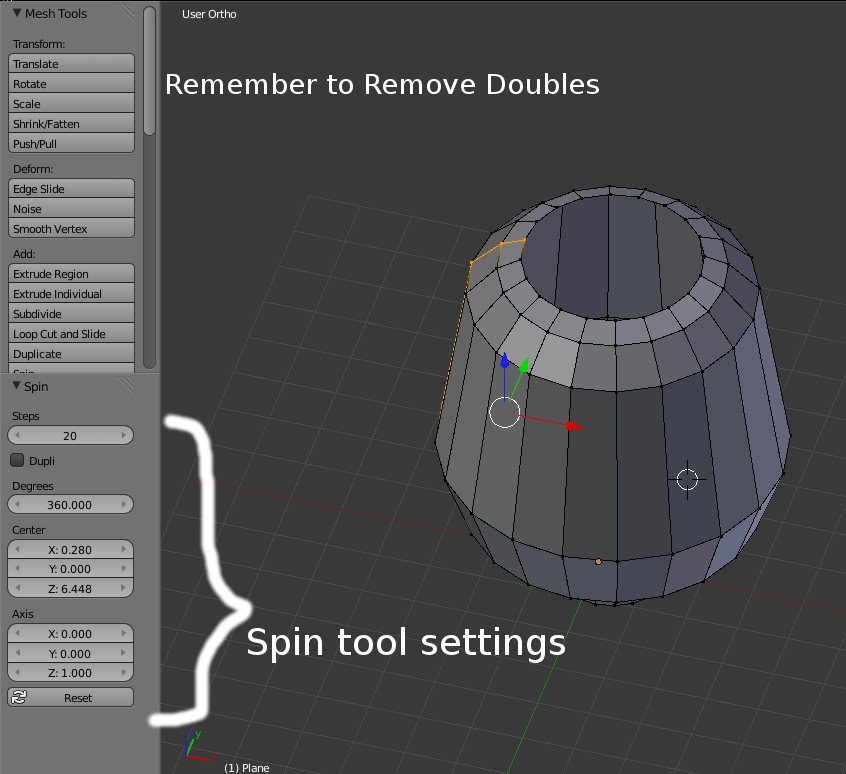 Some spinning happening, right? Okay, down in the Tool shelf, lets tweak some few settings. Increase the angle of spin from 90 degrees to 360.
And increase the Steps to somewhere 25. The higher you set the step, the smoother the roundness of the spin becomes.
Please, one more thing: Twice-Press [A] to select all the vertices, and locate the Remove Doubles in the Tool Shelf. Its an automatic way to remove overlapping vertices that resulted from the spin. Mine removed 9 vertices.
Yours might be different depending on how many vertices overlapped. Go ahead! Play with those settings – its fun. At last, kindly get something similar to what is in image 7.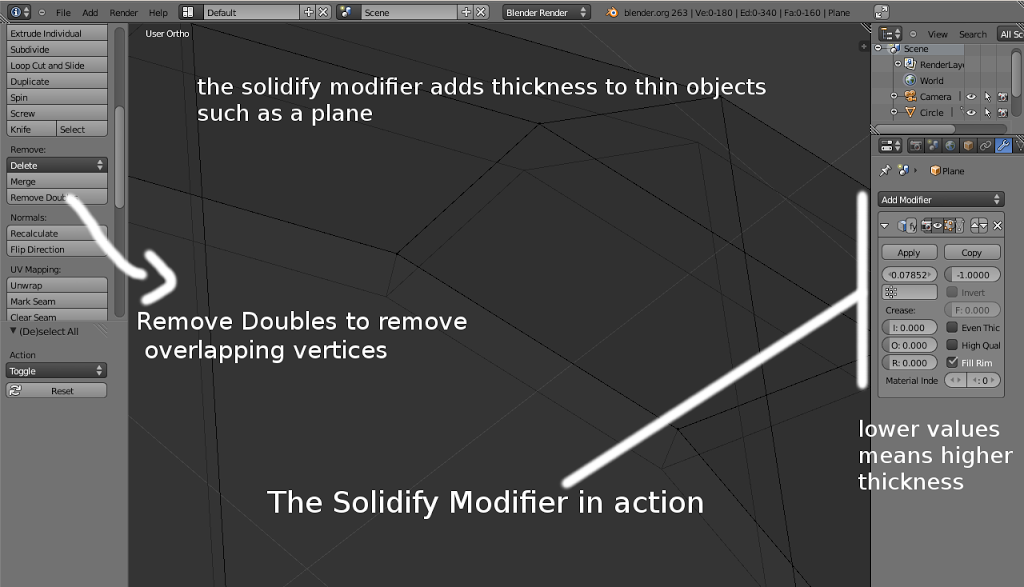
Let me chip in one useful modifier in here. In your Properties panel on the right, locate the Modifiers tab, and select Solidify from the drop-down menu.
Solidify Modifier solidifies your object. Decrease the thickness slider to the negatives. The closer to the negatives, the higher the thickness. Try that!
Now basing on your previous experience with duplicating of vertices, extrusion, scaling and grabbing create something similar to what is in image 9. That will be similar to the top part of a lantern, serving as an exhaust to the fumes from the wick.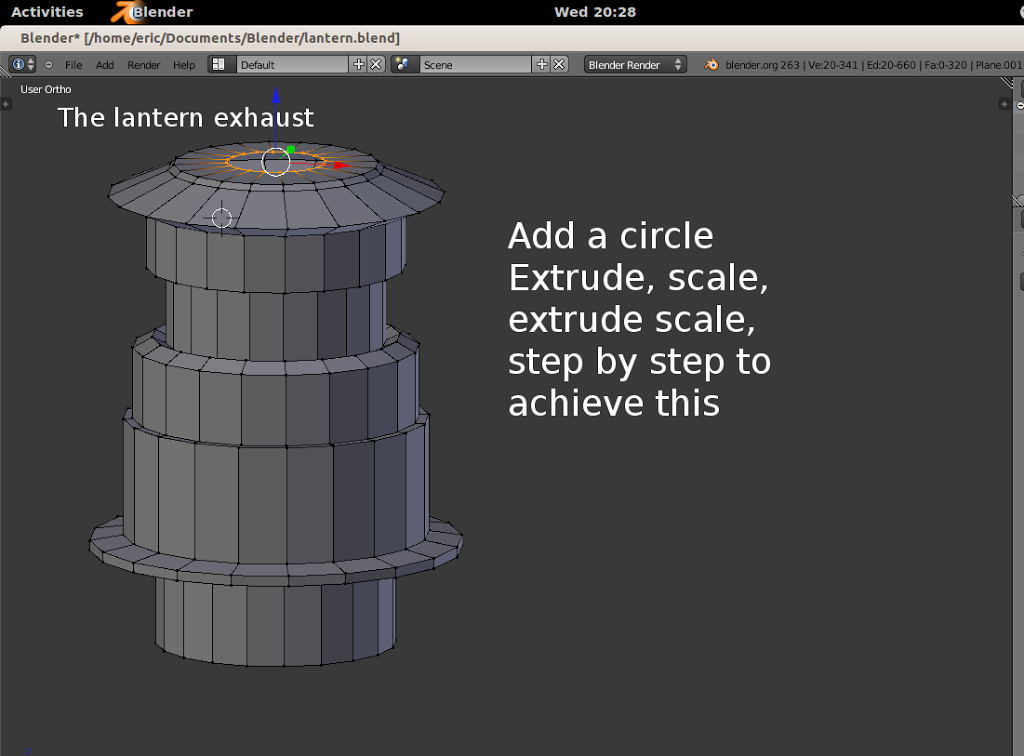
Try arranging the parts of the lantern together as found in image 10. Position them
right, using the grab, scale and rotate manipulators where necessary If you’ll need to add a loop cut to make it nice-looking, you’re good to do that.
Adding the handle should be natural to you by now, I’m sure. Add a Plane Mesh [Shift + A >> Mesh >> Plane]. Rotate so that it falls in line nicely with the base fuel tank.
Extrude, grab to move and rotate to bend to create a shape similar to the one in image 10.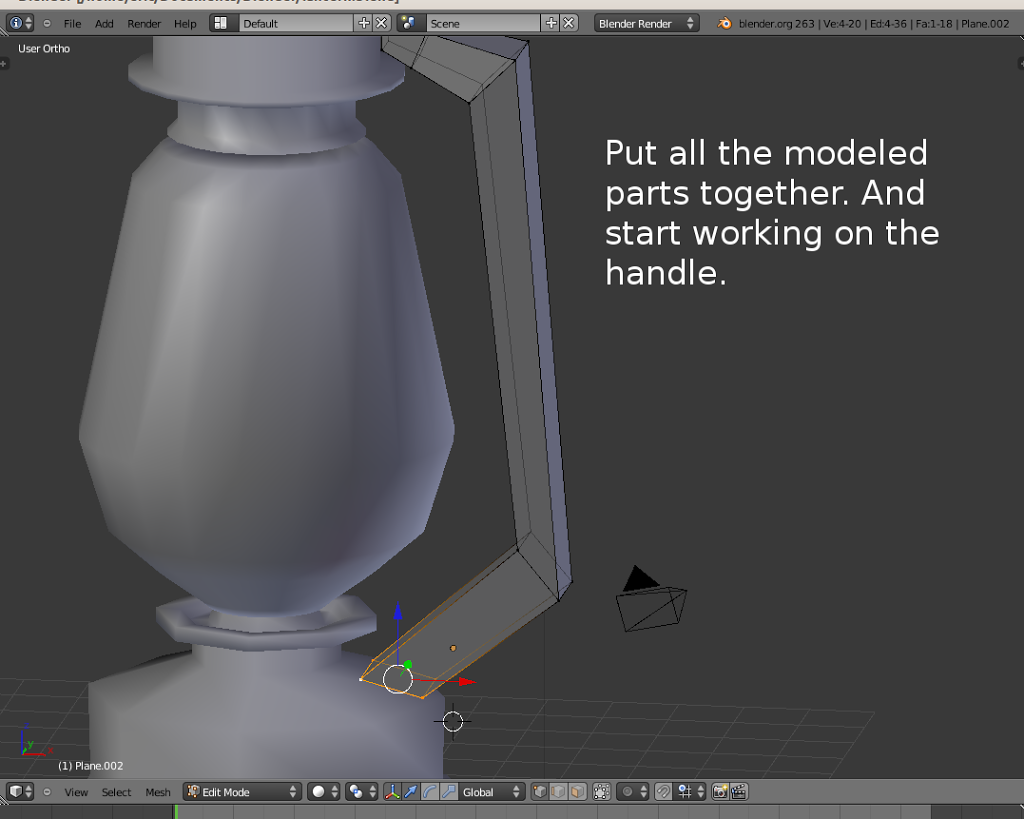
Lets add icing on top of the cake. Your assignment. Please create the cap to the fuel tank as shown in the image 11. I know you can do that with what you’ve learned from this tutorial.
So finally, we’ll have to see the simple lantern we’ve modeled through the lens of a camera, right?
Okay, right-click on the camera, press [G] and move the mouse backwards to zoom out. Zooming out too much but still lantern still large?
Well, I’m sure you’ve heard the saying, ‘There are so many was of killing a cat’. Lets apply that funny principle here. Why not scale down the size of the lantern instead?
Hold down the [Shift] button, and select all the parts making up the lantern. Press [S] to scale down, then Zoom in the Camera by doing the inverse of Zooming out. [Right-click] Camera, press [G] and move forward your mouse.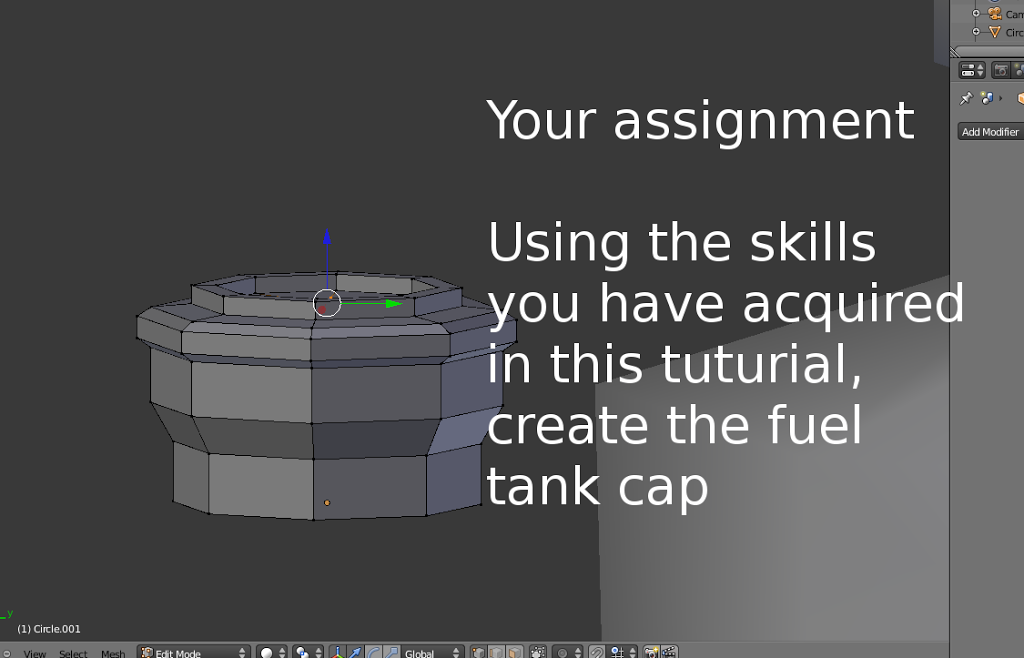
Enough of the position. I know its well too and we’re on the same page. Lets go ahead to enable some basic rendering settings too.
In the properties panel, under the world settings, enable Environment Lighting and set the value to 0.4 and change the sample under raytrace to somewhere 6.
Press [F12] to fire up the rendering! The lantern looking boxy? Haha, press [ESC] to go back to your work.
Select the individual parts and using the shortcut keys for Subdivision Modifier, lets smooth the lantern. Press [Ctrl + 1 or 2 or 3] to subdivide the object that number of times.
Press [F12] again to see something nicer this time round.