Getting Started with FingerprintJS Pro
FingerprintJS Pro is a service and a browser fingerprinting library that queries browser attributes and generates a visitor identifier from them. The visitor identifiers provided by FingerprintJS Pro are widely used for identifying fraudulent behavior on the Internet.
In this tutorial, you will see how a frontend application can work in tandem with a backend API, using Fingerprintto identify and stop fraudulent behavior. In this case, you will see how you can use FingerprintJS to prevent undesired form login attempts.
What happens if the malicious party generates a random string to spoof a different interaction with the backend with every login request? You will use the backend API with FingerprintJS Server API for validation and confirmation of incoming requests.
You will learn how to
- Use fingerprintJS in your frontend client such as React
- Use fingerprintJS in your backend server such as Node JS to detect potential fraudulent behavior by visitors
In the end, you should have an application that behaves like this:

To follow this tutorial, you should have
- a FingerprintJS Pro account, with your API Key. You can create an account at FingerprintJS
- a text editor such as Visual Studio Code
- node installed and configured on your computer
- familiarity with NodeJS, Express and React
NOTE:
If you will like to interactively follow along this tutorial, kindly fork this repository on Github, and [create a codespace](https://docs.github.com/en/codespaces/developing-in-codespaces/developing-in-a-codespace) to follow along in your browser.
Add FingerprintJS to React
In this section, you will learn how to add the FingerprintJS to your React projects. Initialize a new React project with the command below
mkdir -p ~/fingerprint
npx create-react-app frontend --template typescript
cd frontend
Next, install FingerprintJS JS agent and react-hook-form (you will that for grabbing form data)
npm install @fingerprintjs/fingerprintjs-pro
npm install react-form-hook
Change directory to the frontend folder, and remove all the contents in the App.tsx file. Then add the next section to the App.tsx.
import React, { useState } from "react";
import { useForm } from "react-hook-form";
import FingerprintJS from "@fingerprintjs/fingerprintjs-pro";
import "./App.css";

const BACKEND_API = "http://localhost:4242";

export default function Login() {
  const fpPromise = FingerprintJS.load({ apiKey: "xxxxxx", region: "eu" });

  return <div className="section">//</div>;
}
With fpPromise = FingerprintJS.load({ apiKey: 'xxxxxx', region: 'eu' }), you load the fingerprintJS and provide your
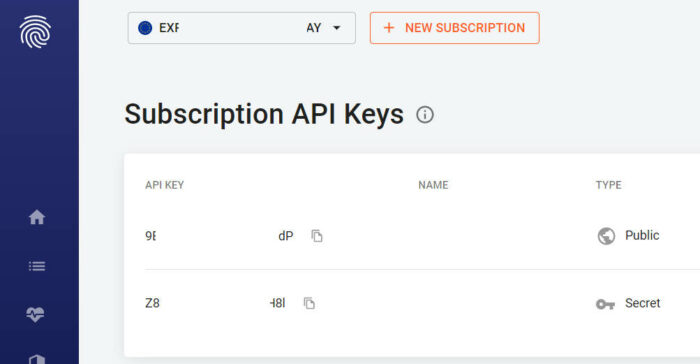
apiKey, which you can grab from your fingerprintJS Pro dashboard

region, which indicates the region you selected during your account creation
In the same App.tsx file, update the return ( ... ) to include the login username and password submit form.
return (
  <div className="section">
    <form onSubmit={handleSubmit(onSubmit)}>
      <label>
        Username: <br></br>
        <input type="text" {...register("username")} />
        <p>{errors.username?.message}</p>
      </label>

      <label>
        Password: <br></br>
        <input type="password" {...register("password")} />
        <p>{errors.password?.message}</p>
      </label>
      <input type="submit"></input>
    </form>
    {errorMessage && <p className="error"> {errorMessage} </p>}
  </div>
);
In the App.css file, update with the CSS style below to center the login form
.section {
  /* Center the section */
  display: flex;
  align-items: center;
  justify-content: center;
  flex-direction: column;
  margin-top: 50px;
}
It’s time to add the form submit logic to your React application. In the Login() function, below the fpPromise constant declaration, add the following
const {
  register,
  handleSubmit,
  formState: { errors },
} = useForm();
const [errorMessage, setMessage] = useState("");

const onSubmit = (values: any) => {
  // grab the fingerprint from the browser client
  fpPromise
    .then((fp) => fp.get())
    .then((result) => {
      // make the visitorId available for login payload
      values.visitorId = result.visitorId;
      // make a post to your API backend (will be created in the next section)
      fetch(`${BACKEND_API}/api/login`, {
        method: "POST",
        headers: {
          "content-type": "application/json",
        },
        body: JSON.stringify({
          username: values.username,
          password: values.password,
          visitorId: values.visitorId,
        }),
      })
        .then((res: any) => {
          res.json().then((data: any) => {
            setMessage(data.msg);
          });
        })
        .catch((err) => {
          setMessage(err.message);
        });
    });
};
By grabbing the result from the FingerprintJS returned data, you can thus attach the visitorId to the payload to be sent. This makes the visitorId available to the backend.
Now that the frontend is grabbing the fingerprint, and sending to the API backend, go ahead to create the NodeJS ExpressJS API backend.
Using Server API at the Backend
In this section the API backend takes in the login credentials sent from the frontend, and checks if no fraudulent activity is involved, such as spoofing a random visitorId. If all is well, the login proceeds as expected. Otherwise, an appropriate error message is sent back to the frontend for display.
Quickly create a Typescript ExpressJS project with the command below
cd ~/fingerprint
npx create-ts-api backend
cd backend
Next, install the needed packages, including FingerprintJS Pro package.
npm install @fingerprintjs/fingerprintjs-pro
npm install axios sqlite3
axios for making requests to the FingerprintJS Pro Server API, and sqlite3 for persisting data.
Note: In this tutorial, `sqlite3` is used as an in-memory storage. You can save and store the sqlite database on the disk, in which case you will not lose data should you restart the NodeJS server
Go ahead and remove all the content in the index.ts file in the src directory of the backend API project created.
Update the index.ts file with these imports, and the initialization of the sqlite3 database with the login table and username, visitorId and timestamp fields.
import { Router } from "express";
const axios = require("axios").default;
const sqlite3 = require("sqlite3").verbose();
const router = Router();

const EU_FPJS_API = "https://eu.api.fpjs.io"; // use the region where you account is based

const db = new sqlite3.Database(":memory:"); // persistent only in-memory

db.serialize(() => {
  db.run(
    "CREATE TABLE login (username TEXT, visitorId TEXT, timestamp DATETIME)"
  );
});
Next, query the FingerprintJS Server API using axios in the /api endpoint. Why /api endpoint? If you check the app.ts file, the routes are exposed under a /api directory, therefore all requests to the apiRoutes will begin with /api
router.get("/:visitorId", (_req, res) => {
  const visitorId = _req.params.visitorId;
  axios
    .get(
      `${EU_FPJS_API}/visitors/${visitorId}?api_key=${process.env.FPJS_API_KEY}`
    )
    .then((response: any) => {
      // response contains an array of visitor activity
      // for the requeted visitor Id

      res.json({
        status: true,
        data: response.data,
      });
    })
    .catch((error: any) => {
      res.json({
        status: false,
        data: error.message,
      });
    });
});
This snippet of code
- gets the visitorId sent from the client via the URL as
:visitorId. ThevisitorIdis thus used in an API Server call to the FingerprintJS Server API, along with the secret API key from theAPI Keyssection on the dashboard.
The secret API key is passed through the Node Process, so as it does not get committed in code. To run the Node Server making available the API Key available to be accessed and used by Node, start the Node Express API using the command
export FPJS_API_KEY=secret-API-key && npm run dev:ts
Now to the login API endpoint, add the next router.post section
router.post("/login", (_req, res) => {
  // payload sent from client
  const username = _req.body.username;
  const password = _req.body.password;
  const visitorId = _req.body.visitorId;
  const timestamp = new Date().toISOString();

  // run the DB queries in a linear way.
  db.serialize(() => {
    db.get(
      "INSERT INTO login VALUES (?, ?, ?)",
      [username, visitorId, timestamp],
      function (err: any) {
        if (err) console.log(err);
      }
    );

    // query how many login attempts in last 5 minutes
    db.all(
      "SELECT * FROM login where (username = ?) AND (timestamp >= Datetime('now', '-5 minutes', 'localtime'))",
      [username],
      function (err: any, row: any) {
        if (!err) {
          // scenario for if the malicious party generates a random string to spoof a different visitorId with every login request
          // check the visitorId against the username record in the database to see if it matches the one in the request
          if (row.length && row[0].visitorId !== visitorId) {
            res.json({
              msg: "Invalid credentials",
            });
            return;
          }

          // no more than 5 attempts in the last 5 minutes
          if (row.length > 5) {
            res.json({
              status: false,
              msg: `We detected multiple log in attempts for this user, but we didn't perform the login action`,
            });
          } else {
            // Login Logic here
            /*
          loginUser(username, password)
            .then(response: iUser) => {
              if (response) {
                // login success
              } else {
                // login failure
              }
            }).catch((error) => {
              res.json({
                'status': false,
                'msg': error.message
              })
            }
          */
            res.json({
              status: true,
              msg: "Login Success",
              user: {
                username: username,
                visitorId: visitorId,
                token: "jwt-xxxxx-token-xxxxx",
              },
            });
          }
        }
      }
    );
  });
});
In summary, the above section achieves the following
- When a user attempts login, the attempt is stored in the
logindatabase - Then if the user has attempted more than 5 login tries in the last 5 minutes, their subsequent login tries is denied
- Next, if the user tweaks the
visitorId, but continues to use same username, the attempts is prevented as well, with aninvalid credentialsresponse
With the visitorId paired with other custom logic in your application, you can prevent bad actors trying to fraud or dilute the clean records your platform needs for serving your genuine users right.
Conclusion
In the above tutorial, you used FingerprintJS to prevent fraudulent login attempts using the JS Agent in tandem with the Server API.
For more scenarios and use cases, see the FingerprintJS Guide


