By now, you might have watched the #FF7 movie. One of the scenes many will remember definitely is what I call, the ‘drop-hit-run’ scene. Cars dropped from the skies, but they hit the ground at ‘lightening’ speed!
In the VPS world (Virtual Private Server) world, being able to get up and running quickly (with subdomains) is priceless (especially if you’re new to it), and will save you lots of time you can spend tweaking your code, writing tests, debugging, sharing your works with friends and family, or perhaps reading more about #FF8 or #FF9 (Trust me, FF404: Page Not Found, might one day drop)
Who’s this for?
This tutorial is specifically for anyone out there, who wants to setup his/her subdomains on a VPS provider such as Digital Ocean quickly without lots of head-to-walls banging . The principles in this tutorial apply to wherever the VPS is hosted, as long as its a Linux system, we’re on the same page.
And so, you want to achieve something like this with your domain:
mysubdomain.mydomain.co
Or
anothersubdomain.mydomain.co
If so, then you are in the right place. I remember raising a question on Stack Overflow some time ago, and with the assistance from dear developers, I could get the gist of what I needed to do. After many hours of reading, and implementing what I learn in putting the setup in production, I’ve prepared this tutorial, giving you all the quick points you need to keep in mind. You’ll be hitting down gracefully, yet at lightening speed after this tutorial, hopefully. Having a VPS was something I never did (I always used Heroku, which bootstrapped most of the process), so the learning curve was not without reading, and extensive hitting of SO.
Getting Started: Ground Rules
Not necessarily ground rules, but we need to be on the same page, so you don’t hit the ground crashing to rubble. Make sure you meet these requirements, namely,
- you have a private server which runs any Linux distro (preferably Ubuntu 14.04+) and
- you’ve got 100% absolute control over what, how and when you install whatever you like,
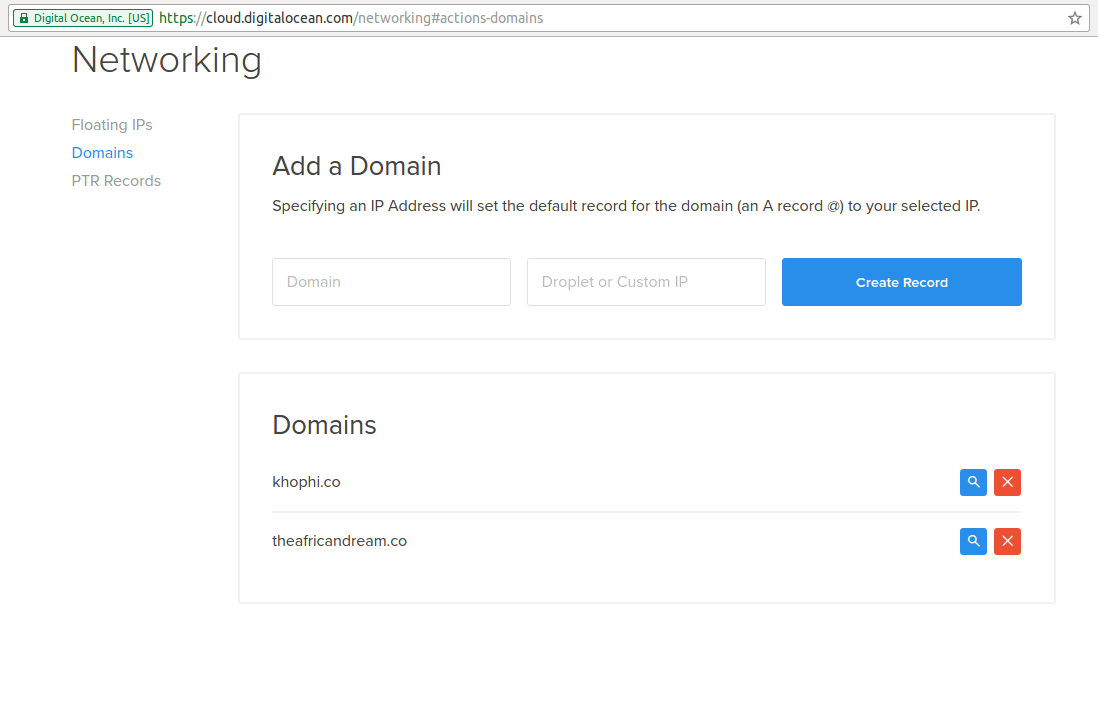
- and last but not least, you have a running website on Digital Ocean (which means you’ve configured your domain name to work with DO in the DNS section of DO).
- I mean, you already have a website running on Django with Gunicorn and Nginx with a domain like, say, example.com. In this tutorial, we’ll add the subdomains part, so I won’t be talking about setting up your DO with Django for the first time. That’s covered nicely already!
In fact, you should own the private server. If you do not have full ownership then perhaps you might not be able to make certain manoeuvres, which can lead to bad landing. Bad landings aren’t what we want, do we? In any case, make sure you meet the hints above, and what a breeze this tutorial will be. Don’t setup something on Azure, and expect the tutorial below to work magic for you. Never works that way.
My tutorial is based on using Digital Ocean, running Ubuntu 14.04. In my configuration, I use Python, Django, Nginx, and Gunicorn. That PDGN (which I pronounce as ‘Pidgin’) is a solid ‘Quadro’ that rocks so well, both for local developments and production. Ever since I started building web applications, these ‘Pidgin’ have always been my friend.
Subdomains, How to?
Configuring to use subdomains on Digital Ocean is not a winding process. You do it once, and you’re good to go for subsequent additions. In fact, as usual, first-times are always the part to be difficult. After this landing, you should be able to land even American School Buses in full glory.
In this department, I wouldn’t be doing much of a talking. I will show you my current setup in Digital Ocean, then you can adapt your setup to match the overview, although I will point out a couple of facets you should pay attention to after the image.
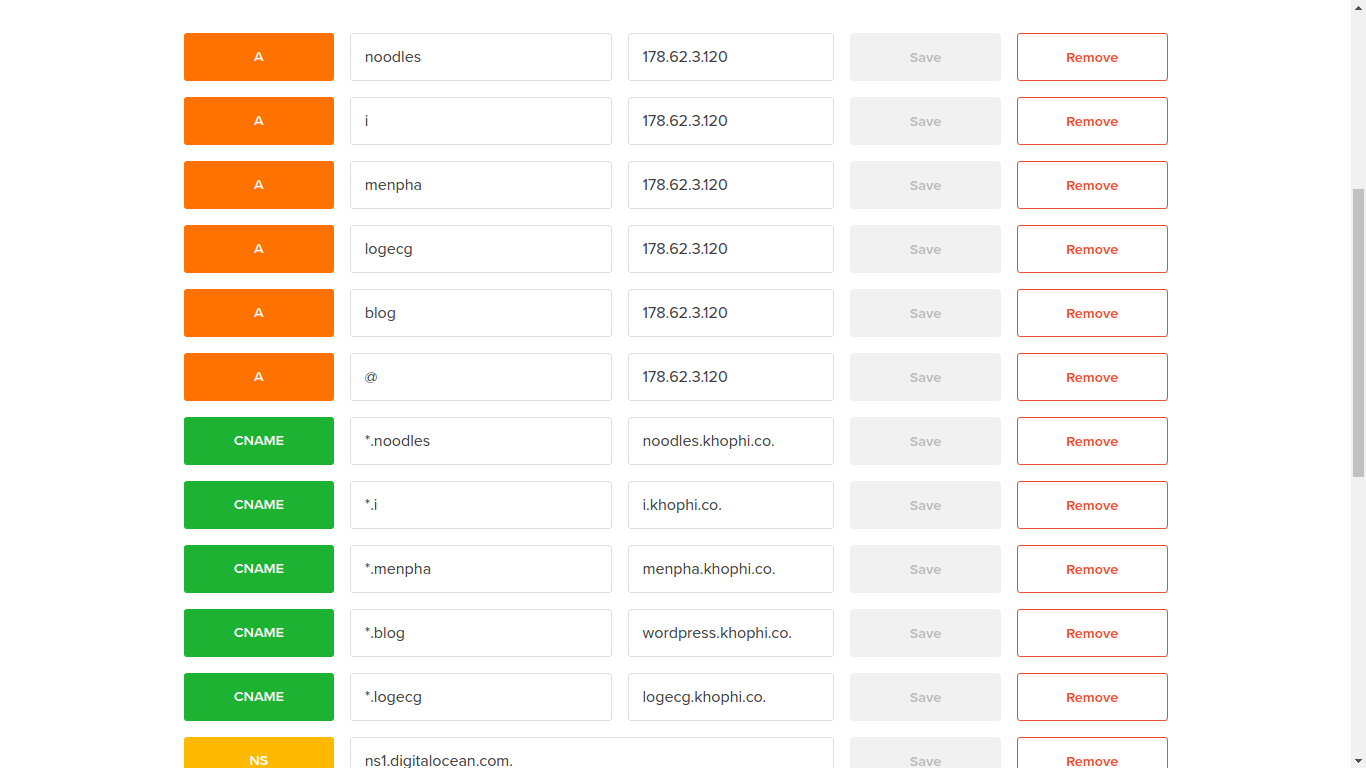
Digesting the above image
In my case, let’s say I wanted to add a subdomain 'menpha‘ to my actual domain which is khophi.co to eventually get something like http:/menpha.khophi.co
To land well with this approach, you need to consider these points
- You need to add an A Record with the name you wish for your subdmain, i.e, the name that comes before the .yourdomain.co (look at the image, please, you see that I mean?)
- This A Record should direct to your @ (in other words, your parent IP address. In my case, what’s the IP?)
- Save the above work, and click on Add Record again. This time…
- You need a CNAME Record. At this point, we’re approaching touchdown. We need to slant well in order to hit the ground with speed in the right direction.
- You CNAME record should have these:
- First Box: an asterisk, then a full stop, then the name for your subdomain (same as what you input in A Record above)
- Second Box: your A Record Name (your subdomain name,
menpha), a full stop, then your actual domain (in my case,khophi.co), then the domain name extension (in my case, the.co), then ANOTHER fullstop - Next? This point is to tell you that, the previous point had a MANDATORY full stop at the end, so your Second Box should have this:
menpha.khophi.co. - Don’t worry, DO checks the input, if you’re missing something, you’re prompted. But its good to know what you’re doing.
- Saved everything? Then at this point, you should see a Zone File at the bottom of the page showing something similar to what’s below
$ORIGIN khophi.co.

$TTL 1800

.... some parts cut which aren't relevant for landing ....

khophi.co. 1800 IN NS ns1.digitalocean.com.

khophi.co. 1800 IN NS ns2.digitalocean.com.

khophi.co. 1800 IN NS ns3.digitalocean.com.

khophi.co. 1800 IN A 178.62.3.120

noodles.khophi.co. 1800 IN A 178.62.3.120

*.noodles.khophi.co. 1800 IN CNAME noodles.khophi.co.

*.khophi.co. 1800 IN CNAME khophi.co.

*.i.khophi.co. 1800 IN CNAME i.khophi.co.

i.khophi.co. 1800 IN A 178.62.3.120

menpha.khophi.co. 1800 IN A 178.62.3.120

*.menpha.khophi.co. 1800 IN CNAME menpha.khophi.co.
If you’ve got something similar to what you see above, then you’re almost landing right. Since we’re talking Domain Name ‘Services’ here, the changes you make might take considerable amount of time before they are propagated, both at DO’s DNS, and to the others around the globe. It doesn’t take long to do so though. Maybe, 30 minutes time, you should be good to go (I mean, land on 4 wheels).
Now Server Things
The previous parts of the tutorial is just about when we’re dancing in the middle of our drop downs from the skies. That was where we keep a close eye on the ‘altitude-meter’ (some call it altimeter).
[wp_ad_camp_1]
In this part, we’re prepping to land, and with that in mind, we need to log into our Private Server to get going. The recommended way is via SSH, via a user account other than the root (Don’t login with root: its like dropping with your car upside down. One word: Catastrophy).
You’re in, and we will be configuring our server things (which are Gunicorn and Nginx, the GN part of our ‘Pidgin’) to talk to each other and do what we want for us. An overview of what we want to be done is just below, maybe something you might call pseudo-process, whatever.
When the user/visitor/customer hits, say, menpha.khophi.co , we want a particular Nginx configuration file to listen in on that and accept the request. Then, if this request is not anything relating to serving of static (or content that don’t need any processing) files within the directory specified for /static/ in our Nginx configuration, relay the request to Gunicorn. Gunicorn then kicks in and calls your Django code to do the rest.
So, in this way, what we want to accomplish is simple: Tell Nginx what address to listen to and where to forward to if the request doesn’t ‘make any sense to Nginx’, that is, doesn’t fall within the rules it should process, here the /static/.
There is a gunicorn config file at /etc/gunicorn.d/gunicorn.py, but we don’t need to touch it. All the subdomains gunicorn configurations can ride in that configuration file.
Configuration Configuration, which configuration is which? Well, the gunincorn.py holds the how to run the Django application as a server, and the gunicorn.conf holds the where to find the Django project itself.
Gunicorn.conf
We can see from the above snippet, the configuration (the .conf of gunicorn) and what they mean. I’ve tried to add enough inline comments explaining what each line does. If that’s clear, let’s move on to the Nginx.conf side
Nginx.conf
Likewise, I’ve tried to add as many as possible inline comments to explain what everything is doing. You will notice I have mixed the port numbers up. Well, I wish and hope you learn from the snippets, rather than copy pasting. At least changing one or two lines to make it work for your project is what you need. You don’t want to drop-land with your car set to auto-land. If so, then where’s the fun?
Concluding Notes
The process above, although might appear a daunting task, all that we did was just make sure, when a user visits a subdomain address, Nginx receives it, then forwards to the appropriate running process (Gunicorn) which in turn looks to your Django Project, and spawn the cascade of commands needed to serve the request.
I hope you found this article useful enough to get you started quickly with creating subdomains. Lemme know in the comments if you face any challenges and feel free to share/+1.
Thanks.