Worldwide Phone Number Verification via Firebase Auth in Angular
Depending on the services or products you offer, you might wanna verify your users via a phone number, on top of the usual email verifications. Google’s Firebase Auth does help with logging in with phone numbers.
In our use case explained in this article, instead of logging in all the time with phone numbers, we simply wanna invoke the phone number OTP process once to verify if the user’s phone number is valid, then upon subsequent visits, log in via usual email could proceed.
For the free tier, you have 10,000 SMS per month on Firebase. For the use case above, which the verification is done one time, it would mean to exhaust this threshold, one would have to register 10k users each month.
It appears the phone number authentication part of the native Firebase Javascript SDK isn’t part of the AngularFire2, thus we’ll be going ‘raw sauce, no ketchup‘ here.
I will save you the time of explaining what Firebase is in general. If you don’t know what it is, please refer to firebase.google.com to learn more.
I proceed henceforth with the assumption
- you have your Firebase project setup in your console already.
- you have an angular project setup via @angular/cli
Let’s dive in
Import & Initialize
Since we’re not using AngularFire, we only need the ‘Fire’ part.
$ npm install firebase --save
Then let’s import into wherever component we wish to use.
import { Component, OnInit } from '@angular/core';
import * as firebase from 'firebase';

@Component({
  selector: 'app-verify-phone',
  templateUrl: './verify-phone.component.html',
  styleUrls: ['./verify-phone.component.css']
})
export class VerifyPhoneComponent implements OnInit {

  public recaptchaVerifier: firebase.auth.RecaptchaVerifier;

  constructor() {
    /* REPLACE CONFIG DETAILS BELOW WITH YOURS */
    const firebaseConfig = {
      apiKey: 'aaaaa-peee-ai-cheee',
      authDomain: 'oooath-love-man',
      databaseURL: 'https://somewhere',
      projectId: 'your-id',
      storageBucket: 'yourbucket.appspot.com',
      messagingSenderId: '0000000000'
    };
    if (!firebase.apps.length) {
      firebase.initializeApp(firebaseConfig);
    }

  ....

}
Nothing special happening here, right? We’ll put to use the recaptchaVerifier pretty soon.
With our Firebase sdk imported and initialized, let’s have some fun.
The
if (!firebase.apps.length) { .. }part is there to check any issue that might arise from the firebase trying to initialize multiple times.I noticed this happening with going back and forth from the verify component page using browser forward back buttons. You’ll see it when you see it.
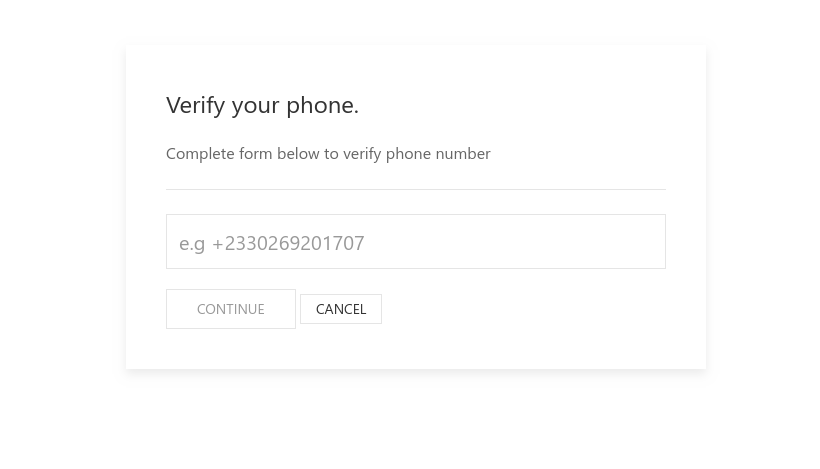
For a UI as seen above, we can use something like this:
<div class="uk-container mt-5">
  <div class="uk-flex-center" uk-grid>
    <div class="uk-width-1-2@s">
      <div class="uk-card uk-card-default uk-padding">
        <p class="uk-text-lead">
          Verify your phone.
        </p>
        <div class="row align-items-center">
          <div>
            <p class="lead">
              Complete form below to verify phone number
            </p>
            <hr class="my-4">
            <div id="recaptcha-container"></div>
            <form class="" #formData='ngForm' (ngSubmit)="onSubmit(formData.value)">
              <div class="uk-margin">
                <input type="number" name="phone_number" class="uk-input uk-form-large" [ngModel]="phone_number" placeholder="e.g +2330269201707"
                  required autofocus>
              </div>
              <button type="submit" class="uk-button uk-button-primary" [disabled]="formData.invalid || busy">
                <span *ngIf="busy">Hold on a second</span>
                <span *ngIf="!busy">Continue</span>
              </button>
              <a [routerLink]="['/']" class="uk-button uk-button-default uk-button-small">Cancel</a>
            </form>
          </div>
        </div>
      </div>
    </div>
  </div>
</div>
And then our complete verify-phone.component.ts can look like this:
import { Component, OnInit } from '@angular/core';
import * as firebase from 'firebase';

@Component({
   ...
})
export class VerifyPhoneComponent implements OnInit {

  ...

  ngOnInit() {
    this.recaptchaVerifier = new firebase.auth.RecaptchaVerifier('recaptcha-container');
  }

  onSubmit(formData) {
    const appVerifier = this.recaptchaVerifier;
    const phoneNumberString = formData.phone_number.toString();

    firebase.auth().signInWithPhoneNumber(phoneNumberString, appVerifier)
      .then((confirmationResult) => {
        this.sent = true;
        const verification = prompt('Enter verification code');
        if (verification != null) {
          console.log(verification);
          confirmationResult.confirm(verification)
            .then((good) => {
              // all checks out
            })
            .catch((bad) => {
              // code verification was bad.
            });
        } else {
          console.log('No verification code entered');
        }
      })
      .catch((err) => {
        console.log('sms not sent', err);
      });
  };

}
In English, here are the steps going on:
- We grab the form value, namely,
phone_numberfrom theformDatangFormobject - Stringify the
phone_number(might not be necessary, if yourinput type="text") - Firebase takes over from this step. You get an SMS on the phone number specified
- Immediately we know SMS is gone (we know this, because if it errored, we would have ended up in the
.catch(...) { }block), we initiate aprompt(...)- Using
prompt(...)ensures whatever code execution is synchronous, as the input from theprompt(...)should be available before proceeding. - The above approach uses the in-built prompt thing, which depending on who you ask, is intentionally designed to look ugly natively. Throw in something like
sweetalertand enjoy life.
- Using
- If the user actually entered the verification code received via SMS in the prompt, we then confirm that in the
confirmationResult.confirm(....)part. - The rest is history!
Here’s the complete snippet:
import { Component, OnInit } from '@angular/core';
import * as firebase from 'firebase';

@Component({
  selector: 'app-verify-phone',
  templateUrl: './verify-phone.component.html',
  styleUrls: ['./verify-phone.component.css']
})
export class VerifyPhoneComponent implements OnInit {

  public recaptchaVerifier: firebase.auth.RecaptchaVerifier;
  public sent: boolean;

  constructor() {
    const firebaseConfig = {
      apiKey: 'AIzaSyAEluZadqp0cAKphA8fMaiGSAe9u5Y3YMc',
      authDomain: 'package-to-me.firebaseapp.com',
      databaseURL: 'https://package-to-me.firebaseio.com',
      projectId: 'package-to-me',
      storageBucket: 'package-to-me.appspot.com',
      messagingSenderId: '3708166249'
    };
    if (!firebase.apps.length) {
      firebase.initializeApp(firebaseConfig);
    }
  }

  ngOnInit() {
    this.recaptchaVerifier = new firebase.auth.RecaptchaVerifier('recaptcha-container');
  }

  onSubmit(formData) {
    const appVerifier = this.recaptchaVerifier;
    const phoneNumberString = formData.phone_number.toString();

    firebase.auth().signInWithPhoneNumber(phoneNumberString, appVerifier)
      .then((confirmationResult) => {
        this.sent = true;
        const verification = prompt('Enter verification code');
        if (verification != null) {
          console.log(verification);
          confirmationResult.confirm(verification)
            .then((good) => {
              // all checks out
            })
            .catch((bad) => {
              // code verification was bad.
            });
        } else {
          console.log('No verification code entered');
        }
      })
      .catch((err) => {
        console.log('sms not sent', err);
      });
  };

}
Conclusion
I’ve always enjoyed the fact that one could drop down to the native Javascript Firebase SDK as AngularFire2 isn’t keeping up with the changes in the Firebase SDK. Or, because, as seen above, it is dumb simple to use the usual SDK in your projects, writing yet a wrapper around an already exposed API just for Angular is kinda overkill.
In any case, go forth and verify or log in your users like a boss, via phone SMS.