Unifi Guest Voucher Check
When I stopped using the Freeradius-cum-DDWRT-cum-Daloradius implementation for the Hotspot Login approach, it was so I could free my hands from any technicalities and whatnot related to getting up and running. So I switched to Unifi, and lo and behold, it isn’t always green on the other side.
At the time of writing this, I’m just less than a month old into the use of the Unifi Controller, and its related hardware.
Specifically, I opted for the Unifi Mesh AC APs as they fall in line with the end goal of what AlwaysOn, the little WiFi project we’re working on, attempts to hit.
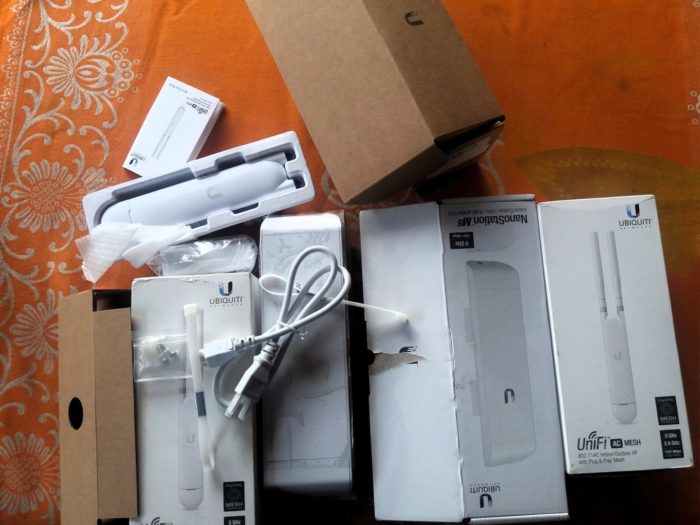
In a matter of hours, the setup was up and running, serving a radius of some 200 meters
On paper, the Unifi AC Mesh goes a 183 Meter distance. After increasing the default
6dbiin the Unifi controller for the routers to16 dbi, people away from the access point as far as even 400 meters get access to connect.The full technicalities behind the why, I do have a fair idea. However, this video got me somewhere useful:
https://www.youtube.com/watch?v=wGE4tjATecY
So Unifi Guest Voucher Check
That was just by the way though. After playing with Unifi Controller Guest Portal with Voucher Authentication, I wish I could love it, but basic features missing just make it a no go for me.
One crucial functionality missing is the ability for guests to check how much data they have left as per their voucher. This sounds like a trivial deal, yet means a lot to users of the network.
The first, and most repeatedly asked feature from us since day one we put the WiFi out there, has been the option for guests to see how much data they have left.
I hit the web, and started searching. Unfortunately, Unifi devs don’t think much of it, thus, haven’t worked on it, YET.
The How To
Primarily, this is what the unifi-guest-bundle-check website does.
- You visit a web address, say
localhost:3010/check-voucher, - You enter a voucher code you got after purchase
- You receive results of data usage
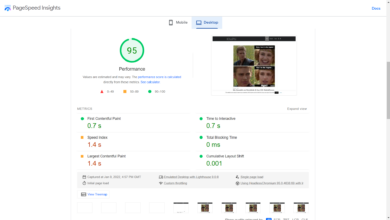
The UI looks like this:
So let’s go through the steps to get this project up and running on your server.
Download & Install
$ git clone https://github.com/seanmavley/unifi-guest-bundle-check unifiguest
$ cd unifiguest
$ npm install && bower install
That should get the project onto your machine or server, with packages installed.
Before you run the application using nodemon bin/www, let us complete our credentials.js file.
Take a look at the credentials-sample.js file in the project root directory, and update it to reflect your actual credentials, then save it as credentials.js
// Save this file as
// credentials.js
module.exports = {
  // Please, it is 2017, use HTTPS for your unifi controller
  // https://blog.khophi.co/use-letsencrypt-unifi-controller-ubuntu/
  baseUrl: 'https://your-unifi-controller:8443', // The URL of the Unifi Controller. This can point to \
           // the localhost if you'll run them both on same server
  username: 'your-unifi-controller-username',
  password: 'your-unifi-controller-password',
  // debug: true, // More debug of the API (uses the debug module)
  // debugNet: true // Debug of the network requests (uses request module)

  // Your ReCAPTCHA API credentials
  sitekey: 'something-something',
  sitesecret: 'duh-duh'

}
We’re good to go then.
Run nodemon bin/www, then access the application in the browser at localhost:3010/check-voucher
The root of the url, the localhost:3010 is a page for the AlwaysOn WiFi project we’re working on. Feel free to retweak the URLs to point to whatever or wherever you want.
Just open the routes/index.js file, and do changes to the routes as you wish:
......

// Homepage
router.get('/', function(req, res, next) {
  res.render('index', {});
});

// Terms
router.get('/terms', function(req, res, next) {
  res.render('terms', {});
})

// Page to display after user logged in.
router.get('/logged-in', function(req, res, next) {
  res.render('loggedin', {});
})

// Voucher check begins from here.
router.get('/check-voucher', function(req, res, next) {
  res.render('checkvoucher', {
    captcha: recaptcha.render()
  })
});

........
Deploy on Server
On the server, you definitely wish to have the service start on system boot and restarted automatically when a problem comes up.
You can use Digital Ocean as your server for both hosting your Unifi Controller and the Unifi Guest Check Voucher project.
PM2 is what I use, which happens to be one of the best node.js process managers out there.
All it takes after installing pm2 on the server is to run,
$ cd unifiguest
$ pm2 start bin/www --name unifiguest
$ pm2 show unifiguest
Run the pm2 show unifiguest to see stats of your new process.
If you have your pm2 connected to keymetrics.io, then your process should show up in the web dashboard as well, in your account.
Sit Nginx In Front
I use Nginx to sit in front of the locally running unifiguest process, which is hooked at port 3010
The most basic Nginx conf you might need to get going can be this:
upstream unifiguest_nodejs {
    server 127.0.0.1:3010;
}

server {
    listen 443 ssl http2;

    server_name check-voucher.mydomain.com;

    # these are group ssl-related settings of mine.
    include /etc/nginx/ssl/ssl-params.conf;
    include /etc/nginx/ssl/khophi.ssl;

    root /home/user/unifiguest;

    # also, something specific where I place rules for statics & compressions etc.
    include /etc/nginx/snippets/statics.conf;

    location / {
        proxy_pass http://unifiguest_nodejs/;
        proxy_set_header X-Forwarded-For $proxy_add_x_forwarded_for;
        proxy_set_header Host $http_host;
        proxy_http_version 1.1;
        proxy_set_header X-NginX-Proxy true;
        proxy_set_header Upgrade $http_upgrade;
        proxy_set_header Connection "upgrade";
        proxy_cache_bypass $http_upgrade;
    }
}

server {
    listen 80;
    server_name check-voucher.mydomain.com;
    rewrite ^ https://$server_name$request_uri? permanent;
}
So incoming traffic to port 80 with server name as check-voucher.mydomain.com will be proxied to an upstream server running at port 3010 which is our unifiguest process managed by pm2
Conclusion
This is a fairly straightforward process, and I’m sure anyone can deploy the steps above in just about 5-10 minutes.
I hope you enjoyed this one, will see you in the next one.