Tech Leads Programming Class Week 2
Welcome to Tech Leads Programming Class Week 2.
This week, we dive in straight into building our front-end pieces (the part users will interact with in the browser). We continue from where we left off in the class of Week 1. If you missed the class, check out the Week 1 class to learn more about what we’re up to this week, and more.
Some Prep Work
Let’s do a few preparations for what’s to come next. In the process, we’ll learn how Package Managers work, and whatnot.
The steps indicated below will be for users of the Ubuntu Operating System (OS). If you do not use Ubuntu, links will be provided to your operating system of choice. However, you’ll have to follow the steps in the link to setup for your system accordingly.
I use Ubuntu, and therefore will be providing steps for the Ubuntu OS.
Installing NPM and NodeJS:
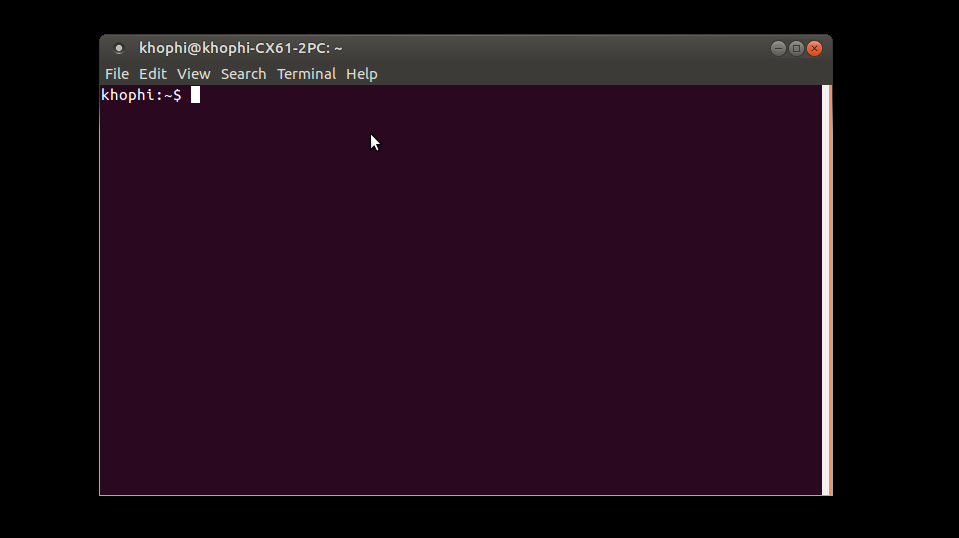
Open your Terminal on your computer (Ctrl + Alt + T is a shortcut key). On Windows, it is also known as the ‘Command Prompt’.
Ctrl,Altare keys on your keyboard. Look for them.Note: Throughout our class, whenever asked to open a Terminal, think nothing else, except to open it via
Ctrl + Alt + TIf asked to ‘Enter something into terminal’, then that something should be entered in the line that shows after opening the Terminal.
The terminal is a software that allows us to run commands we type. Eventually, you’ll come to love the terminal.
Enter below in your terminal. The terminal handles your commands, one line at the time, so, write the first line first, press Enter key, and then when the command finishes doing what it’ll do, write the second line, and press Enter too.
curl -sL https://deb.nodesource.com/setup_7.x | sudo -E bash -
sudo apt install -y nodejs
sudo apt install -y git
The first command gets a script file from a web address using curl(Read more about Curl), to prepare our system for the next command
The second command actually installs NodeJS.
As weird as it might sound, we’re using a Package Manager for Ubuntu,
aptto install yet another Package Manager,npm, that comes with the installation of the NodeJS
You should have NodeJS and NPM installed now.
We install git, which we’ll use later in this article.
Change npm default directory to another directory:
If we don’t change the default directory, we may have to use sudo whenever we want to install a package, and we don’t want that.
mkdir ~/.npm-global
NPM_CONFIG_PREFIX=~/.npm-global
Again, enter the commands in the Terminal, one line after the other. After writing each line, press Enter
The mkdir (Make Directory) does the same thing as right-clicking somewhere on your computer, and clicking, ‘Create Folder’ or ‘New Folder’
The mkdir ~/.npm-global therefore means, you want a folder called .npm-global in the current logged in user’s folder.
Whenever you do ~/in Ubuntu, it takes you to a folder as same as /home/user/, where user is the username of the currently logged in account.
See video below to see how moving around in terminal works. cd stands for, ‘Change Directory` (like double clicking into and out of folders), pwd means ‘Print Working Directory’, as in, where am I at the moment.
With our NPM and NodeJS installed nicely, run this command in the terminal to see what version was installed, if any!
npm -v
node -v
First command should give you a response like, 5.4.2 and second, v7.10.1. Remember, these values were at the time of writing this article, therefore your values might be higher. However, it should NOT be lower than the above. So you might get something like, 5.8.1 for the first command, and say, v8.2.5 for the second command, which is all fine.
Our Project Folder
To keep things clean, we will create a folder in which our pages will be created into. Therefore, let’s do that.
In the terminal, please run these commands:
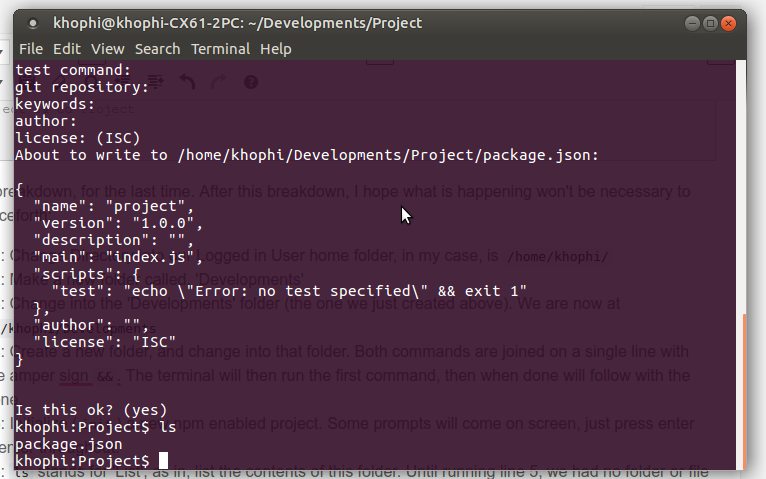
cd ~
mkdir Developments
cd Developments
mkdir Project && cd Project
npm init
ls
Here’s the breakdown, for the last time. After this breakdown, I hope what is happening won’t be necessary to explain henceforth:
- Line 1: Change Directory into our Logged in User home folder, in my case, is
/home/khophi/ - Line 2: Make a new folder called, ‘Developments’
- Line 3: Change into the ‘Developments’ folder (the one we just created above). We are now at
/home/khophi/Developments - Line 4: Create a new folder, and change into that folder. Both commands are joined on a single line with double amper sign
&&. The terminal will then run the first command, then when done will follow with the next one. - Line 5: Initialize (
init) a new npm enabled project. Some prompts will come on screen, just press enter enter enter throughout. - Line 6:
lsstands for ‘List’, as in, list the contents of this folder. Until running line 5, we had no folder or file in the/home/khophi/Developments/Project(aka~/Developments/Project) directory. Runninglsnow shows us one file
ls of our Project folderOur Text Editor
Again, my choice of Text editor is called Sublime Text 3.
I recently tried Visual Studio Code from Microsoft; I was impressed, the experience was great. I’ll be using Sublime Text 3 throughout this class, however, VSCode also comes with almost all functionality of Sublime Text 3. However, you may have to configure a few features first.
Enter these commands one by one to install Sublime Text 3 eventually. After installation, and opening Sublime Text 3, you should see something like this:
Below are the commands. Trust me, there’s no shame in copy pasting these commands. Make sure you copy them line by line and run them one by one in the terminal.
wget -qO - https://download.sublimetext.com/sublimehq-pub.gpg | sudo apt-key add -
sudo apt-get install apt-transport-https
echo "deb https://download.sublimetext.com/ apt/stable/" | sudo tee /etc/apt/sources.list.d/sublime-text.list
sudo apt-get update
sudo apt-get install sublime-text
Installation was done, right?
After opening up Sublime Text 3 (from your Application Menu or Desktop Icon), let’s create a new workspace for our project.
Install Needed Packages
We’re going to need Twitter Bootstrap. As mentioned in the Week 1 Class, Bootstrap is a CSS framework, that allows us to write less to do more.
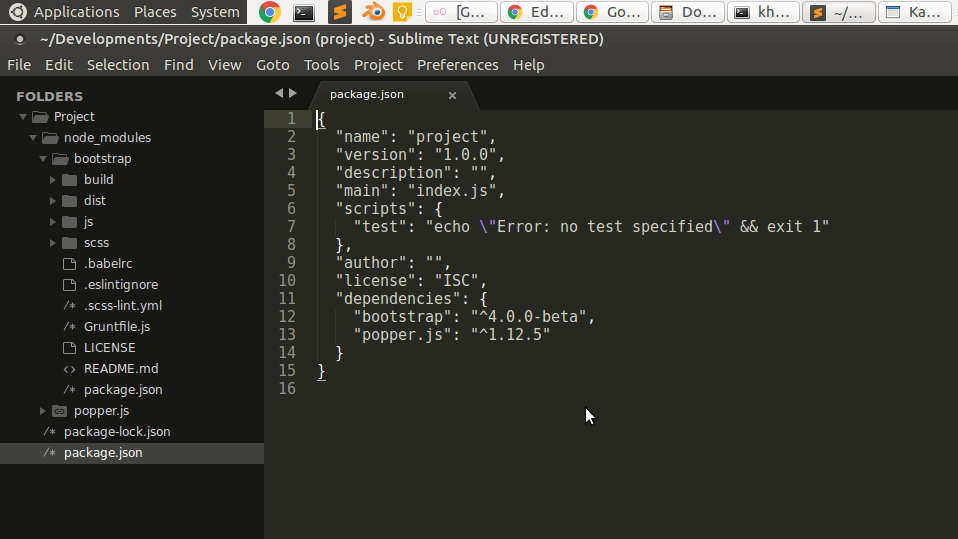
npm install bootstrap@4.0.0-beta popper.js jquery --save
You shall notice both packages are added to our package.json file. Without the --save argument, what package you install won’t be added to the package.json file.
Adding the --save argument which in turn saves the packages installed into the package.json file would mean should you share your file with anyone, it would only take them a single command, namely, npm install for them to have all the packages in the file installed for them once, without having to type them one by one.
Here’s my package.jsonafter installing both packages.
{
  "name": "project",
  "version": "1.0.0",
  "description": "",
  "main": "index.js",
  "scripts": {
    "test": "echo \"Error: no test specified\" && exit 1"
  },
  "author": "",
  "license": "ISC",
  "dependencies": {
    "bootstrap": "^4.0.0-beta",
    "popper.js": "^1.12.5"
  }
}
You should notice a new folder created, namely, node_modules
This folder contains all the packages for an npm project. Therefore, that is where we will find all the packages we just installed.
Quickly install the Package Manager for sublime text 3.
Follow the instructions here: https://packagecontrol.io/installation#st3
After installing the package manager for Sublime Text 3, next, follow the instructions here to install the SideBar Enhancements Extension: https://github.com/SideBarEnhancements-org/SideBarEnhancements#installation
You don’t have to install the Package Manager or SideBar Enhancements Extension. It is just optional, however will enhance your experience in using Sublime 3
With that out of the way, here’s how to create our very first HTML5 page, called the index.html
Our First Page, index.html
Why index.html? No reason. It is just common practice to name first (home) page file of your site a index.html. However, it isn’t mandatory. The name could be anything.
Update your index.html to have this content:
<!DOCTYPE html>
<html>

<head>
    <title>My Project</title>
</head>

<body>
    <div>
        <div>
            <div>
                <form>
                    <div>
                        <label for="searchbox">Search</label>
                        <input type="text" name="searchbox" id="searchbox" maxlength="30" required autofocus placeholder="e.g 01234567891011121">
                    </div>
                    <div>
                      <button type="submit">Search</button>
                    </div>
                </form>
            </div>
        </div>
    </div>
</body>

</html>
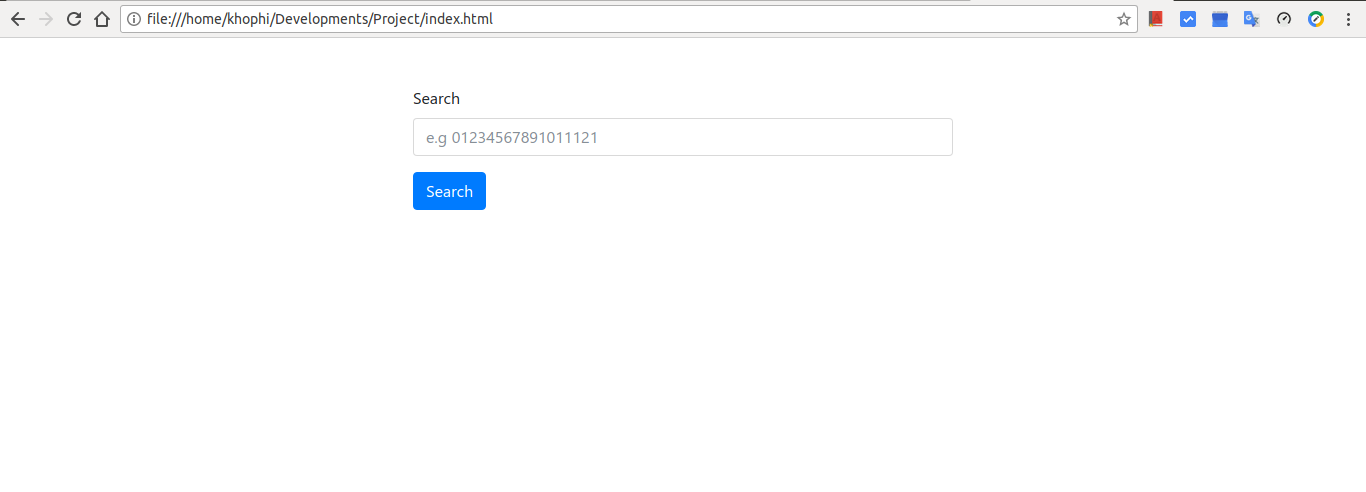
When you save the index file above and open in the browser, you shall see something like this:
Anytime I make reference to a ‘Browser’, throughout this class, it refers to Chrome, unless otherwise stated.
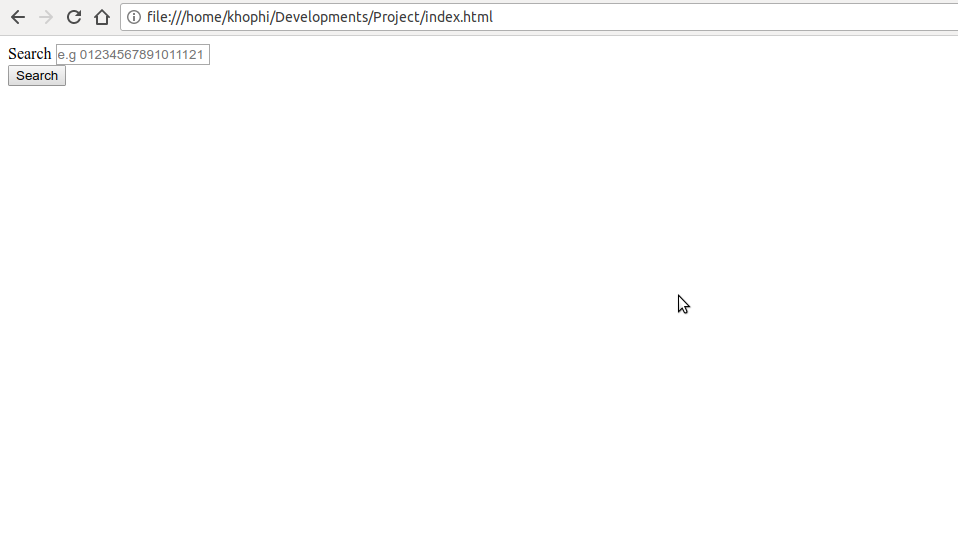
Does it look good? See how ugly the page looks like!
We can do better. Heck, we installed Bootstrap. Let’s bring in the power of bootstrap, and let’s see how gorgeous our page will immediately look like.
Let’s make these changes:
<!DOCTYPE html>
<html>

<head>
    <title>My Project</title>
    <!-- These are comments -->
    <!-- By the way, Bootstrap requires the next two lines. -->
    <meta charset="utf-8">
    <meta name="viewport" content="width=device-width, initial-scale=1, shrink-to-fit=no">

    <link rel="stylesheet" type="text/css" href="./node_modules/bootstrap/dist/css/bootstrap.min.css">
</head>

<body>
    <div class="container mt-5">
        <div class="row">
            <div class="col-sm-12 col-md-6 mx-auto">
                <form>
                    <div class="form-group">
                        <label for="searchbox" class="form-control-label">Search</label>
                        <input type="text" class="form-control" name="searchbox" id="searchbox" maxlength="30" required autofocus placeholder="e.g 01234567891011121">
                    </div>
                    <div class="form-group">
                      <button type="submit" class="btn btn-primary">Search</button>
                    </div>
                </form>
            </div>
        </div>
    </div>
    <!-- We load these files too, required by bootstrap -->
    <script type="text/javascript" src="./node_modules/jquery/dist/jquery.min.js"></script>
    <script type="text/javascript" src="./node_modules/popper.js/dist/umd/popper.min.js"></script>
    <script type="text/javascript" src="./node_modules/bootstrap/dist/js/bootstrap.min.js"></script>
</body>

</html>
We added a few Bootstrap CSS classes, and we see massive changes
Using a CSS framework means we get to enjoy many beautification tweaks for free in our frontend designs. We could have written our own CSS to get such a nice button, input box and center alignment. But such work starts to compound, when we simply just want to concentrate on our application, without worrying about many of these chores.
A CSS framework takes away the chore, leaving on the fun of building our application alone.
There are many CSS frameworks out there. The most popular is Twitter Bootstrap. As much as I enjoy using Bootstrap, Materialize CSS, Material Design Lite, and Foundation Zurb are all other CSS frameworks that are fun to work with.
Let us go over the code we’ve written.
<!DOCTYPE html>
<html>

<head>
    <title>My Project</title>
    <!-- These are comments -->
    <!-- By the way, Bootstrap requires the next two lines. -->
    <meta charset="utf-8">
    <meta name="viewport" content="width=device-width, initial-scale=1, shrink-to-fit=no">

    <link rel="stylesheet" type="text/css" href="./node_modules/bootstrap/dist/css/bootstrap.min.css">
</head>
A typical HTML file begins with a <!DOCTYPE html> and opens with an <html> tag. Words or text you see within the greater and less than signs are known as tags.
HTML has many tags, including the <html>tag itself. This tag marks where the HTML document begins.
Many HTML tags are closed. To close a tag, it ends with the same tag name, with just a slight difference.
In the case of the <head>, it is closed by </head>. The closing format of adding a forward slash applies to ALL HTML tags. A few tags don’t necessarily have closing tags, and without them, won’t cause any issues.
However, some tags, unclosed, will mess up the HTML structure of a page, as the browser relies on where it starts and ends to draw the content on the page.
Speaking of <head>tag, any tag within this tag do not visibly show up in the page for people to see. They are shown behind the scenes, for search engines to use in learning more about what a website is about. In our case, we only have one useful thing, which is the <title> ... </title>.
The title tag is followed by a few <meta>tags. Just think of the two meta tags are requirements for Bootstrap to work properly. Thank you!
A <link>tag is so useful, and likely one of the tags you’ll frequently use in your head tag. The link tag does what its name suggests – it links other files to the page.
Therefore, when the browser is loading the page, reading it line by line, when it gets to the Link tag, it’ll go pull whatever content was linked INTO the page, and continue processing the remaining part.
Tags in HTML come with different attributes. The <meta>tag has different attributes than the <link>. An attribute on a tag can be considered as an option of a tag, allowing the tag to behave in different ways depending on values given the tag attributes.
rel– The rel attribute defines the relationship that the linked resource has to the document from which it’s referenced.- The
type, well refers to the type of the file referenced - And then the
hrefis a Hyperlink Reference to the actual file wanted. In the above case, that was the Bootstrap 4 CSS file. We referenced the file from our local computer, in the same project directory, in thenode_modulesfolder.
<body>
    <div class="container mt-5">
        <div class="row">
            <div class="col-sm-12 col-md-6 mx-auto">
                <form>
                    <div class="form-group">
                        <label for="searchbox" class="form-control-label">Search</label>
                        <input type="text" class="form-control" name="searchbox" id="searchbox" maxlength="30" required autofocus placeholder="e.g 01234567891011121">
                    </div>
                    <div class="form-group">
                      <button type="submit" class="btn btn-primary">Search</button>
                    </div>
                </form>
            </div>
        </div>
    </div>
    <!-- We load these files too, required by bootstrap -->
    <script type="text/javascript" src="./node_modules/jquery/dist/jquery.min.js"></script>
    <script type="text/javascript" src="./node_modules/popper.js/dist/umd/popper.min.js"></script>
    <script type="text/javascript" src="./node_modules/bootstrap/dist/js/bootstrap.min.js"></script>
</body>
The <body> tag usually holds the, (duh) body of our website. We put in the flesh of our website, the part people will see.
A <div>is a division we wish to have, and we apply a few classes to it. A class refers to a CSS class. The container and mt-5 are all classes that come with Bootstrap.
Read more about Bootstrap’s grid on the documentation page: https://getbootstrap.com/docs/4.0/layout/grid/
In a container, we have what is called rows. Each row can have columns. We specific how wide a column should be, out of 12 total columns.
Therefore, col-sm-12 col-md-6 means, when our page is opened on a small screen (smartphone), the column width should be full and cover all the 12 possible columns. When on a medium or up, it should cover only 6 columns.
The mx-auto allows to get horizontal centering easily:
“Bootstrap also includes an .mx-auto class for horizontally centering fixed-width block level content”
Read about Bootstrap’s spacing classes. Very flexible and powerful https://getbootstrap.com/docs/4.0/utilities/spacing/
By now I hope you get the hang of how the classes in CSS works. All the CSS classes we use are from Bootstrap and applies a specific style to our HTML tags, in a way that ‘styles’ it.
The classes we apply for the form elements too comes from Bootstrap. And then for the button.
Explore Bootstrap’s Form components and other components like Buttons too.
Version Control
As best practice dictates, it is recommended we version control whatever we do. Here’s how you can do yours:
I pushed the changes I did onto Git, and it is available online for access.
Our .gitignorefile is, as the name suggest, to let git ignore certain folders or files. We ignored the node_modules folder because whoever downloads our repository will end up installing the packages via NPM.
git add adds our changes, and stages them, ready for commit and eventual pushing.
The git commit -m " ... " allows us to attach a message explaining whatever changes we did.
We then have to add where our repository will be pushed to.
We do so via git remote add origin link-to-the-repository
Here is the result: https://github.com/seanmavley/techleadsclass
Assignment
We’ve covered so much throughout this week. So many technologies explored for this week.
Here is your assignment:
- We created the
index.htmlfile together. - Go ahead and create the login/register pages (On this page, users will enter email and password, or register with email and password
- Create an add IMEI page, where a logged in user will add a new IMEI
- Create a list IMEI page, where a logged in user will see all their already added IMEIs
Conclusion
It has been a long week, and full of activity. Next week plans to be as exciting.
We move onto attaching a frontend Javascript framework to the pages we’ve built. We will start with creating an Angular project and how we can leverage some of the powerful features of this frontend framework to our advantage.
Until next week, have fun, and enjoy!