10 Days of Laravel 5 – Laravel Survey App
Now that we know what we want to build and have even seen screenshots of the end results, how about we start a Laravel project and install some packages, with the end results of a Laravel Survey App!
Changes: After readers feedback, I decided but bundle the entire 10 days article into one, cut the ‘lengthy’ talk, and get straight to the point.
In this post, we consider these:
- Our Survey App, What we expect
- Start a Laravel Project & Install Packages
- Layout and Styling in Laravel
- Authentication in Laravel
- Models in Laravel
- Views in Laravel
- Controllers in Laravel
Let’s be On the Same Page
I built the Laravel Survey App on my Ubuntu box. So all the steps I share in this10 Days of Laravel 5 series will be tailored to how it all happened on the Ubuntu Operating System. Nonetheless, I believe the process is similar to whatever your platform is and probably easier there.
For commands that need to happen within the terminal, do well to run them within the appropriate terminal program on your respective platform.
The PHP version I use throughout is PHP7.0. I switched my entire local and remote server PHP instances to version 7 or above.
PHP >= 5.5.9 is required to use Laravel 5.2, which we use throughout the building of the Laravel Survey App.
With the above points in mind, let us rock and roll considering how to install Composer, then to Laravel and other packages we might need.
Install Composer
I understand you came here to learn about how to use Laravel Framework in building an app. So why are we installing Composer, and what even is that?
Think of Composer as Pip of the Python packages or NPM for NodeJS related package. Remember you can simply do sudo pip install something and get a Python Package installed along with its related dependencies on your machine for use in your, say Django Project? Or even NPM?
The Composer is something similar to Pip or NPM, however for PHP stuff.
So let us get in and start ‘composing’ PHP things to our liking. According to the official docs, this is probably the recommended way to install Composer on an Ubuntu box:
$ cd ~
$ curl -sS https://getcomposer.org/installer | php
$ sudo mv composer.phar /usr/local/bin/composer
When you install global packages, more like npm you wish to have that available on the entire system. That is achievable easily, by appending this to the end of your ~/bashrc file:
export PATH="$HOME/.config/composer/vendor/bin:$PATH"
With that out of the way, should we install Laravel globally, we’ll be able to invoke it from anywhere in the terminal!
Remember to re-source your
bashrcafter adding the change. Sourcing yourbashrcis a simple as sayingsource ~/bashrc
Laravel Survey App Time
The time is now for Laravel to be installed.
$ composer global require "laravel/installer"
Installation should be done in a jiffy. When that’s done, you’re good to go with spinning up a new Laravel 5 project, which is exactly what we want.
The process of installing Laravel is similar to other frameworks, like Django. With Django, you get your Pip up and running, set up your virtualenv which is optional, then install your Django, which pulls in dependency packages.
Troubleshoot Installation
During installation, one or two errors might be thrown here and there. Do me a favor. I do not know exactly what you don’t have installed on your machine to have caused the error. However, you can follow the error messages you receive in determining what you don’t have installed and install them.
However, you can follow the error messages you receive in determining what you don’t have installed and install them.
I remember I did not have mcrypt installed, so the Laravel installation failed. The fix was mere to install the missing dependency.
If you’re looking to have an entire PHP7.0 for your machine just like I have, you might find having this command out of the way enough to suppress many issues that might come up during installation.
sudo apt-get nginx php7.0-fpm php7.0-cli php7.0-mcrypt
If the missing package the installation errors about is PHP related, look for a php7.0 of that and perhaps it might be available for install.
[wp_ad_camp_1]
Start our Laravel Project
What we’ve done up until this point so far are mere fun facts. The actual fun begins now with the start of our Laravel Project.
We will call our app ‘SurveyApp’, so let us go ahead and get that done.
$ cd ~
$ laravel new SurveyApp
Maybe my network connection was horrible, but it took me some 20 minutes for every single ‘thing’ Laravel needs to complete the initialize of a new project. The wait was killing me so I went away to catch some fresh air outside. Why does it take that many dependencies? Oh well…
However, after the initial app creation, any subsequent Laravel projects you spin up come up quick. Yep, the dependencies will be loaded from cache, instead of hitting the network. Just like the others i.e npm or pip.
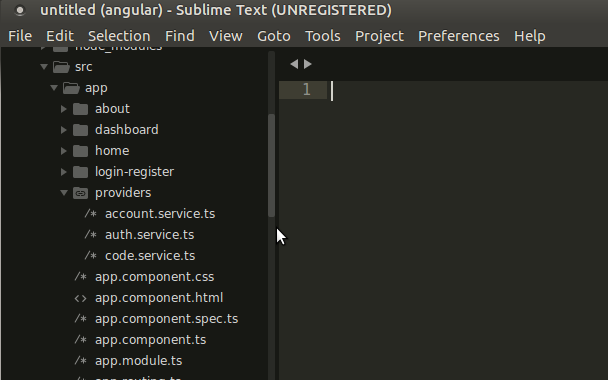
Project Structure
One of the features of Laravel I spent a bit of time getting comfortable with was the project folder structure. Getting used to a project structure is essential. Knowing where what file is at what time helps make switching between files easily.
So let us take a moment to go over the folder structure we get when we change into the directory of the SurveyApp.
The folder structure you see above felt overwhelming to me initially. However, take a closer look at what each part do in this tutorial.
The official documentation on the folder structure above offers a clearer understanding of the subject. Check out the docs on Folder Structure.
What you need to know to build the Survey App ain’t all that was listed in the folder structure. On a need to learn basis, you’ll eventually learn most of the parts of the folder structure and what they do.
[wp_ad_camp_1]
Keep in Mind
If there is anything I’ll wanna draw your attention to, it’ll be to check where these files and what these folders will contain.
routesfile- The Controllers folder
- the
app.phpanddatabase.phpwithin theconfigfolder - the
publicfolder - and the
viewsfolder in theresourcesfolder.
As we build our Laravel Survey App, we’ll get to move around the above folders a bit, so make sure you know where they are. Combined with your knowledge from the official docs explanation of the folder structure, you’re fully good to move onto the next tasks of our App building.
Do not expect to grow guru and comfortable with the folder structure just yet. It might take a bit of time through practice and use of a great IDE.
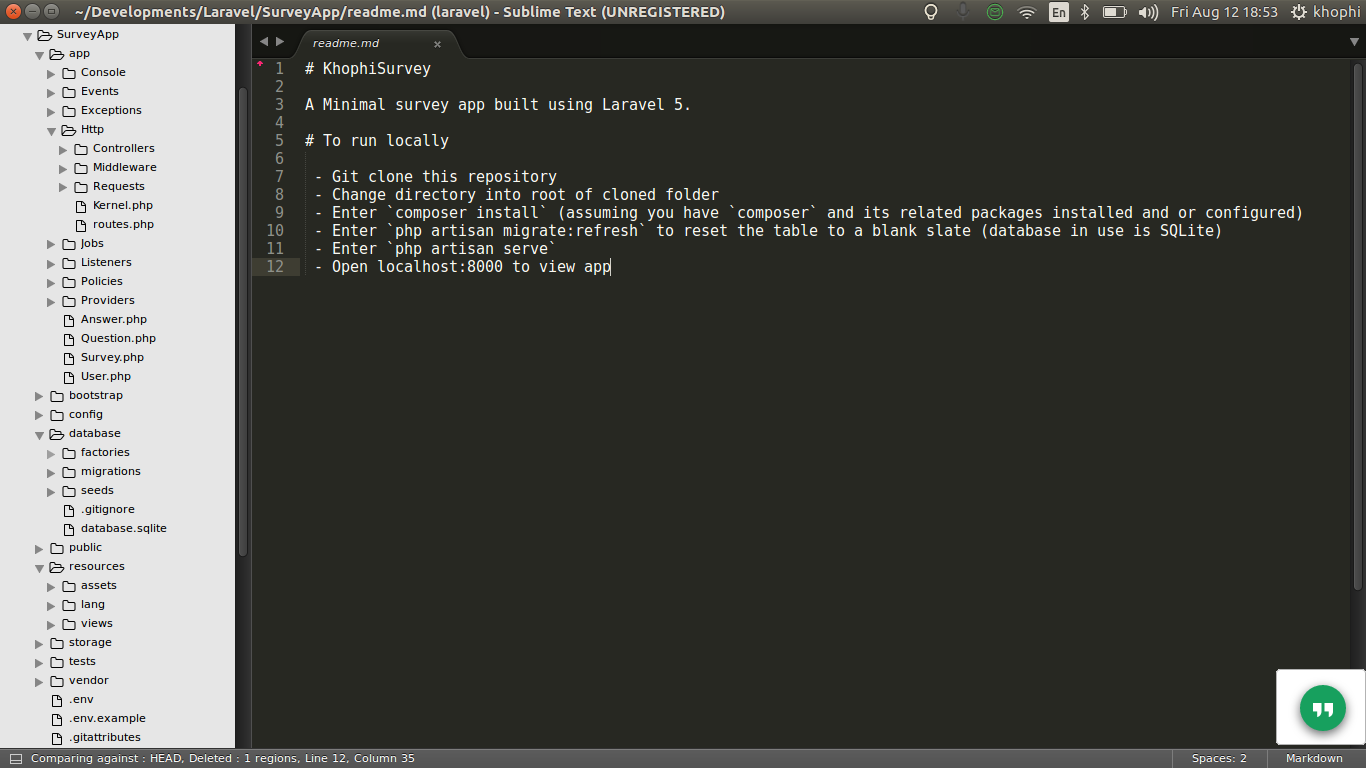
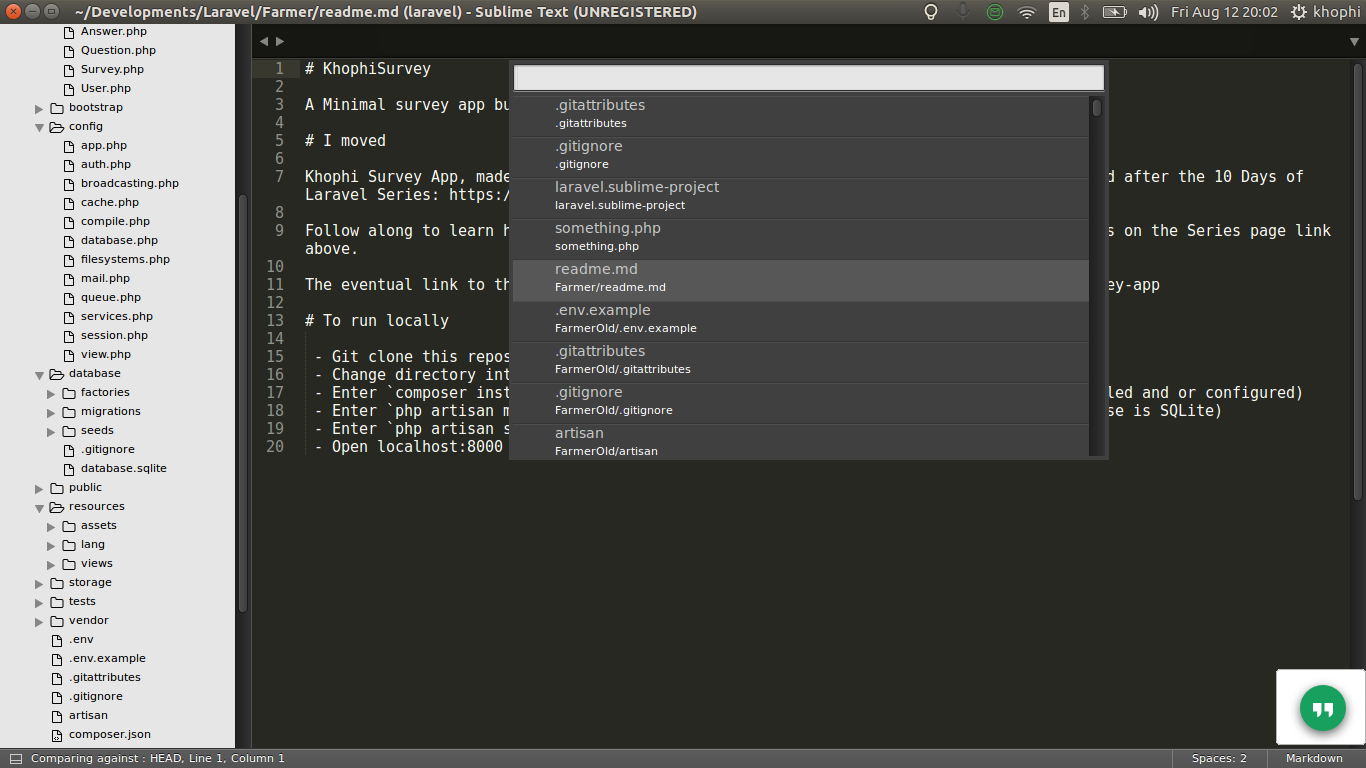
I guess you noticed I use Sublime Text 3. In this IDE, there’s a quick way of moving around within your project files. Simply press Ctrl + P and start typing the file name.
The IDE will traverse your entire project structure and pull up all the files matching the search, and allows you to via the up or down key, see in real-time what each file you highlight on contains, assuming you have two files with similar names but the different content of functionality.
Start local Server
Out of the box, after installing everything right, we are able to spin up our project and access via the browser using the local developer server bundled with our installation.
Before I jumped into Laravel, I was wondering if they had something as cool as python manage.py runserver from Django. Indeed, Laravel has one:
$ cd ~/SurveyApp
$ php artisan serve
Immediately, a local server for our project will be available at localhost:8000 accessible via the browser. You should see something like this:

If you get to this page, then we’re good to go. In that case, all is set and fine.
However, before we get into how to install packages, let us spend a minute on discussing the thing php artisan
“Artisan is the name of the command-line interface included with Laravel. It provides a number of helpful commands for your use while developing your application. It is driven by the powerful Symfony Console component.
So there you have it, from the official docs. So a php artisan list should display the possible commands you are capable of calling to handle certain tasks for you.
Again, you don’t need to know what every single command in there does. At this point, just know that something of that sort exists, and the available commands can make life easier, such as spinning up a new Controller or enabling Authentication or even making a new Model.
Installing Third Party Packages
Right from day one, I needed MaterializeCSS. If you follow my articles on this platform, you might have witnessed how many projects I’ve done using MaterializeCSS. It helps me get up and running with basic material design look quickly.
I recently even put up a site that allows you to download custom MaterializeCSS .css quickly.
Installing packages to help with a Project in Laravel is fairly straightforward. Most often, the developer might have written a short guide to help you include their package in your app after installation.

The developer behind MaterializeCSS for Laravel did so, and the steps are pretty straightforward. In general, the principle follows as this:
- Add the package details to the
composer.jsonfile within the project root folder - Run
composer update - Add the ServiceProvider of the package to the
providersarray in theconfig/app.phpfile - Add Facade to the
aliasesarray inconfig/app.php - And then depending on what the package does, you might have to publish the assets of the package to their rightful places:
php artisan vendor:publish --tag=packagename --force
The installation steps might vary for each package, so do check the respective package and how the developer recommends the package to be installed.
For instance, to install MaterializeCSS package which will give us a Material Design look for our entire app, see the developer instructions on the Github page.
Layout & Styling

Our Laravel Survey App was born nicely in the previous section, installed the MaterializeCSS package, and now, we are ready to learn about Laravel’s layout and styling our entire website.
We will throw in a few other features of Laravel here and there a bit, however, all in preparation to tackle them in-depth in the parts below. You should end up with something like in the image above before the end of this article.
Ensuring a uniform user experience across your entire app is important to make your users feel at home, and also drop the learning curve your users need to go through on every page.
More like a theme, certain parts of your website are likely repeating and can be tucked away a single file, which when called in, comes in full glory with any goodness it has.
Our Base File
Our Laravel Survey App has multiple pages for different tasks – a page to create a new survey, another one for editing a survey and so on.
One way to ensure a DRY ( don’t repeat yourself ) principle works is to have a single file that’ll contain information that runs across our entire website. Such information can be our footer markup or the header information.
Forgive me, but lemme throw in Django here. Not necessarily specific to Django and might be available in other frameworks, including Laravel.
What happens is, we will create a single file, called the layout.blade.php (in Django, base.html) and put in this file, mere placeholders for places we wish to change dynamically with content, but maintain static parts of the file with content we believe will run across the entire site.
Let us create our layout.blade.php file. And remember, the name can be anything, as long as you make sure to reference it correctly in your other files.
This layout.blade.php file will be put in the resources/views directory of your project root folder. So from your root folder, go resources => views then create the layout.blade.php file with the content below in it.
Blade is the template engine Laravel uses. Blade will allow us to teach our HTML new tricks like you see in the snippet below.
Take your time to consume the snippet below. Seems like a lot, however, we’ll discuss it in-depth in the sections that follow.
<!DOCTYPE html>
<html>
    <head>
        <title>Survey App built with Laravel :: Khophi's Dev</title>
        {!! MaterializeCSS::include_css() !!}
        <link href="http://fonts.googleapis.com/icon?family=Material+Icons" rel="stylesheet">
    </head>

    <body>
      <div class="container">
          <!-- TOP MENU -->
          <div class="row" style="padding-top:10px;">
              <div class="center-align">
                <a class="btn blue waves-effect waves-light lighten-1 white-text" href="/"> Home </a>
                  @if(Auth::check())
                    <a class="btn-flat waves-effect waves-light darken-1 white black-text" href="/logout"> Logout </a>
                    <a class="btn-flat disabled" href="#" style="text-transform:none;">{{ Auth::user()->email }}</a>
                  @else
                    <a class="btn-flat waves-effect waves-light darken-1 white black-text" href="/login"> Login </a>
                    <a class="btn-flat waves-effect waves-light darken-1 white black-text" href="/register"> Register </a>
                  @endif
              </div>
          </div>
         <!-- End TOP MENU -->

         <!-- BODY OF PAGE -->
          <div class="row">
              <div class="col s12 m10 offset-m1 l8 offset-l2" style="margin-top:10px;">
                @yield('content')
              </div>
          </div>
         <!-- End BODY OF PAGE -->
      </div>
    </body>
    <script src="{{ URL::asset('jquery.min.js') }}"></script>
    {!! MaterializeCSS::include_js() !!}
    <script src="{{ URL::asset('init.js') }}"></script>

</html>
The <head> section
That is how according to the developer behind the MaterializeCSS for Laravel package explains we use his package in our views layout file.
In the head section, we are only calling for the CSS of MaterializeCSS. That gives us the stylesheets without the Javascript companion.
The rest in the head section are a standard setup for using MaterializeCSS.
The Footer
<script src="{{ URL::asset('jquery.min.js') }}"></script>
{!! MaterializeCSS::include_js() !!}
<script src="{{ URL::asset('init.js') }}"></script>
The first line references a jquery.min.js file I have within my public folder within the project root. So place your jQuery file within the public folder, along with an empty init.js file, then using the above lines 1 and 3, reference them within the footer part.
You might be tempted to do
<script src="init.js"></script>but try not to. The loading of your scripts might break when you visit something likelocalhost:8000/apage/then/anothersince Laravel might try looking for the file fromlocalhost:8000/apage/then/init.jswhich is obviously not where theinit.jsfile is located.
The Middle Body Part
Within the <body> tag, we find the menu snippet. We want to display a menu across our entire Survey App. A menu that’ll be dynamic about what it displays depending on whether a user is logged in or not.
And so we use what Laravel calls a ‘Facade‘ (pronounced Fas-sa-ad ) of the Authentication system to determine if a user is logged in or not.
From the official docs:
“In the context of a Laravel application, a facade is a class that provides access to an object from the container.”
To the fancy part is the where we find the @yield() template tag. Two of the primary benefits of using Blade are template inheritance and sections. Undoubtedly, this could be said for Twig, Django Template Engine or even Pug.
Template inheritance are essential in keeping our code DRY. Without template inheritance, we would be copy pasting more than we should. In fact, imagine having a 100 pages website, but had to change the CSS on all the pages to reflect updates or point to a new CSS.
You would have to literally replace the reference to the stylesheet in all those 100 places in your webpages.
With template inheritance, you only state the reference to your stylesheets in just a single file, the base file, then have the 99 other pages inherit from it. Simple.
Blade’s way of indicating where other templates can/should inherit in a specific page is via the use of the @yield tag.
<div class="row">
    <div class="col s12 m10 offset-m1 l8 offset-l2" style="margin-top:10px;">
        @yield('content')
    </div>
</div>
For this whole @yield to make complete sense, why don’t we create our homepage and from there play this throw-catch game?
Our Home page file
@extends('layout')

@section('content')
<ul class="collection with-header">
    <li class="collection-header">
        <h2 class="flow-text">Recent Surveys
            <span style="float:right;">{{ link_to_route('new.survey', 'Create new') }}
            </span>
        </h2>
    </li>
    @forelse ($surveys as $survey)
      <li class="collection-item">
        <div>
            {{ link_to_route('detail.survey', $survey->title, ['id'=>$survey->id])}}
            <a href="survey/view/{{ $survey->id }}" title="Take Survey" class="secondary-content"><i class="material-icons">send</i></a>
            <a href="survey/{{ $survey->id }}" title="Edit Survey" class="secondary-content"><i class="material-icons">edit</i></a>
            <a href="survey/answers/{{ $survey->id }}" title="View Survey Answers" class="secondary-content"><i class="material-icons">textsms</i></a>
        </div>
        </li>
    @empty
        <p class="flow-text center-align">Nothing to show</p>
    @endforelse
</ul>
@stop
See what we did there in the home.blade.php?
What is our base or layout file? We say layout (without the extension, which will translate it to layout.blade.php ). Then, in place of @yield('content'), we’re telling our template engine to replace that with everything within our @section('content').
Honorable Mentions
There is a @forelse @empty @endforelse blade template tag in there. If you’re coming from any template engine similar to Blade, you probably have seemed types of this tag.
The basic function is to do a for...loop , however with the @empty saying if there’s nothing in the object to iterate over, do what is within the @empty part.
The $survey object we’re iterating over will be introduced within our template comes with a controller attached to the template.
Notice these too? They’re ways to dynamically generate links using Blade’s {{ link_to_route (..) }} template function.
{{ link_to_route('detail.survey', $survey->title, ['id'=>$survey->id])}}
It takes the name of the route, in this case, detail.survey then the text to put within the string, then if the detail.survey takes a parameter, the array argument is used to specify that.
Putting all together
We have created a base file, and our homepage file. Now how do we get to see them when we do php artisan serve?
That is what we wish to consider under this part. Let us put everything together to have a basic working homepage.
Route
Locate your routes.php file in the project root app/Http folder, remove everything in it, and add this to it:
<?php

Route::get('/', 'SurveyController@home')->name('home.page');
The
->name('home.page')will allow us to use the name of this route, should we want to use the{{ link_to_route()function for instance. See example above for thedetail.survey(we’ll get detailly about this later)
Controller
In your terminal, in your project root directory, do the following:
$ cd ~/SurveyApp
$ php artisan make:controller SurveyController
A new controller file will be created for you, within the app/Http/Controllers folder called SurveyController. In the file, please update with this within the Class block:
class SurveyController extends Controller
{
  public function home(Request $request)
  {
    # $surveys = Survey::get();
    # return view('home', compact('surveys'));
    return view('home');
  }
}
You’ll notice some parts have been commented out. Well, because those parts reference areas in our Survey App we haven’t built yet.
Run php artisan serve and open the running server in the browser. At this point, you should encounter an error.
We’re mentioning a variable $survey in our template but the SurveyController did not pass anything of that sort to the template. To suppress the error, simply delete the entire forelse block.
At this point, you should see a Material Designed homepage, something like this:
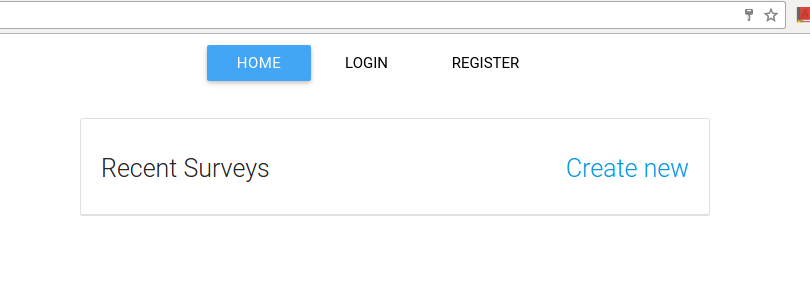
We are making progress, aren’t we?
[wp_ad_camp_1]
Authentication
Authentication remains one of the easy parts of the Laravel framework. I was surprised to learn how quick, probably the quickest way I could get any web app of mine to enjoy basic authentication.
In the previous section, we talked about Layout and Styling our Survey App. We threw in a bit of routing and controller stuff but they weren’t enough explained. I will go deeper into them in subsequent articles.
For now, let us throw in Authentication.
So, Authentication
If you’re following along, we have a homepage displaying with a login and register buttons at the top. Let us put them to good use when you click on them.
Open up your terminal in your project root, and go:
$ php artisan make:auth
That is all you need to get authentication up and running.
In your database folder within the app directory, you’ll see a new migration created for the User Table. Go in there and have a peek at how the migration is done. Mine looked like this
<?php

use Illuminate\Database\Schema\Blueprint;
use Illuminate\Database\Migrations\Migration;

class CreateUsersTable extends Migration
{
    /**
     * Run the migrations.
     *
     * @return void
     */
    public function up()
    {
        Schema::create('users', function (Blueprint $table) {
            $table->increments('id');
            $table->string('name');
            $table->string('email')->unique();
            $table->string('password');
            $table->rememberToken();
            $table->timestamps();
        });
    }

    /**
     * Reverse the migrations.
     *
     * @return void
     */
    public function down()
    {
        Schema::drop('users');
    }
}
The above snippet was automatically generated for me after we entered the auth command. In fact, you’re free to go in there and add extra fields if you wish, like Country and Age if you plan using them in your app.
One issue many tend to face with Django’s User Model is how not flexible it can be should you want to add extra fields to the already existing ones. I did an article going full retard on how to Extend the Django User Model like a Pro. Be sure to check it out.
Why am I mentioning Django here again? Because Laravel makes extending the user model as easy as merely adding fields to the migration table above, and you’re good to go. So easy and straightforward!
Immediately, some changes happen automatically to both our routes.php file and a separate file is created within our Controllers to handle Auth stuff. That is awesome, however…
The make:auth command, although generates ready-to-use authentication system along with their templates, they come in Bootstrap skin, which means for our MaterializeCSS UI we’re working on, we might need to change a few here and there.
I have done those changes, and happy to share with y’all. Download the Materialized auth templates from my Laravel Auth Materialize repo. Follow the instructions on the project page.
Honorable Mentions
You’ll notice a Route::auth(); added to your routes.php file. Do not take that away. You may add it to the bottom of your routes, and add new ones on top of it instead.
A User model was also created for us, found in the app folder. Models will be discussed later on, however in basic terms, a Model defines what we expect objects entering or leaving our database to behave. Check the User and let us discuss what is in there by default.
<?php

namespace App;

use Illuminate\Foundation\Auth\User as Authenticatable;

class User extends Authenticatable
{
    protected $fillable = [
        'name', 'email', 'password',
    ];

    protected $hidden = [
        'password', 'remember_token',
    ];
}
Even more
What is the ‘Namespace’ there for? Answer!
The protected $fillable = [ ] specifies which fields incoming from the form are allowed to enter the database. Any other input value incoming not one of the 3 in the array will be dropped.
Be sure to include any new field name you add to the User migration also to the $fillable field array, otherwise you won’t be allowed to update those fields from the browser although they existing in your User Table.
Remember, without a
$fillablearray on a model, you will receive aMassAssignmentbla bla error from Laravel when you try to use aModel::create(['bla'=>'bla])function, althoughModel::save()would work. Explicit is better than Implicit, so specify them manually!
The protected $hidden = [ ] helps us as in, whenever a query comes looking for any User object or objects, do not send along the password and or remember_token values. Keep them hidden. This is essential for fields you wish not returned to the user, especially the Password field.
You might be tempted to try to hide the password or other sensitive data returned from the database in your Controller or worse, the template.
Although that sounds like a bad idea, in fact, it is a horrible one. Sensitive data might slip away easily. With the restriction done at the model level, you abstract away that functionality, not having to omit those fields over and over again.
Sweet!
Now, test it!
If all is working fine, you should be able to fire up your local server, php artisan serve and be able to log in and out successfully. The routes are all handled within the Authentication Controller that php artisan make:auth magically gave us.
You should have a login/logout/register experience as shown in the video below:
If you’ll remember from our previous post, we did something like this in our layout file:
@if(Auth::check())
   <a class="btn-flat waves-effect waves-light darken-1 white black-text" href="/logout"> Logout </a>
   <a class="btn-flat disabled" href="#" style="text-transform:none;">{{ Auth::user()->email }}</a>
@else
   <a class="btn-flat waves-effect waves-light darken-1 white black-text" href="/login"> Login </a>
   <a class="btn-flat waves-effect waves-light darken-1 white black-text" href="/register"> Register </a>
@endif
The Auth:check() we did there now will make sense and work, because if we’re logged in, the check will return True, allowing us to display the appropriate part of the snippet.
Models
Models in Laravel are important and help you ensure a very robust and efficient interface to your database tables.
The previous article touched on how to implement the native authentication found in Laravel. A simple artisan command was all we needed to get up and running with the authentication. We threw in a slightly modified templates to match our the material design we’re using in our Survey App.
In this article let us dive deeper into how to get our models working. The next two articles will touch on Views and Controllers, combined with today’s article, we should get a working piece.
Models in Laravel
According to the Django docs:
A model is the single, definitive source of information about your data. It contains the essential fields and behaviors of the data you’re storing. Generally, each model maps to a single database table.
The principle applies in Laravel too. Laravel models are used to ensure a defined behavior for the data entering or leaving a particular database.
Our Laravel Survey App needs four models namely, User, Survey, Question and Answer. We created the User Model in the previous article when we used the php artisan make:auth .
Tha command did a few tricks for us, including creating a User Model and a migration for the User table. In this article, we will create the extra 3 models then connect them to each other to ensure we’re able to talk to each other from the other.
Survey Model
When building the Survey app, I started from the top most model, the one other models will belong to. And so, let us create our Survey Model.
php artisan make:model Survey
Then we need a Survey table migration, so let us do that using
php artisan make:migration create_survey_table --create=Survey
Best practice indicates always give a migration name that describes the action you’re doing. So in this case, we are ‘Creating a Survey Table’ and the name of the table is
Survey
At this point, I believe you are beginning to enjoy some of the commands available with the Artisan Console which makes building Laravel apps a breeze.
Migration
Before we go into our Survey Model to make some quick changes, we want to complete our migration file created, then migrate it eventually.
So, locate the create_survey_table migration file within the app/database/migrations folder and fill it with this:
<?php

use Illuminate\Database\Schema\Blueprint;
use Illuminate\Database\Migrations\Migration;

class CreateSurveyTable extends Migration
{
    /**
     * Run the migrations.
     *
     * @return void
     */
    public function up()
    {
        Schema::create('survey', function (Blueprint $table) {
            $table->increments('id');
            $table->string('title');
            $table->integer('user_id')->unsigned()->index();
            $table->string('description');
            $table->softDeletes();
            $table->timestamps();
        });
    }

    /**
     * Reverse the migrations.
     *
     * @return void
     */
    public function down()
    {
        Schema::drop('survey');
    }
}
There are a couple of functions that stand up tall in the above snippet. We find the function up() and down(). As their names indicate, one creates the table and the other the opposite.
Tip: If you manually create your own migration REMEMBER to add the
Schema::drop('survey');part, otherwise, you will run the commandphp artisan migrate:refreshto find an error indicating the specific table still exists.
php artisan migrate:refreshis a sweet command to help you reset your tables. The resetting happens by running thepublic function down()then doing thepublic function up()
Most of the part in the migration up function is self-explanatory. The part I wish to touch on is the user_id and softDeletes.
Each survey object will be associated with a user. The user id will be acquired during any saving of an object from the Request . This request object includes the user object when user is logged in. So we prepare a place to store the user id. This user id needs to be unsigned. Yes it has to. Why?
The thing is the ID field of parent table was built with $table->increments(‘id’);, which is, by default UNSIGNED. So, basically, you cannot build foreign key from signed field to a table with an unsigned ID field. Tip from LaravelDaily
That is why the user_id is unsigned, then we move on to say index it should be an index with the ->index();
When done, go ahead and run:
php artisan migrate
If all goes well, you should see migration success response. At this point, since the User migration was done already, you should see a migration for the Survey table at the moment. As we add new migrations, we’ll keep running the migrate command to apply the changes to the database.
Model Modeling!
Let us see the model changes we need to make. First, lemme drop in the snippet:
<?php

namespace App;

use Illuminate\Database\Eloquent\Model;

class Survey extends Model
{
  protected $fillable = ['title', 'description', 'user_id'];
  protected $dates = ['deleted_at'];
  protected $table = 'survey';

  public function questions() {
    return $this->hasMany(Question::class);
  }

  public function user() {
    return $this->belongsTo(User::class);
  }

  public function answers() {
    return $this->hasMany(Answer::class);
  }

}
Here we go:
We talked about Namespace in a previous post, so that’s done for now.
Our Survey model extends the Eloquent Model. A standard class extending.
We saw the protected $fillable in the Authentication article.
protected $table = 'survey'; tells Eloquent that I want the name of the table to remain survey. That is a quick fix because Eloquent adds a ‘s’ to table names. So our survey becomes surveys when we trying to use it. That automation can be annoying as there’s no indication of that sort. Plus, if I wanted a ‘s’ to my model name, I would have added it, I did not forget. So keep that tip in mind. One mind-bending automation with Eloquent I hate there.
The protected $dates = 'deleted_at'; is meant to initialize the soft deletion of objects.
When models are soft deleted, they are not actually removed from your database. Instead, a
deleted_atattribute is set on the model and inserted into the database.
The use case is obvious. When a Survey object is deleted, the object actually doesn’t get deleted. It is simply marked as missing. There are ways to query objects marked missing, however, they don’t show up in usual queries.
This approach can be used for User Profiles, where a user deletes the account, but you keep the account for a period of time before actually deleting it. When put in missing mode, you can concoct a script which will delete all soft-deleted objects after a period of time.
Next, we see the public functions.
public function questions() {
    return $this->hasMany(Question::class);
  }
This is basically saying, the Survey Model has many children of the Question class. Think of it as One-to-Many relationship. That relationship is easily referenced using the questions() function.
In the controller section of this series, we’ll consider how this all plays well with ensuring we are able to make the cleanest of queries. With the above relationship, something like this possible:
  public function detail_survey(Survey $survey)
  {
    $survey->load('questions.user');
    return view('survey.detail', compact('survey'));
  }
We’ll talk about all this in the controllers part of this series.
The other way round relationship, will be specified on the Question class (will get there in a minute), which will also give us a link from the Question Model to the Survey Model.
[wp_ad_camp_1]
Questions and Answer Model
Now that we have done the Survey model, aren’t you ready and equipped to do for the other two models we’ll create?
Well, lemme share with you what you should end up with.
Questions Migration
<?php

use Illuminate\Database\Schema\Blueprint;
use Illuminate\Database\Migrations\Migration;

class CreateQuestionTable extends Migration
{
    /**
     * Run the migrations.
     *
     * @return void
     */
    public function up()
    {
        Schema::create('question', function (Blueprint $table) {
            $table->increments('id');
            $table->integer('survey_id')->unsigned()->index();
            $table->integer('user_id')->unsigned()->index();
            $table->string('title');
            $table->string('question_type');
            $table->string('option_name')->nullable();
            $table->timestamps();
        });
    }

    /**
     * Reverse the migrations.
     *
     * @return void
     */
    public function down()
    {
        Schema::drop('question');
    }
}
Question Model
<?php

namespace App;

use Illuminate\Database\Eloquent\Model;

class Question extends Model
{
  protected $casts = [
      'option_name' => 'array',
  ];
  protected $fillable = ['title', 'question_type', 'option_name', 'user_id'];
  public function survey() {
    return $this->belongsTo(Survey::class);
  }

  public function user() {
    return $this->belongsTo(User::class);
  }

  public function answers() {
    return $this->hasMany(Answer::class);
  }

  protected $table = 'question';

}
Answer Migration
<?php

use Illuminate\Database\Schema\Blueprint;
use Illuminate\Database\Migrations\Migration;

class CreateAnswersTable extends Migration
{
    /**
     * Run the migrations.
     *
     * @return void
     */
    public function up()
    {
        Schema::create('Answer', function (Blueprint $table) {
            $table->increments('id');
            $table->integer('user_id');
            $table->integer('question_id');
            $table->integer('survey_id');
            $table->string('answer');
            $table->timestamps();
        });
    }

    /**
     * Reverse the migrations.
     *
     * @return void
     */
    public function down()
    {
        Schema::drop('Answer');
    }
}
Answer Model
<?php

namespace App;

use Illuminate\Database\Eloquent\Model;

class Answer extends Model
{
    protected $fillable = ['answer'];
    protected $table = 'answer';

    public function survey() {
      return $this->belongsTo(Survey::class);
    }

    public function question() {
      return $this->belongsTo(Question::class);
    }
}
Summary
Models in Laravel are ways to define how your objects entering or leaving your tables should behave. It ensures we make good queries and put up simple measures to secure our data.
We considered how to, using the Artisan Console commands, generate a model boilerplate as well as a migration file to go along with each table we created.
The relationship between models are crucial and the Eloquent models allow as to connect on model to the other in an easy way.
Next is the article on Controllers, so let us get to that and enjoy some controlling! See ya tomorrow
Controllers
Controllers in Laravel, the part in the MVC pattern responsible for, well, controlling what goes into and out of your views or models. Controllers sit in between your data models and your views (or templates). This ensures decoupling of tasks and keeps the codebase cleaner and easy to follow.
In the previous article, we got up to speed with our models. We created 3 models in addition to the User Model we got for free by using the Artisan Console in creating the authentication system.
We want to get an overview of Controllers in Laravel in relation to our Survey App, and then we will begin actual CRUD work in our subsequent article. This article builds on the fundamentals and introduces a few more concepts we need to grasp with.
So, Controllers
When a route matches a request, the request needs to be processed by a function. The route is responsible for sending that request to a specific function you the developer has prepared.
This function, sometimes, we can include in our route directly, like so:
Route::get('/myroute', function() {
   return view('home');
})
The function that takes the request and returns a response is referred to as the Controller. This Controller function is responsible for many things, and within this function, you could do all sort of tricks and run all the crazy stuff you want.
Now, this controller, although currently looks simple and flat, as our app begins to grow, we might need to start importing other Classes or do some logics etc.
This can pretty much overwhelm our Routes file to the point that the file responsible for routing ends up full with all sort of code.
To solves, this clutteredness in code is why the MVC pattern exist. Different frameworks have it differently. Django, for instance, has the MVT (Models Views Template) where the Model is same as Model in Laravel, the Views is the Controllers, and the Template is the Views.
Irrespective of whatever names the pattern is called, it is a pattern, a form of principle which applies. The basic principle involved is to have your parts of the code with specific functionality separated from the others.
So the code responsible for receiving incoming requests remains separate from the code responsible for model oversight.
make:controller
The Artisan Console comes with, yet another piece of command good for creating a controller. In fact, you might wonder why one would want to use this and not type the boilerplate code yourself.
Question is, how many times would you do it until you realize it is tedious?
A typical controller generated with the php artisan make:controller MyController looks like this:
<?php

namespace App\Http\Controllers;

use Illuminate\Http\Request;

use App\Http\Requests;

class MyController extends Controller
{
    //
}
So if we would want our route point to this controller, we could go ahead to mention this controller and the specific function we want to handle the request.
Let’s see an example.
Route::get('/', 'MyController@home');
This looks straightforward and easy to understand. We mention the specific controller we want, in this case, the MyController above, then run the function called home.
We don’t have the home function created yet, so let’s do it:
<?php

namespace App\Http\Controllers;

use Illuminate\Http\Request;

use App\Http\Requests;

class MyController extends Controller
{
    public home() {
       return view('home');
    }
}
Simple! The above reference to the view('home') assumes there’s a template within the views folder called home.blade.php . We’ll get to views in the next chapter so we’ll discuss that in detail.
A useful feature of specifying routes is to name them. Yes, like so:
Route::get('/', 'MyController@home')->name('home.page');
In a subsequent article, we’ll dig deeper into Routing. For now, know this is how a route is connected to a controller.
Controller Middlewares
In our Laravel Survey App, we make use of Middlewares in our controllers. Middlewares are a way of filtering request before they reach a controller.
When a middleware is applied to a controller, the conditions in the middleware are satisfied before the specific controller is executed or not executed at all.
  public function __construct()
  {
    $this->middleware('auth');
  }
For instance, all the controllers in the Laravel Survey App takes this public function which calls the use of the auth middleware.
The auth middleware can be found in the App/Http/Middleware/Authenticate.php file. In there, the handle function is responsible for handling what the auth middleware is supposed to work.
Take a peek at the auth middleware file, and the process is that simple. If incoming request ain’t authenticated, redirect to the login page.
So, let me share with you the SurveyController. Your assignment is to, using the understanding acquired so far in the article, go ahead to create the other two controllers we’ll need, namely, AnswerController and QuestionController.
<?php

namespace App\Http\Controllers;
use Auth;
use App\Survey;
use App\Answer;
use Illuminate\Http\Request;
use App\Http\Requests;
use App\Http\Controllers\Controller;
use Illuminate\Support\Facades\Redirect;

class SurveyController extends Controller
{
  public function __construct()
  {
    $this->middleware('auth');
  }

  public function home(Request $request) // Homepage function
  {
    $surveys = Survey::get();
    return view('home', compact('surveys'));
  }

  # Show page to create new survey
  public function new_survey()
  {
    return view('survey.new');
  }

  public function create(Request $request, Survey $survey)
  {
    $arr = $request->all();
    // $request->all()['user_id'] = Auth::id();
    $arr['user_id'] = Auth::id();
    $surveyItem = $survey->create($arr);
    return Redirect::to("/survey/{$surveyItem->id}");
  }

  # retrieve detail page and add questions here
  public function detail_survey(Survey $survey)
  {
    $survey->load('questions.user');
    return view('survey.detail', compact('survey'));
  }


  public function edit(Survey $survey)
  {
    return view('survey.edit', compact('survey'));
  }

  # edit survey
  public function update(Request $request, Survey $survey)
  {
    $survey->update($request->only(['title', 'description']));
    return redirect()->action('SurveyController@detail_survey', [$survey->id]);
  }

  # view survey publicly and complete survey
  public function view_survey(Survey $survey)
  {
    $survey->option_name = unserialize($survey->option_name);
    return view('survey.view', compact('survey'));
  }

  # view submitted answers from current logged in user
  public function view_survey_answers(Survey $survey)
  {
    $survey->load('user.questions.answers');
    return view('answer.view', compact('survey'));
  }
  public function delete_survey(Survey $survey)
  {
    $survey->delete();
    return redirect('');
  }

}
Let us consider the above in detail a bit.
Laravel has this beautiful way of knowing what object to work on depending on the incoming request. So if we’re on the detail page of an object, when we do a get request, by simply type-hinting a class, we’re able to associate that request to the respective object we want which will be available for use directly in our controller.
For instance:
  public function view_survey(Survey $survey)
  {
    $survey->option_name = unserialize($survey->option_name);
    return view('survey.view', compact('survey'));
  }
The code snippet above has nothing to indicate what specific object we’re looking at. The corresponding route that leads to this controller looks like this:
Route::get('/survey/view/{survey}', 'SurveyController@view_survey')->name('view.survey');
Noticed the similaries? We’re using a variable of name same as in controller and route. the /survey/view/{survey} should have a param that matches the type-hinted variable we have in our controller. In this case, should we have mismatching variable names, we won’t be able to take advantage of this auto-magic feature in Laravel.
Thus, immediately the param from route matches the name we’ve type-hinted, Laravel automatically knows what Survey object we’re looking at, and so when we do: $survey->option_name Laravel knows exactly what object we’re talking about.
If /survey/view/2 is the URL we’re on, Laravel will get the Survey Object with id 2 for us when we do our queries.
I find this automation seamless and very useful.
[wp_ad_camp_1]
How do you save Answers to a Survey?
You have a survey object with many questions attached. How do you save many answers attached to a single question?
At first, I thought of converting the answers into a single JSON object then save in the answer field in my Answer table. Although that sounded like a good idea, how to properly retrieve and display the data was a bit trickier than a second option I had in mind.
The other way round was to simply iterate through the incoming form answers submission, then save each answer as a separate object. Upon retrieving, it is kinda easier looping through the objects to find what belongs to what question, submitted by who at what datestamp.
Lemme quickly go over how that happens (explained also in the video below)
<?php

...

class AnswerController extends Controller
{
  public function __construct()
  {
    $this->middleware('auth');
  }

  public function store(Request $request, Survey $survey)
  {
    // remove the token
    $arr = $request->except('_token');
    foreach ($arr as $key => $value) {
      $newAnswer = new Answer();
      if (! is_array( $value )) {
        $newValue = $value['answer'];
      } else {
        $newValue = json_encode($value['answer']);
      }
      $newAnswer->answer = $newValue;
      $newAnswer->question_id = $key;
      $newAnswer->user_id = Auth::id();
      $newAnswer->survey_id = $survey->id;

      $newAnswer->save();
    };
    return redirect()->action('SurveyController@view_survey_answers', [$survey->id]);
  }
}
We exempt the _token field from our request, then runs through the incoming request finding the key-value pair. If the value is of the form array, we want to json_encode it first. Otherwise, we proceed as usual.
If you have the Answer model right, you’ll find the fields for the question_id . The question id refers to the specific question this answer is attached to. This attachment is necessary as it allows us to eventually query all answers related to a specific Question model and in turn what Survey model.
At the moment, a typical answer submission might look like this:
{
  4: {
    answer: "My answer"
  },
  5: {
    answer: "on"
  },
  6: {
    answer: "on"
  }
}
So our function store() , the part, foreach ($arr as $key => $value) goes through the above JSON object, then the key will be, for example, 4, then the value will be the $value['answer']
In that way, we’re able to iterate and grab the key which refers to what question id, then the answer is stored in the $value['answer']
At the end, we redirect to the $survey->id in context, because we type-hinted our $survey variable as a Class, and the name matches the param from the route, thus Laravel knows exactly what we’re talking about.
The routes
The route file is responsible for connecting all the joints. Without a routes file to dictate what-request-goes-to-where, it will be confusing for our Controllers to know what to do when what comes in.
If you have a networking background, you might consider a router in general in frameworks as a Switch, routing packets from source to destination appropriately.
Our routes.php file is responsible for mapping what type of request came in hitting what particular URL to a specific controller.
Take note of the parts of a route:
Route::get('/survey/new', 'SurveyController@new_survey')->name('new.survey');
First, we use the get method on the Route class. So in English, we’re saying:
When a user asks for the page (consider it another way of saying
get)/survey/new, look for thenew_surveyfunction in theSurveyControllerclass. Then, called this routenew.survey.
The ->name() is useful if you want to be able to reference particular routes within your templates/views. Something like this:
{{ link_to_route('new.survey', 'Create new') }}
The above generates the HTML markup for us, so we’ll get this in return:
<a href="/survey/new">Create new</a>
So the entire routes.php file looks like this for the Survey App.
<?php

Route::get('/', 'SurveyController@home');

Route::get('/survey/new', 'SurveyController@new_survey')->name('new.survey');
Route::get('/survey/{survey}', 'SurveyController@detail_survey')->name('detail.survey');
Route::get('/survey/view/{survey}', 'SurveyController@view_survey')->name('view.survey');
Route::get('/survey/answers/{survey}', 'SurveyController@view_survey_answers')->name('view.survey.answers');
Route::get('/survey/{survey}/delete', 'SurveyController@delete_survey')->name('delete.survey');

Route::get('/survey/{survey}/edit', 'SurveyController@edit')->name('edit.survey');
Route::patch('/survey/{survey}/update', 'SurveyController@update')->name('update.survey');

Route::post('/survey/view/{survey}/completed', 'AnswerController@store')->name('complete.survey');
Route::post('/survey/create', 'SurveyController@create')->name('create.survey');

// Questions related
Route::post('/survey/{survey}/questions', 'QuestionController@store')->name('store.question');

Route::get('/question/{question}/edit', 'QuestionController@edit')->name('edit.question');
Route::patch('/question/{question}/update', 'QuestionController@update')->name('update.question');
Route::auth();
Views
Views in Laravel are the parts you see in your browser. Views are the part the end user interacts with. And so all what we’ve been doing opens the door to the Views, where every logic, every task we want the user to accomplish is passed through to the Controllers through the routes from which our Controllers will make the right queries via the models to hit our database.
Our views files are many, however, I’ll be covering them in one scoop in the video below. Watching the video below isn’t necessarily required, as you can see everything from the source repo. However, the video explains how the entire Laravel Survey App we’ve been trying to build work.
In fact, the video explains how everything we’ve considered so far fit together.
https://youtu.be/i9ii8jvAMwg
The Views in Laravel are pretty much standard Blade syntax. I shared in the video how our views tie in to the controllers and model and how user input are handled. The source code is available on Bitbucket, and you can check it out!
Conclusion
In this entire article we have considered how to start a Laravel project – specifically, we started our Laravel Survey App. We also considered the folder structure and what the Artisan Console is all about.
We have considered many moving parts of our app, from laying out our pages to bringing the homepage back to life, which needed us to specify a route then connect to the controller.
In our upcoming articles in the episodes, we’ll dive closer into each and everyone of that, and how they play an integral part of our app.
We end here for today, however, the above should just offer you a quick start. I hope enjoyed and found the article useful, and see you in the next one tomorrow.
[wp_ad_camp_1]